

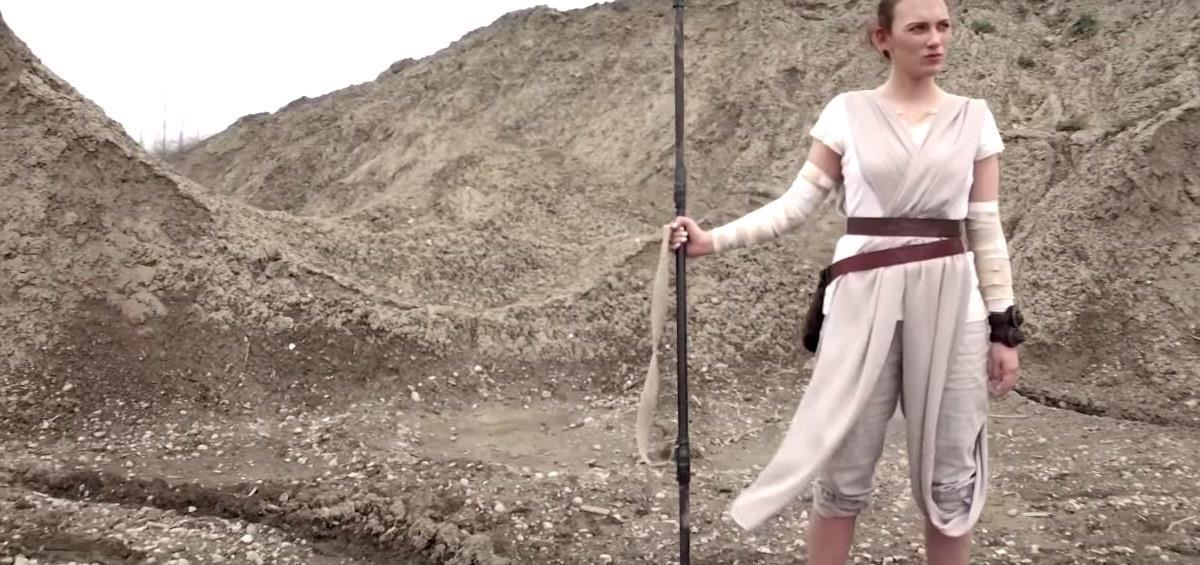
"I'm Rey." That's what a lot of people will be saying again this Halloween, as Rey costumes are sure to be another favorite of trick-or-treaters and cosplayers. Yes, on Oct. 31 we all have a chance to be the scavenger of Jakku who just so happens to be the "new hope" for a Jedi renaissance.
For nearly two years now, Star Wars fans have been waiting to learn more about Rey, the Force, the First Order, and the whereabouts of Luke Skywalker. By Halloween, the hype for The Last Jedi will be nearing the home stretch and what better way to ready for 2017's theatrical event than to pay homage to one of its brightest heroes: Rey.

Becoming Rey from 'Star Wars'
To help us transform into Rey, meet the Sorry Girls, who not only recreate Rey's outfit in their video tutorial but also tackle her bun hairdo and staff. As you'll see, materials and supplies can be acquired from a variety of places, from thrift shops to hardware stores. Likely you'll also need to visit your local fabric store, a craft store, and maybe a few big-box retailers. The key is to shop around and find the best deals. We all like deals!
Since this tutorial covers the entire Rey costume, we'll go through each part one at a time: outfit, accessories, hair, and staff. Let's get started!
Rey's Practical Outfit
Looking at Rey's outfit, it's clear that nothing about it is superficial; every element has a purpose. TFA's costume designer Michael Kaplan confirmed as much in an interview with Clothes on Film, explaining that Rey's costume was based on these clues from the script:
[S]he is poor, she works as a scavenger, her work requires agility, climbing, she lives in a hot and bright desert climate, where the nights are probably cool, there are possibly sandstorms, she rides a speeder ...
Indeed, there's no room for the ornamental here, and that's an important quality to try and capture too when creating a DIY version.
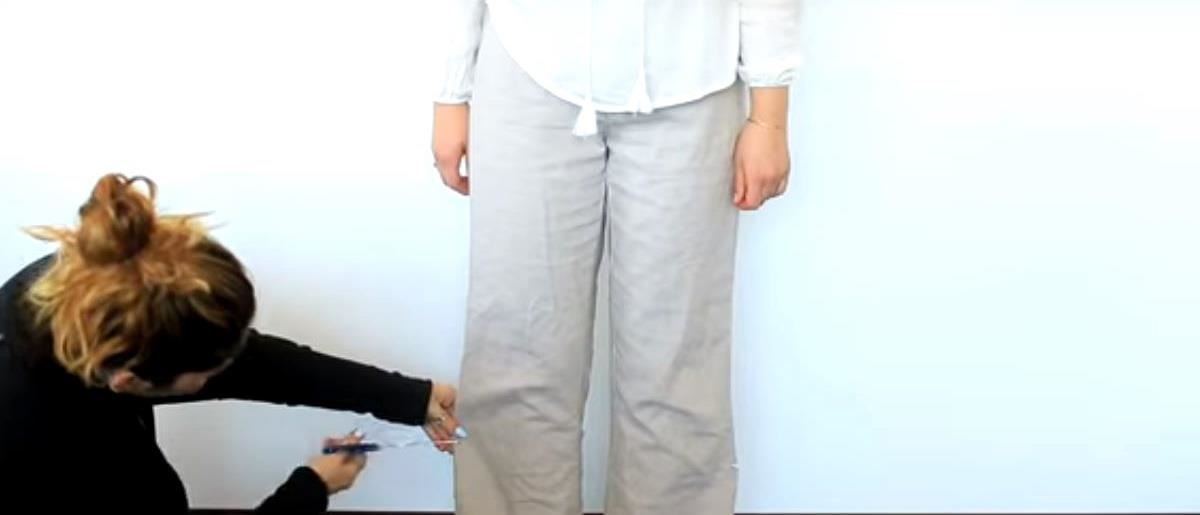
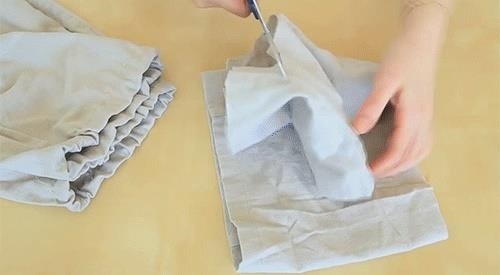
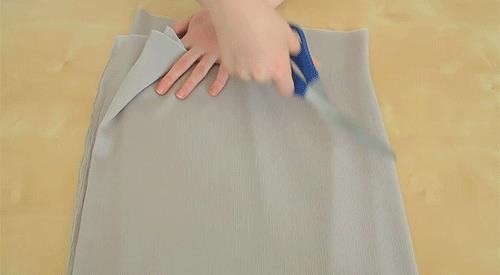
Step 1: Pants for Climbing
Wearing the pants for measurement, make a cut slightly below mid-calf. Then, cut two pieces of elastic that will fit snugly around each calf.


Shorten the pants and flip them inside out. Roll up the bottom edge of each leg. Use a needle and thread to sew around the top of the cuff, creating a tube. Don't sew completely around yet; leave a small gap open so you can insert your elastic.
Add a pin to the end of the elastic to help feed it through the tube. Once all the way around, stitch the ends of the elastic together and sew the opening closed. Repeat on the other leg.
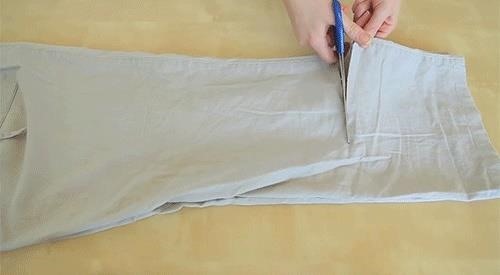
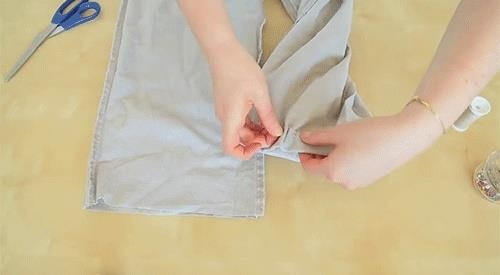
To create the bandage effect, use the fabric cut from the pant bottoms. At an angle, cut around the fabric to make one long strip. Find the middle of the strip and stitch it to the side seam of the pant leg. (Later when the outfit is assembled, this fabric will be wrapped.) Repeat on the other leg.
Step 2: Sash for Dust Storms
- 1½ meters of sheer grey or beige fabric
- scissors
- needle and thread
Cut the fabric into three long panels, of equal length. Sew the panels together to make one long strip of fabric. If your fabric frays easily, add a hem. Note you could also burn the hem, but be careful if you do.
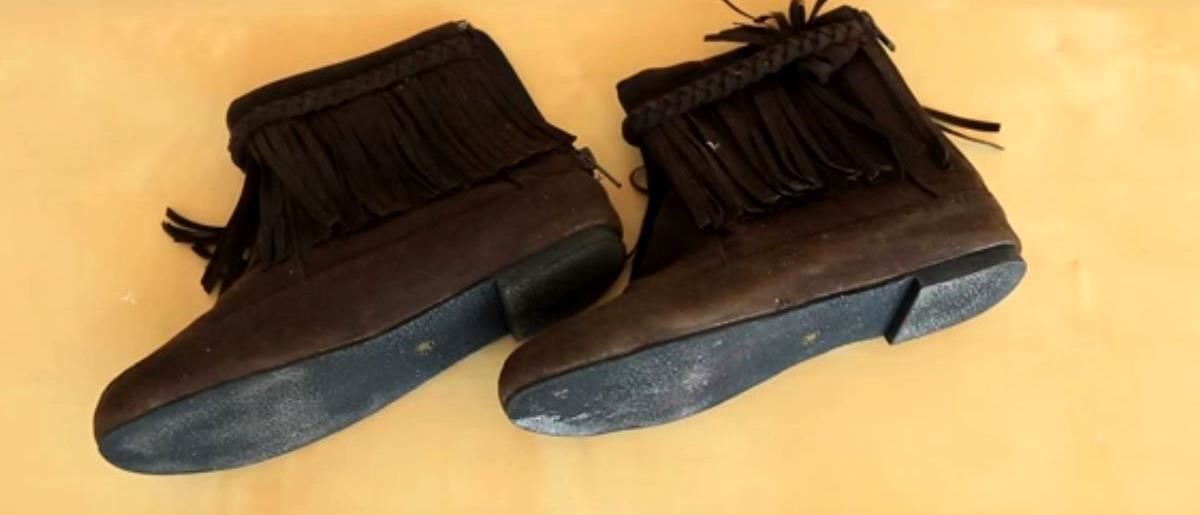
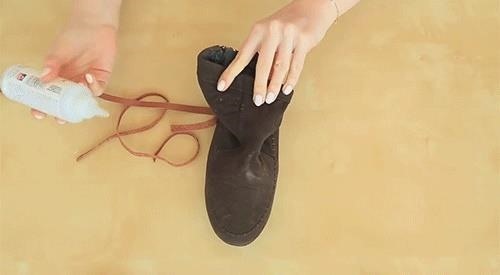
Step 3: Shoes for Long Treks
- dark brown moccasin boots (again, check out thrift stores)
- scissors
- needle and thread (or fabric glue)
- strip of leather or other fabric
For Rey's shoes, look for something that combines a moccasin and an ugg-style boot. If yours has a fringe or any other sort of embellishment, like a braid, remove it completely.
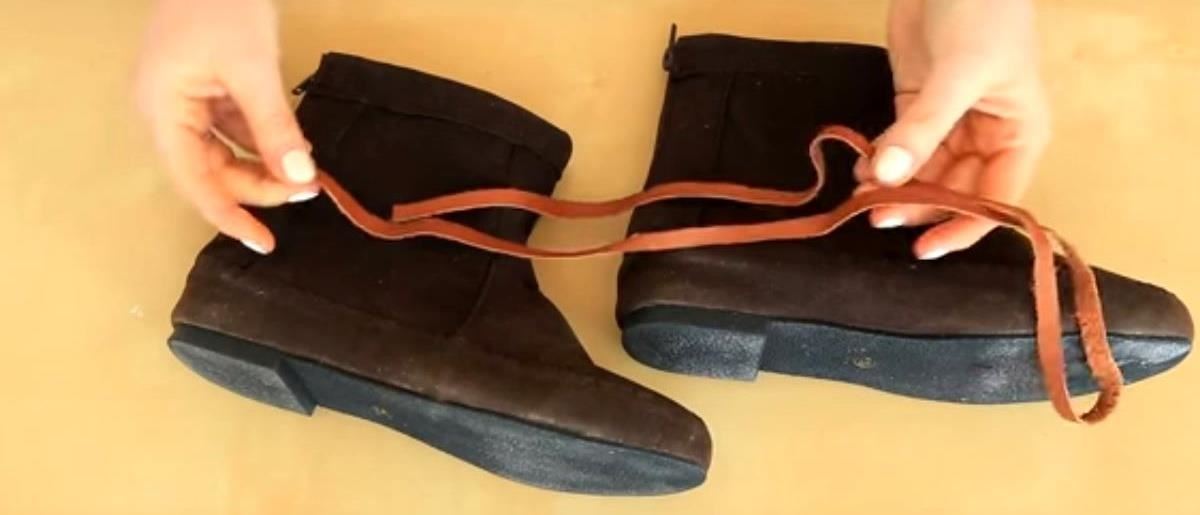
Then, cut a long strip of leather (or brown fabric) in half and attach the ends to the front of the shoe with a needle and thread or fabric glue. Wrap it around and tie in the back for assembly later.
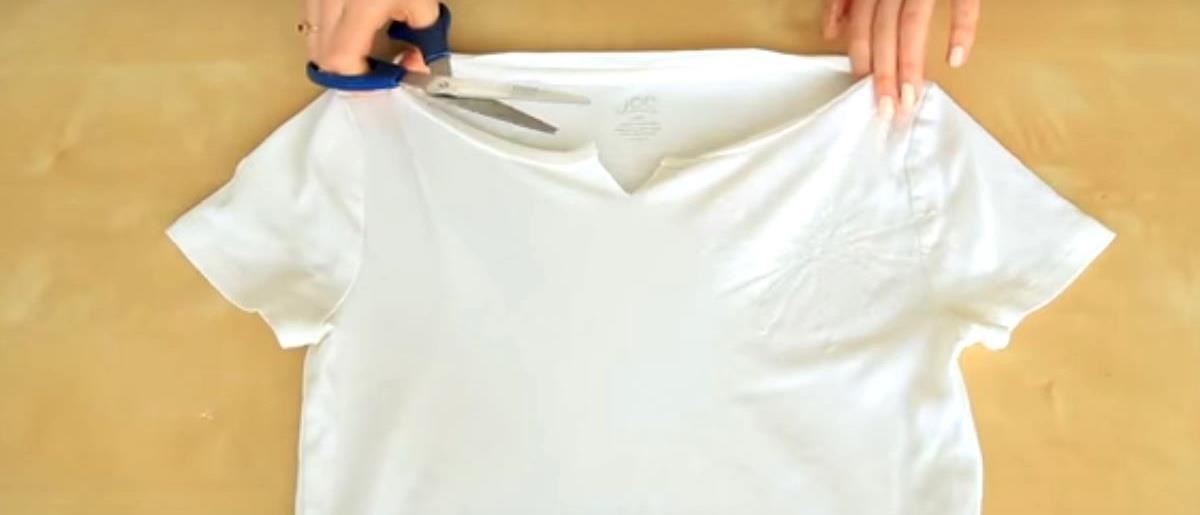
Step 4: Top for Agility
- plain white or cream T-shirt shirt
- scissors
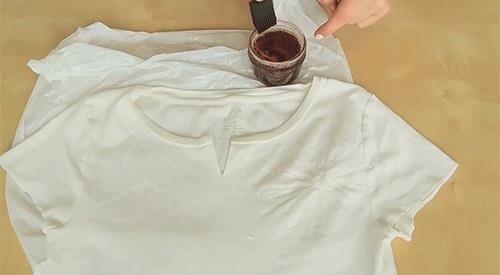
- tea
- sponge brush
Cut a slit down the center to create a v-neck; also cut off the sleeve cuffs and the bottom hem of the shirt for a "raw edge look."
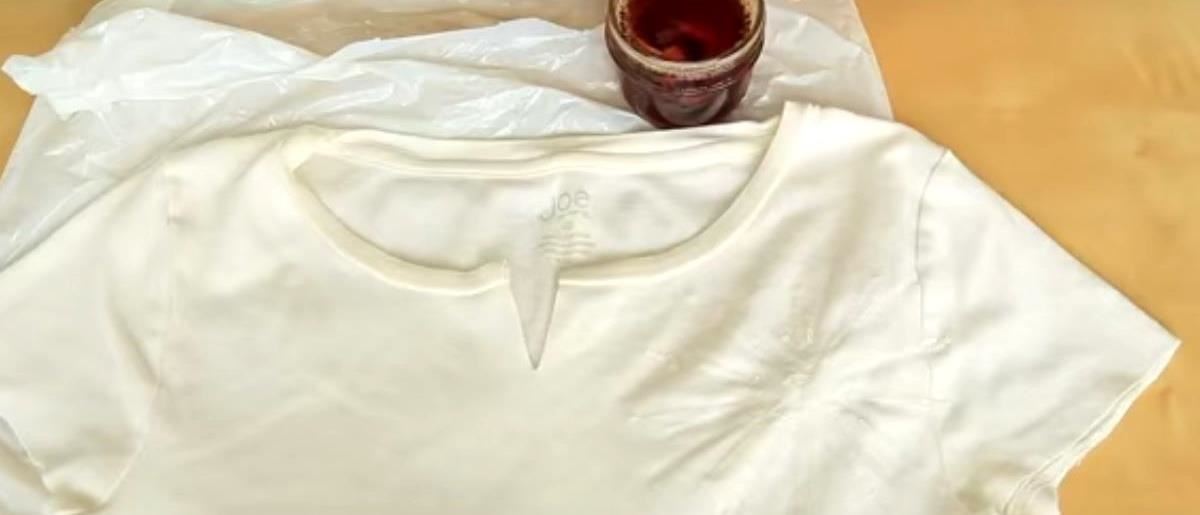
To make the shirt look old and worn, brew some dark tea and with a sponge, dab it along the neck, sleeves and bottom, as well as randomly to make it look like it's that of a scavenger who works in the desert.
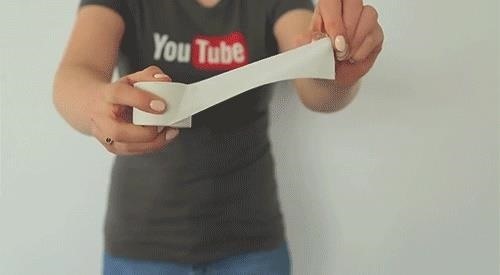
Step 5: Arm Bandages for the Elements
To create Rey's arm bandages, the Sorry Girls used wrap bandage purchased at the dollar store, but as noted, gauze or (white, cream, beige, light grey) fabric strips will also work. Approximately 13 feet is needed per arm. You'll also want to stain the bandages, just as you did the shirt.
Step 6: Wrist Cuff for Protection
- brown belt (look for one with an interesting design)
- scissors
- needle and thread (or fabric glue)
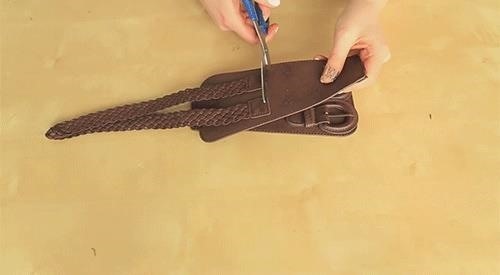
For Rey's wrist cuff or bracer, it will all depend on what you find in your shopping but look for something that's already meant to be wrapped. The Sorry Girls, for instance, used a waist belt featuring double buckles and braids. To create the cuff, they simply cut the belt in half.
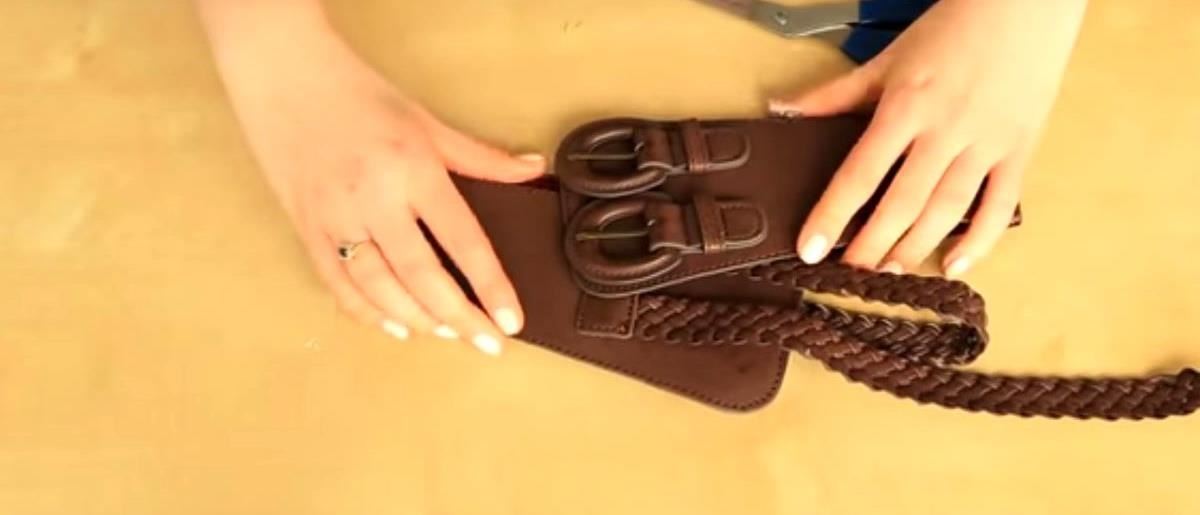
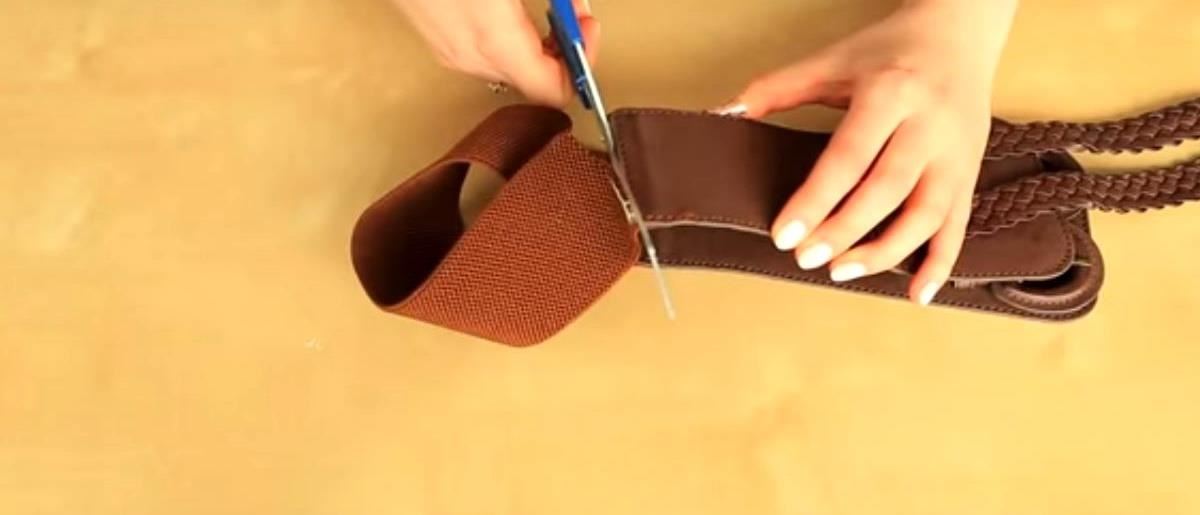
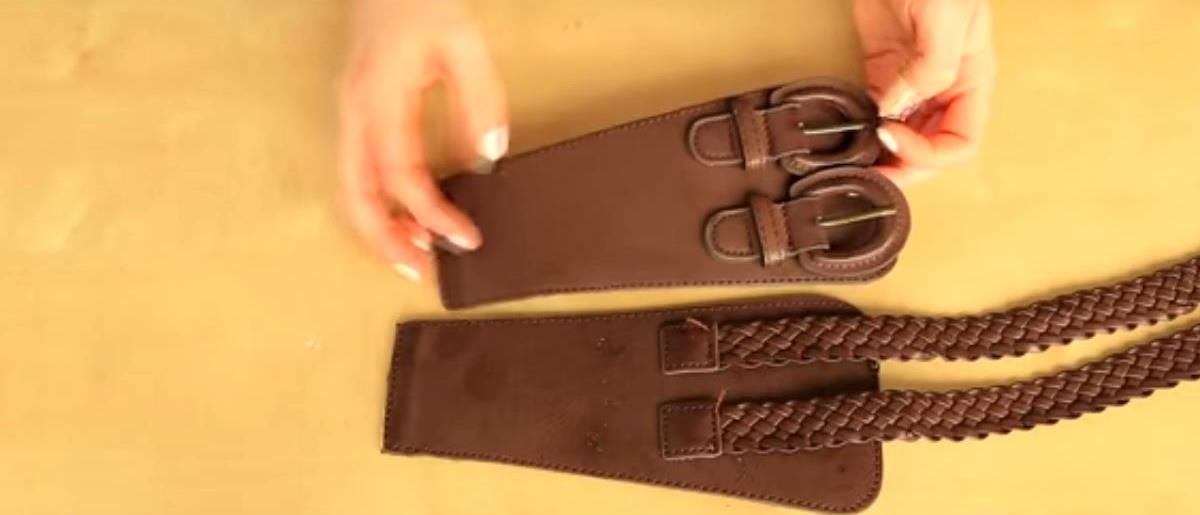
They then cut the braids off and glued them to the half with the buckles, basically creating a smaller belt from the original.
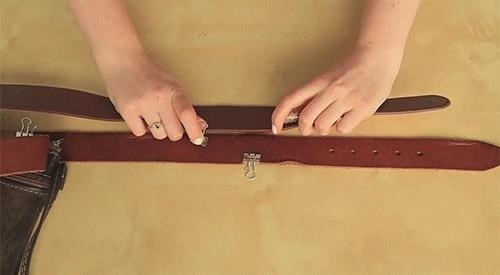
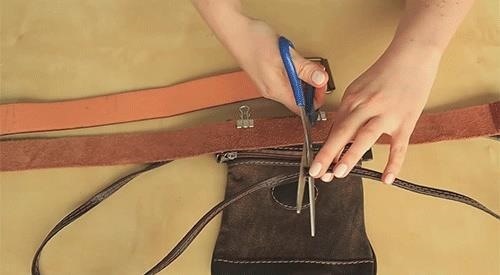
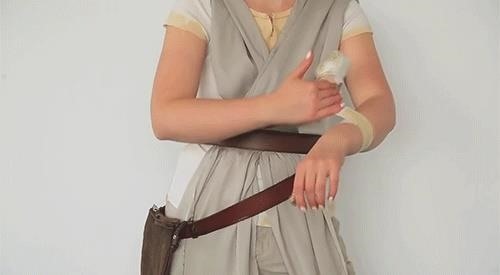
Step 7: Belt & Satchel for Movement
For Rey's belt, you'll want to combine two similar belts. One belt will be wrapped around the waist and the other will hang down and hold the satchel. The two belts will be held together with a piece of fabric sewn to the back of the belts at the hip.
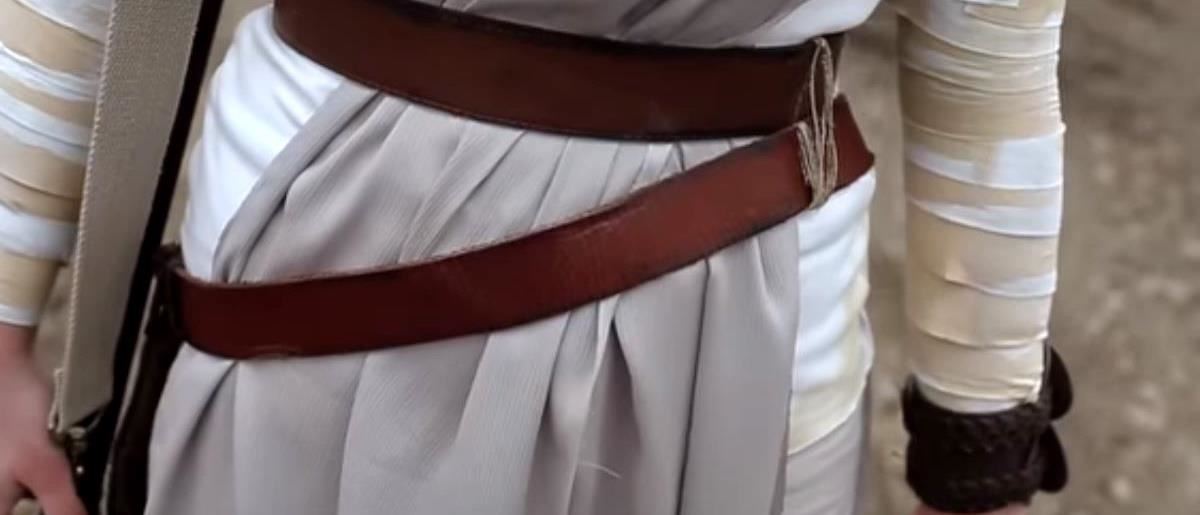
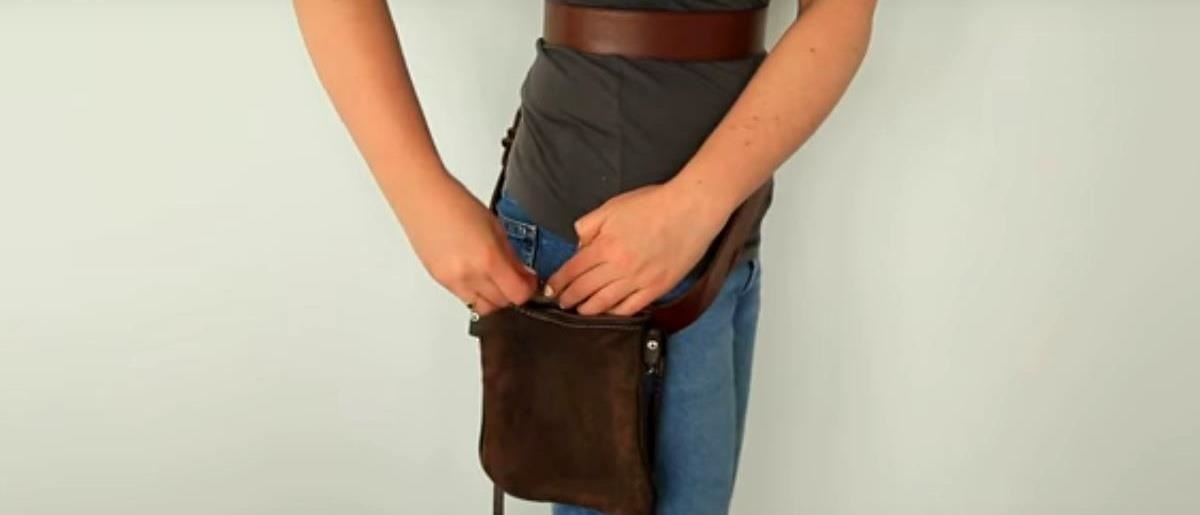
Note there's also a bit of twine on Rey's belt; add this to where the belts connect. For the satchel, try and find any small brown bag. Cut the bag's strap in half and then wrap the ends around the lower belt. Lastly, feather the edges with black paint to make the accessory look worn.
Step 8: Assemble Rey's Outfit
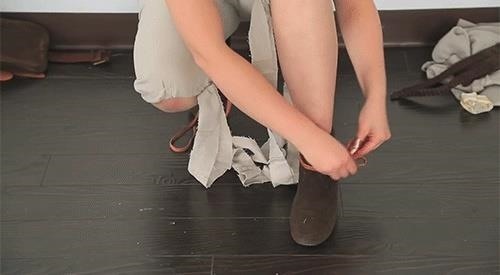
Once you have all your individual pieces done, it's time to assemble Rey's scavenger outfit. For the shoes, use the leather/fabric strips as laces. For the pants, wrap the extra fabric around the elastic bottoms; tie a knot. Also, for her sash, if it slips off the shoulders, secure it to the shirt with a few stitches.

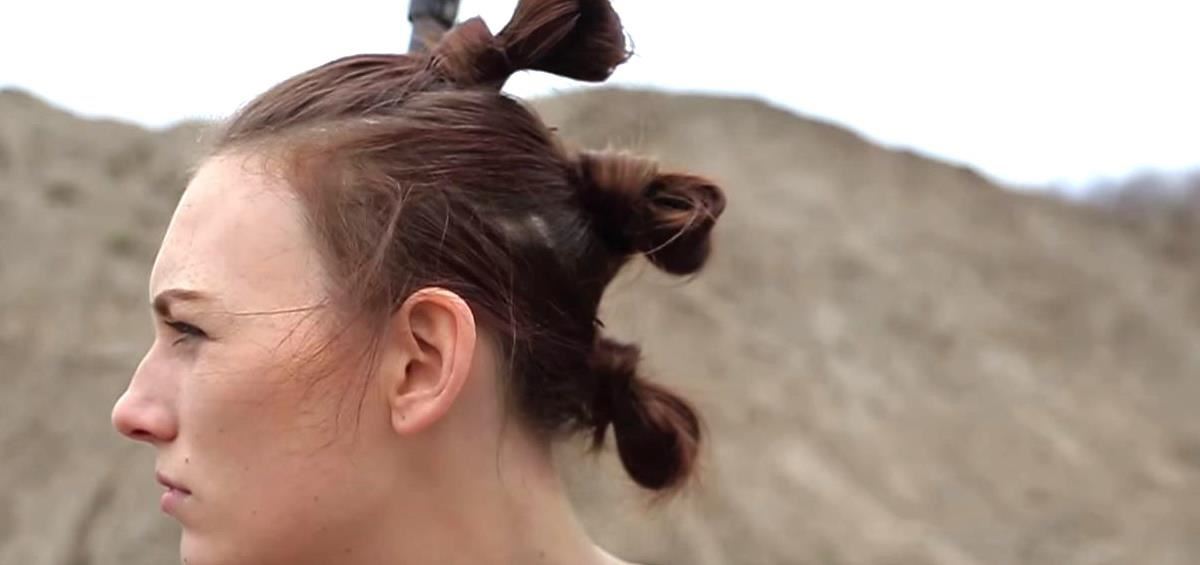
Rey's Trio of Buns
With the outfit for Rey's costume now done, it's time to style the hair. To make Rey's trademark buns, divide your hair into three equal sections top to bottom. Starting with the top, pull the hair into a regular ponytail, but don't pull it all the way through the ponytail holder. Pull only enough out to create a loop; wrap the extra hair around the loop. Secure the bun with a bobby pin.

Repeat this two more times and pull some hair out around the face to complete Rey's three-bun style.
Rey's Scavenger Staff
And finally, Rey's staff. This costume element really completes Rey's epic look. Also, it's just cool to see how a few basic materials can turn into something so authentic-looking. For those materials, visit your local hardware store.
- 72" wooden dowel
- PVC fittings
- electrical tape
- black spray paint
- swivel hooks
- fabric belt (beige, light grey, no design)
- glue gun
- hot glue
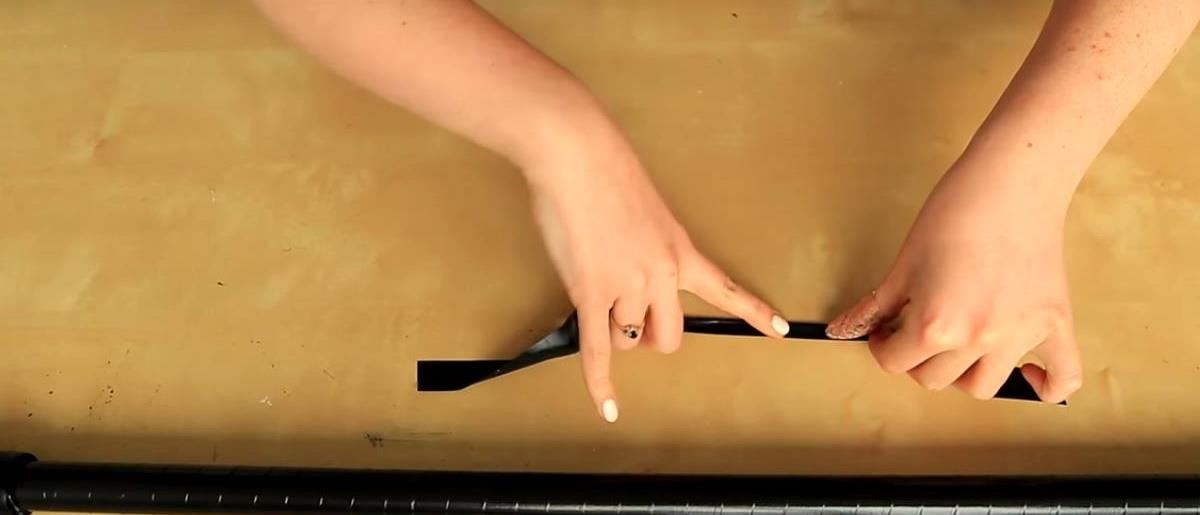
To measure where the staff's handle will be, hold the dowel next to you with your arm straight down. Where your hand falls is where the handle should be marked. With a hot glue gun, secure a PVC fitting at this spot. Repeat for the opposite end.
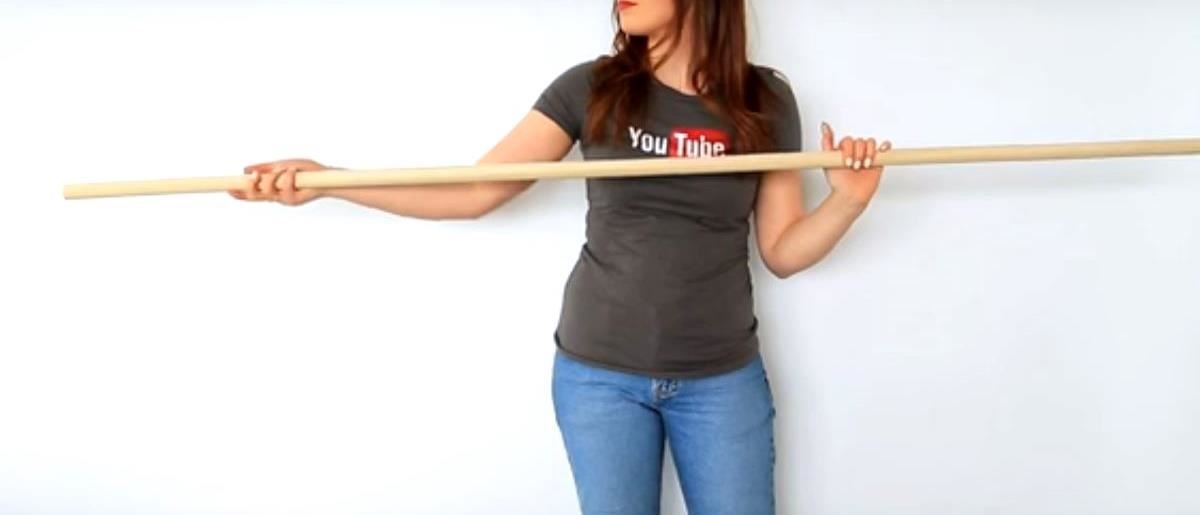
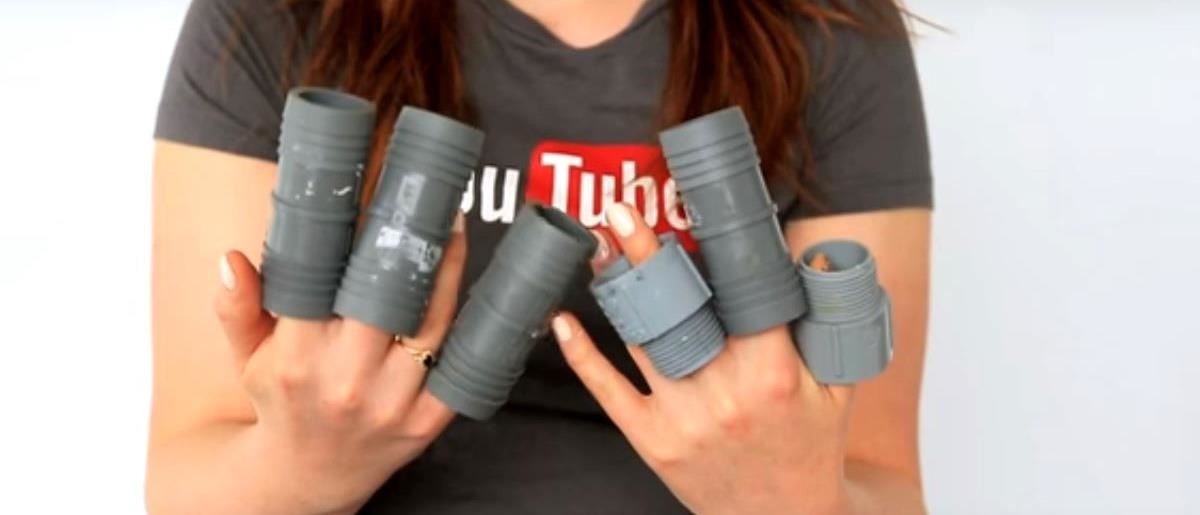
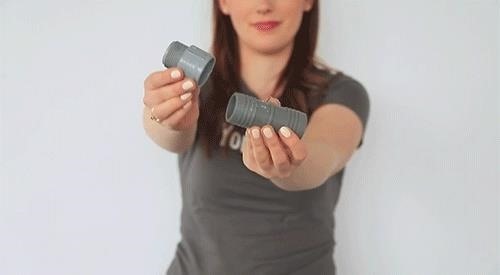
For the ends, glue on two more fittings, with the smaller one as the end piece:
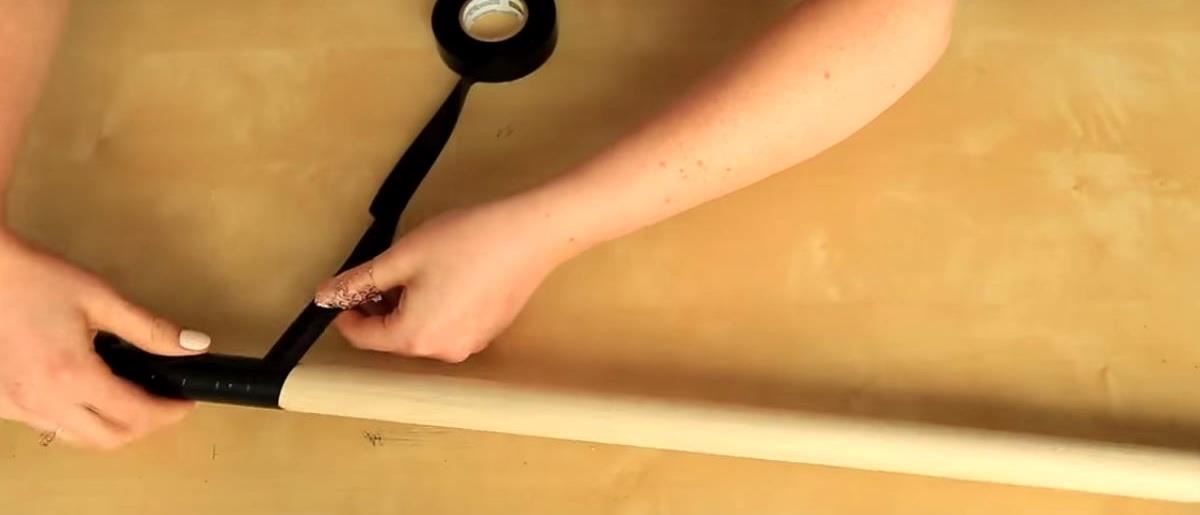
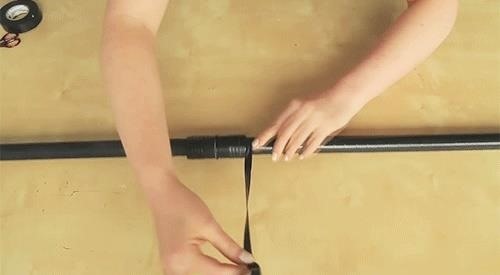
Next, spray paint the staff: everything but the middle. Wrap the middle in electrical tape and then create loops for the staff's strap. To make the loops, fold electrical tape in half and then wrap it around one end of the handle until the loop is just big enough for a swivel hook.
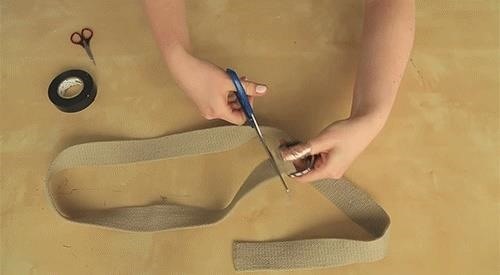
To create the staff's strap, take a fabric belt (the Sorry Girls used a woven one) and cut the buckle off. Attach a swivel hook to one end with a bit of glue or thread. Then, hook it onto the staff and measure out the strap (according to you). Cut the strap at this point, leaving a little bit at the end for the other swivel hook. Glue or sew on the second hook and then attach it to other electrical-tape loop. This is the final step.
And that's it, your DIY Rey costume is complete. Nothing left to do now but go and train with Luke! While you gather your things for your journey, be sure to also check out the full Rey costume tutorial by The Sorry Girls below, and may the Force be with you:
Just updated your iPhone? You'll find new emoji, enhanced security, podcast transcripts, Apple Cash virtual numbers, and other useful features. There are even new additions hidden within Safari. Find out what's new and changed on your iPhone with the iOS 17.4 update.


Be the First to Comment
Share Your Thoughts