

Using an iPhone isn't difficult, but it can be if you're using it for the first time, especially if you switched from an Android phone. That's primarily because of the massive difference in the user interface between the two operating systems. And when it comes to taking screenshots, you have more options than just using the hardware buttons.
If you're new to the Apple ecosystem and have just received an iPhone 13, iPhone 13 mini, iPhone 13 Pro, or iPhone 13 Pro Max, carrying out the most basic of tasks such as switching between apps, force-restarting them, and shutting down the device may take some getting used to. Perhaps the most important thing any iPhone owner should know is how to take screenshots.
- Don't Miss: Tips for Using Your iPhone's Screenshot Tools
There are at least eight ways you can take screenshots of your iPhone 13, 13 mini, 13 Pro, or 13 Pro Max. Most methods will show you a brief flash of light on the screen followed by a clicking sound (if it's not on Silent mode), which means the screenshot has been taken. Most will also result in a thumbnail popping up in the bottom left. Tapping that thumbnail will open up the screenshot editor, where you can crop, scale, edit, and share your screenshot.
Jump to a section: Hardware Buttons | Siri | Back Tap | Shortcuts | Voice Control | AssistiveTouch | Screen Mirroring | QuickTime Player
Option 1: Hardware Buttons
In all iPhone 13 variants and all previous iPhone models with Face ID, the default method of taking a screenshot is to press the Side button and Volume Up button simultaneously and let go. Keep in mind that you should press and release both buttons quickly, or you'll end up at the screen for Power Off, Medical ID (if set), and Emergency SOS screen, which also disables Face ID.
Option 2: Siri
Let's say you're driving and can't take a screenshot safely. In this case, you can use Siri, iPhone's virtual assistant, to snap an image of your screen for you. As long as you have Listen for "Hey Siri" enabled in your Siri settings, all you need to do is say "Hey Siri, take a screenshot" or Hey Siri, take screenshot."
Alternatively, with "Press Side Button for Siri" enabled in your Siri settings, you can long-press the Side button to activate Siri, then say "take a screenshot" or "take screenshot."
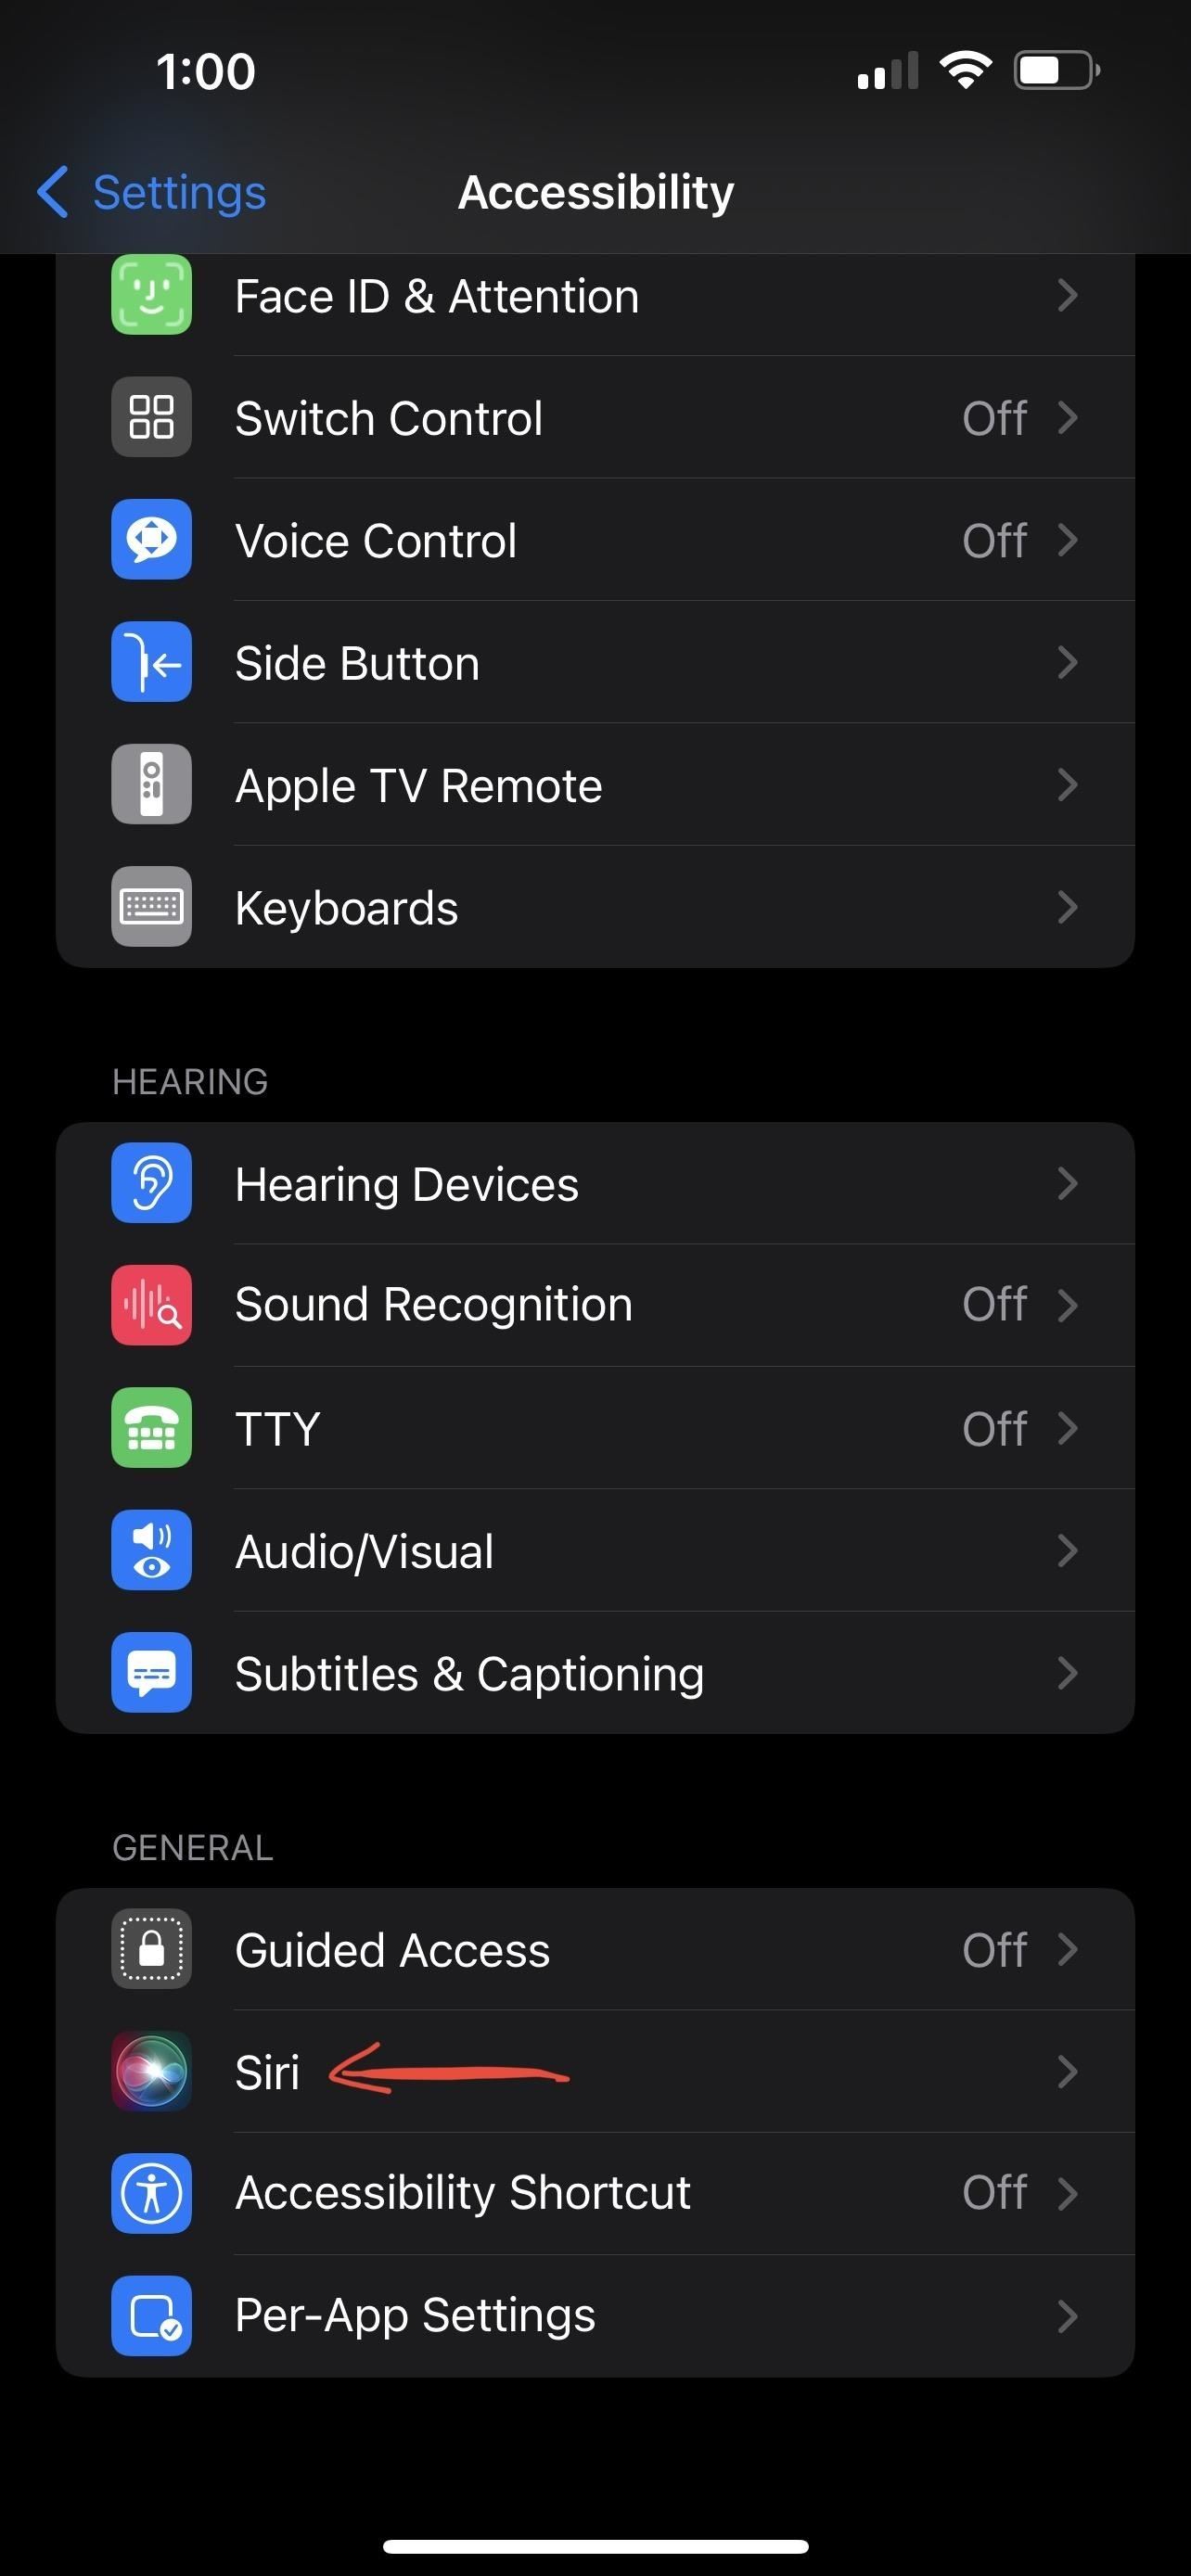
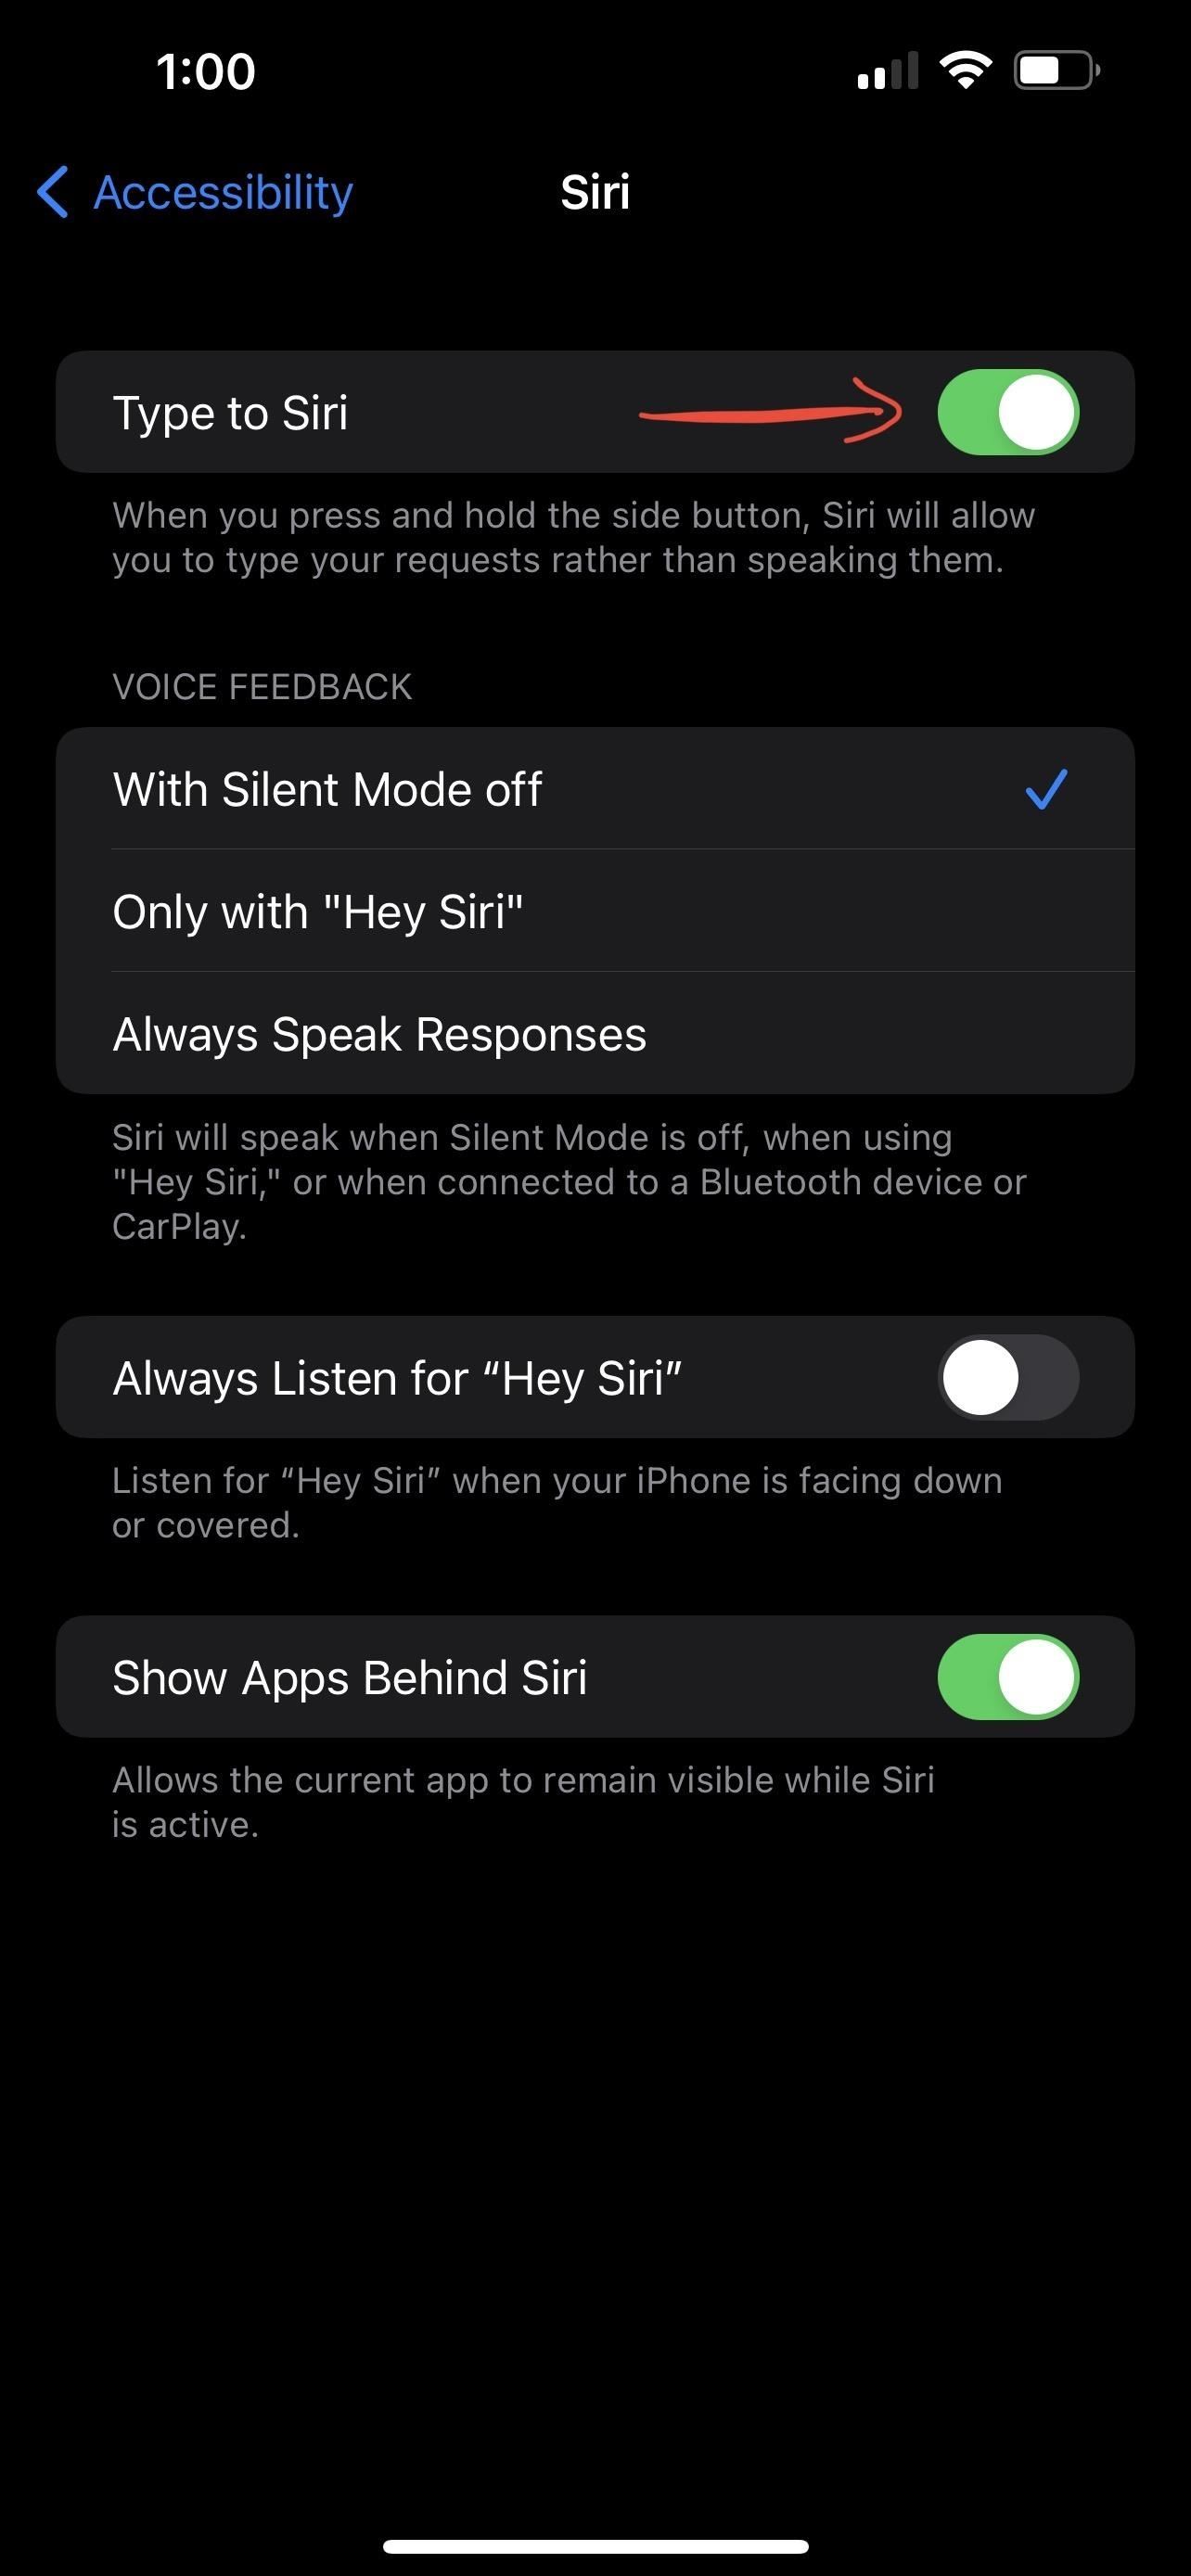
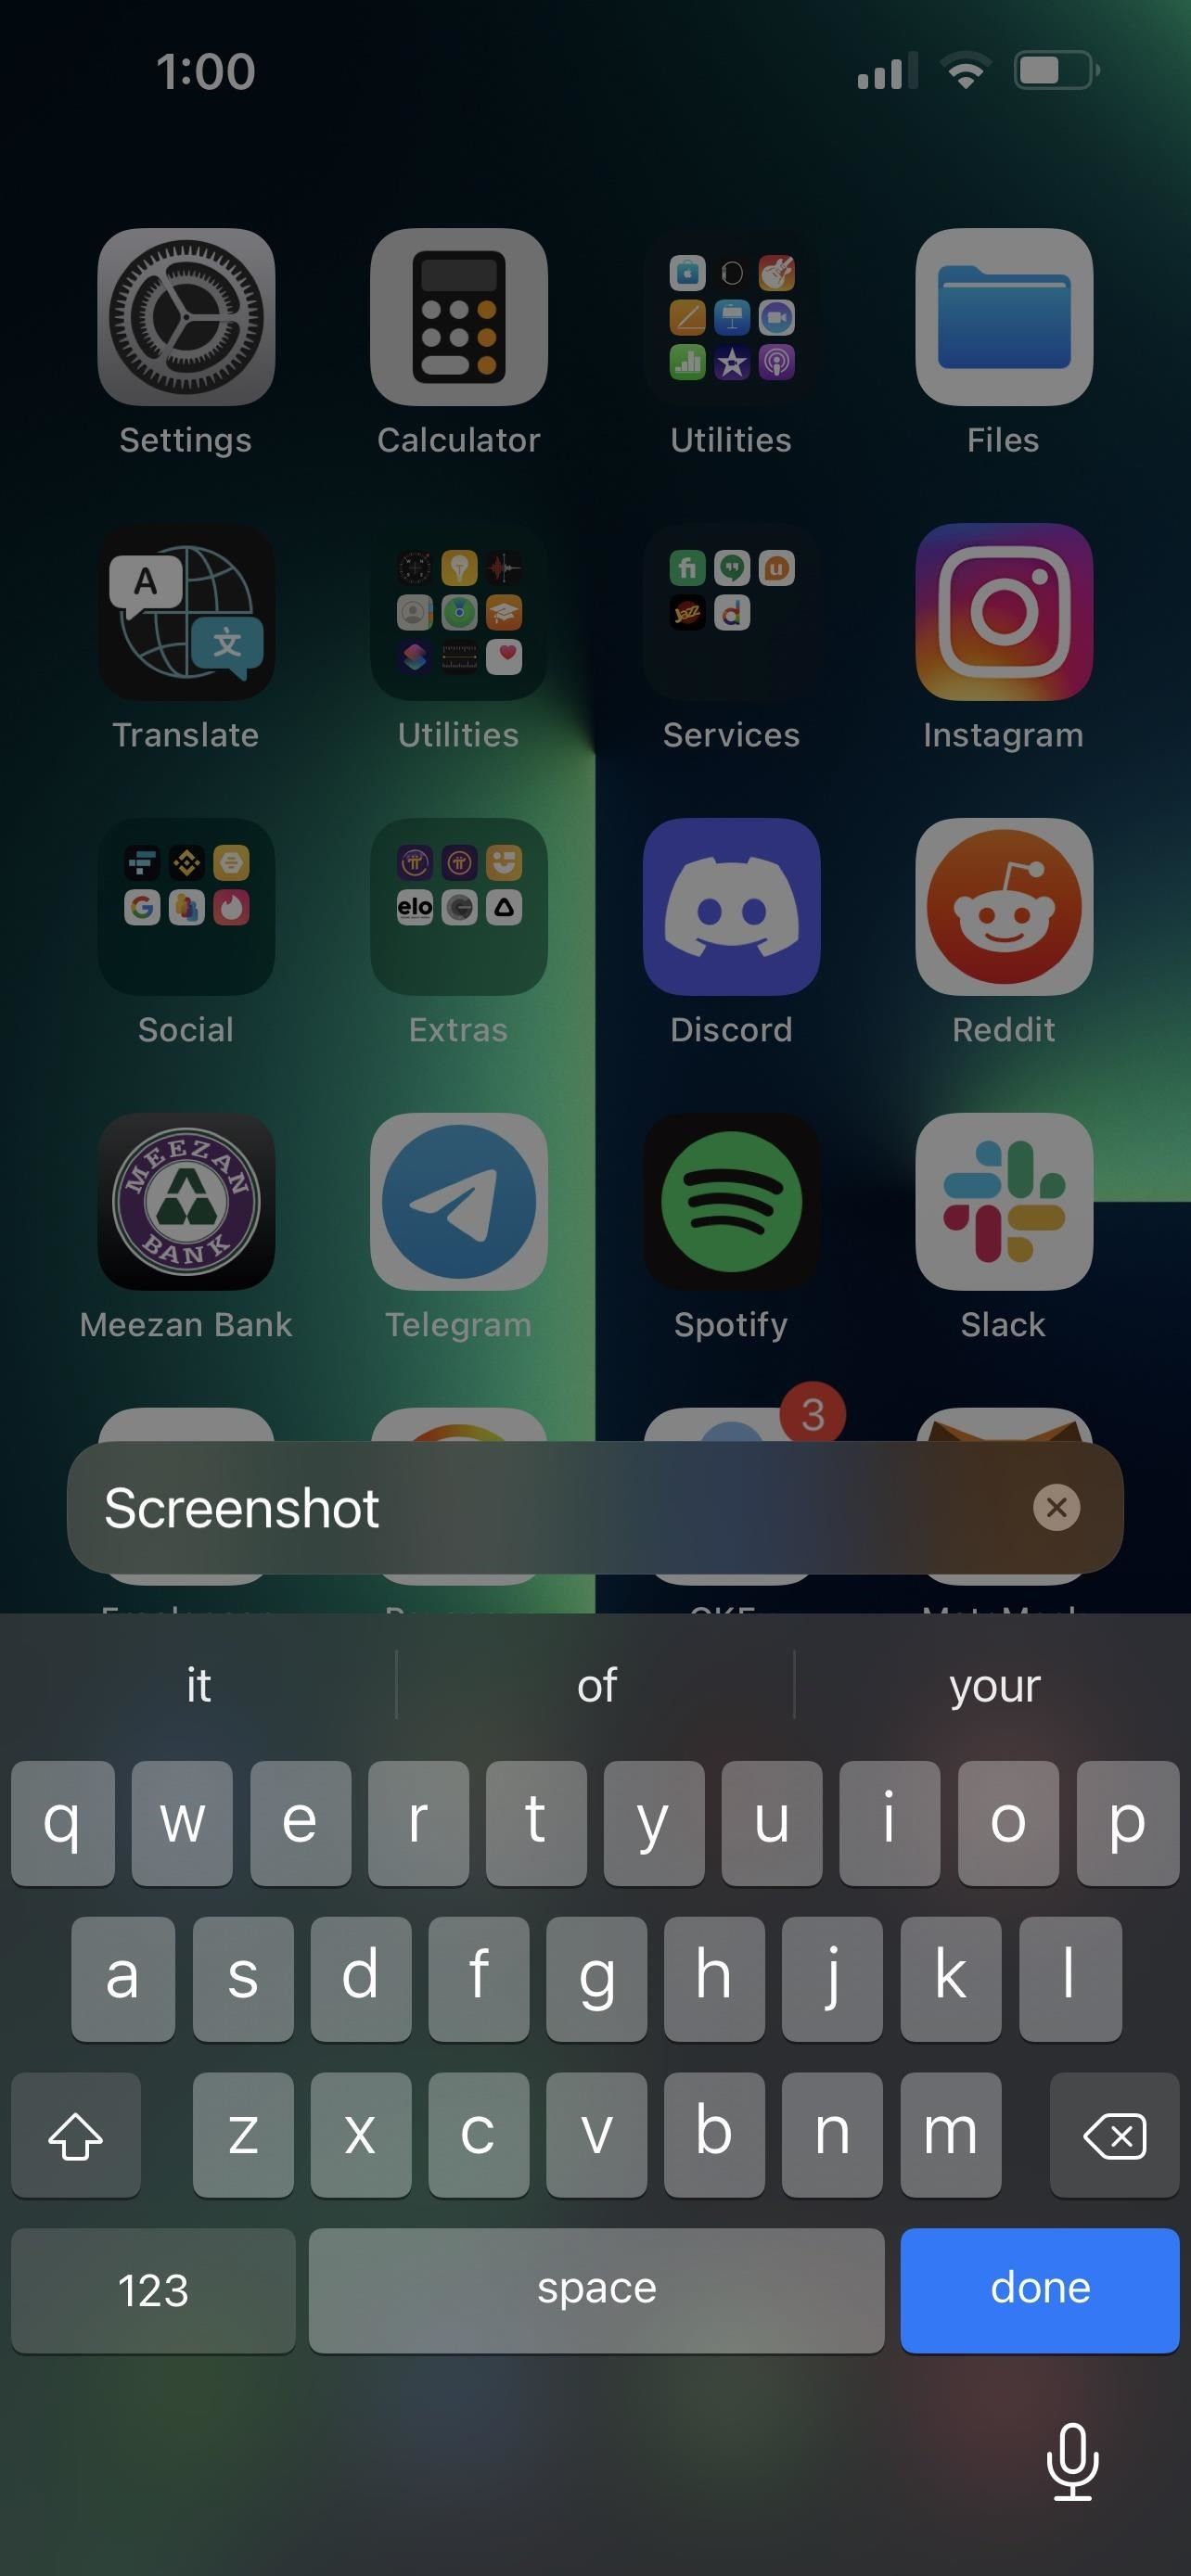
Another way is to use "Type to Siri," which you can turn on from Settings –> Accessibility –> Siri. As the name suggests, this allows you to type to Siri instead of giving it a voice command. Long-press the Side button to activate Type to Siri, type in "screenshot," and hit "done."
Option 3: Back Tap
Back Tap is a nifty accessibility feature Apple introduced in iOS 14 and still offers in iOS 15. The tool allows you to carry out different actions simply by double- or triple-tapping the back of your iPhone, and you can choose which actions you want to perform with each.
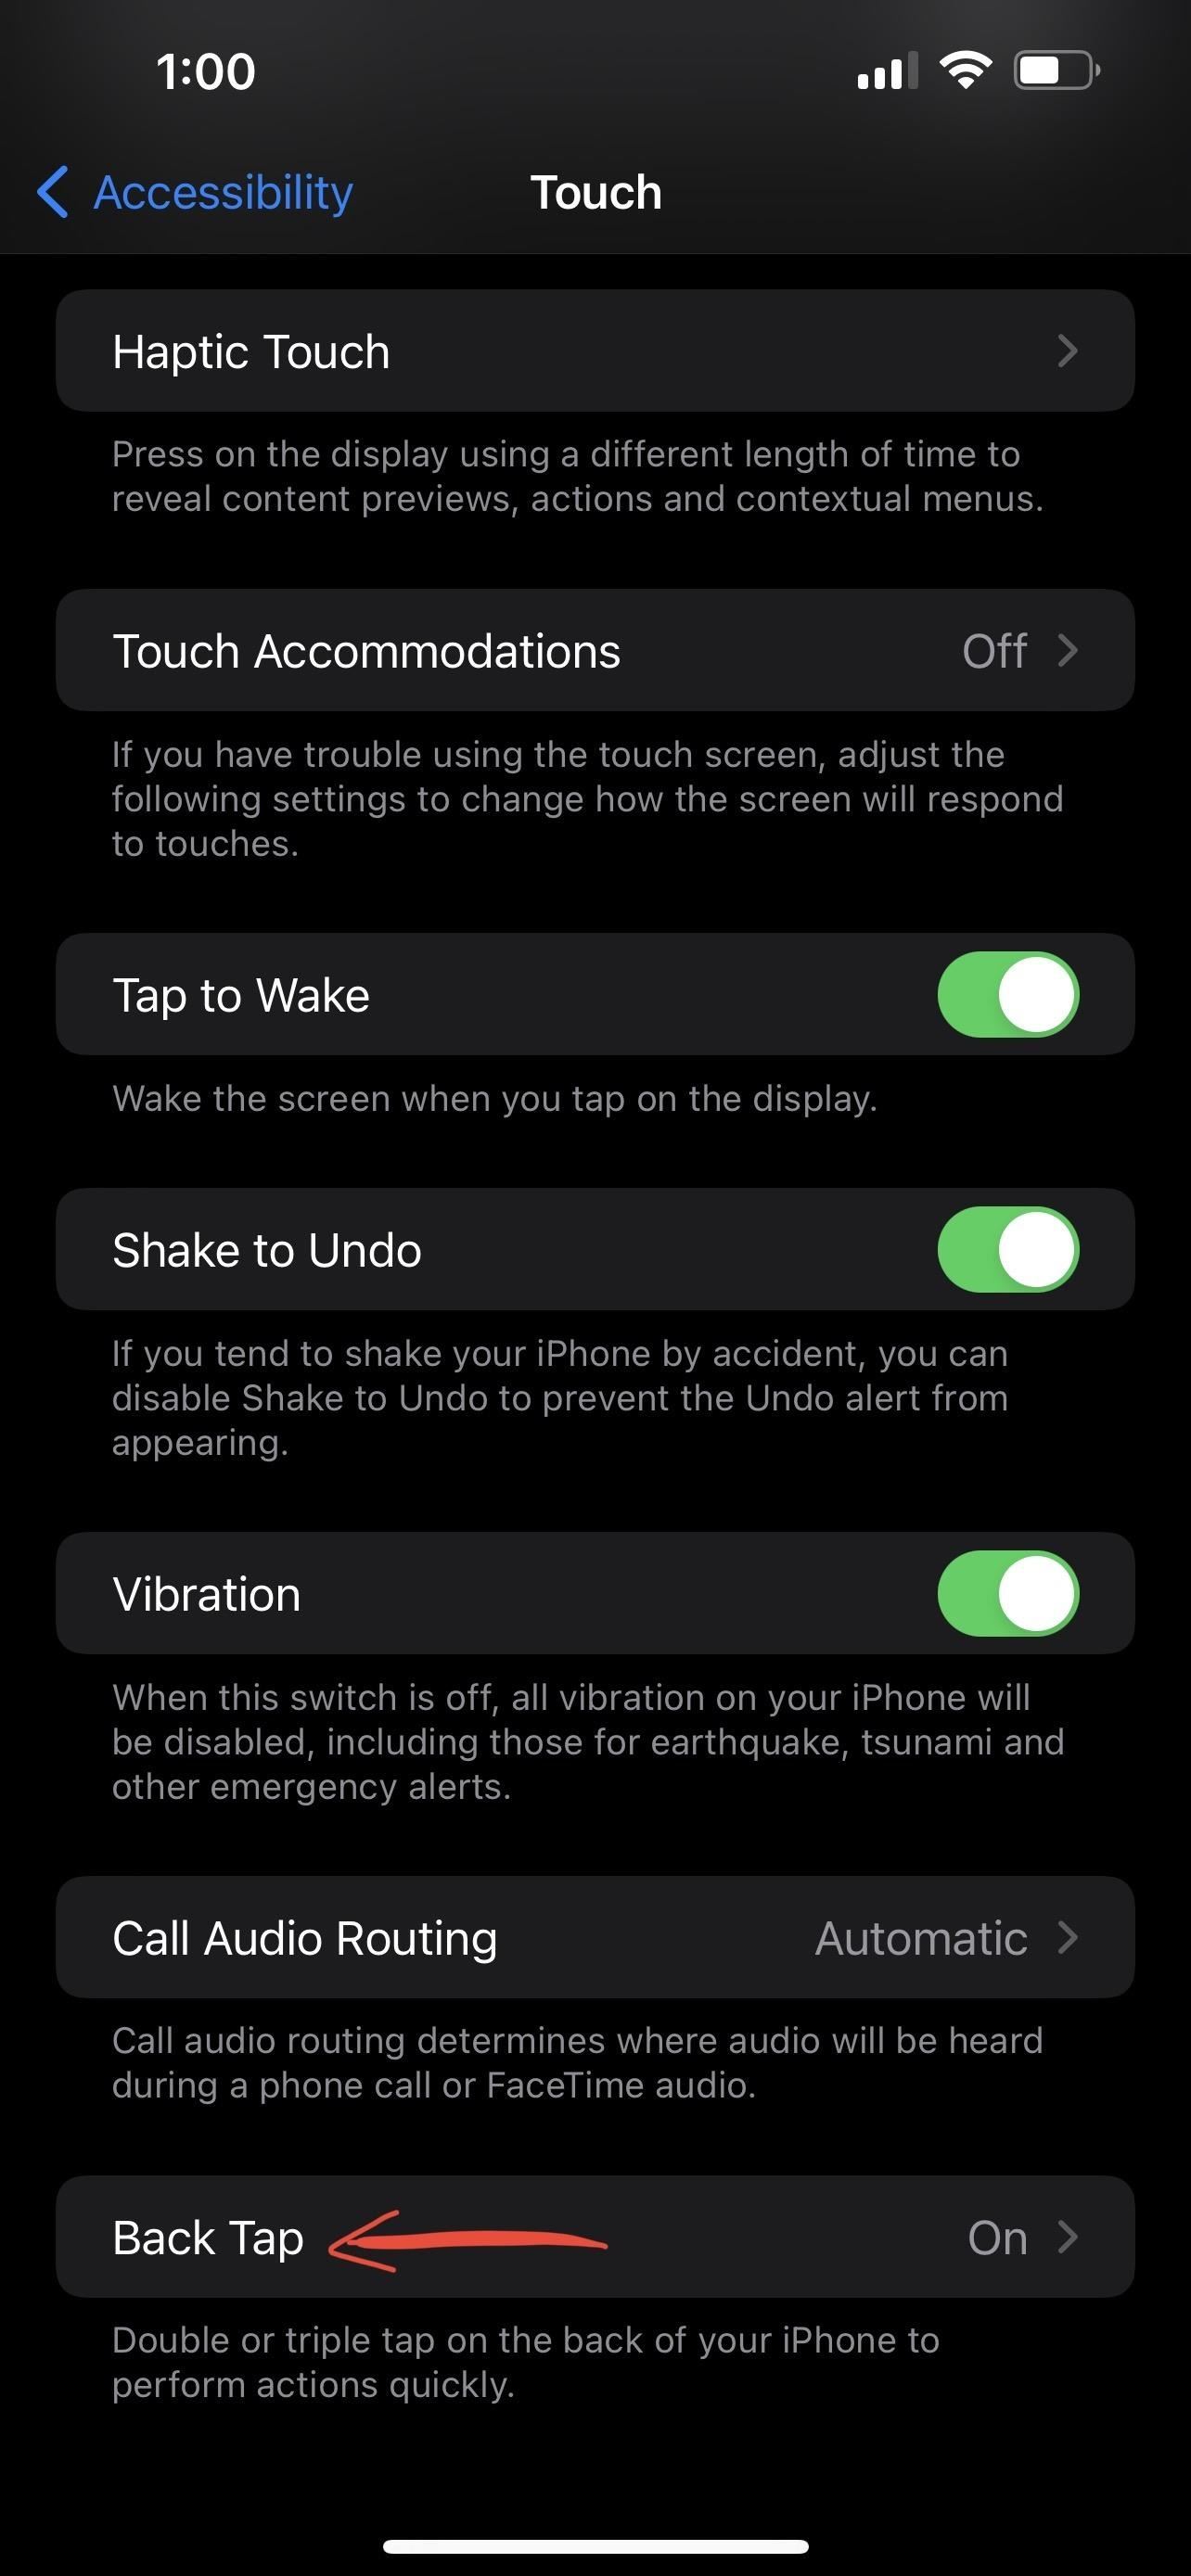
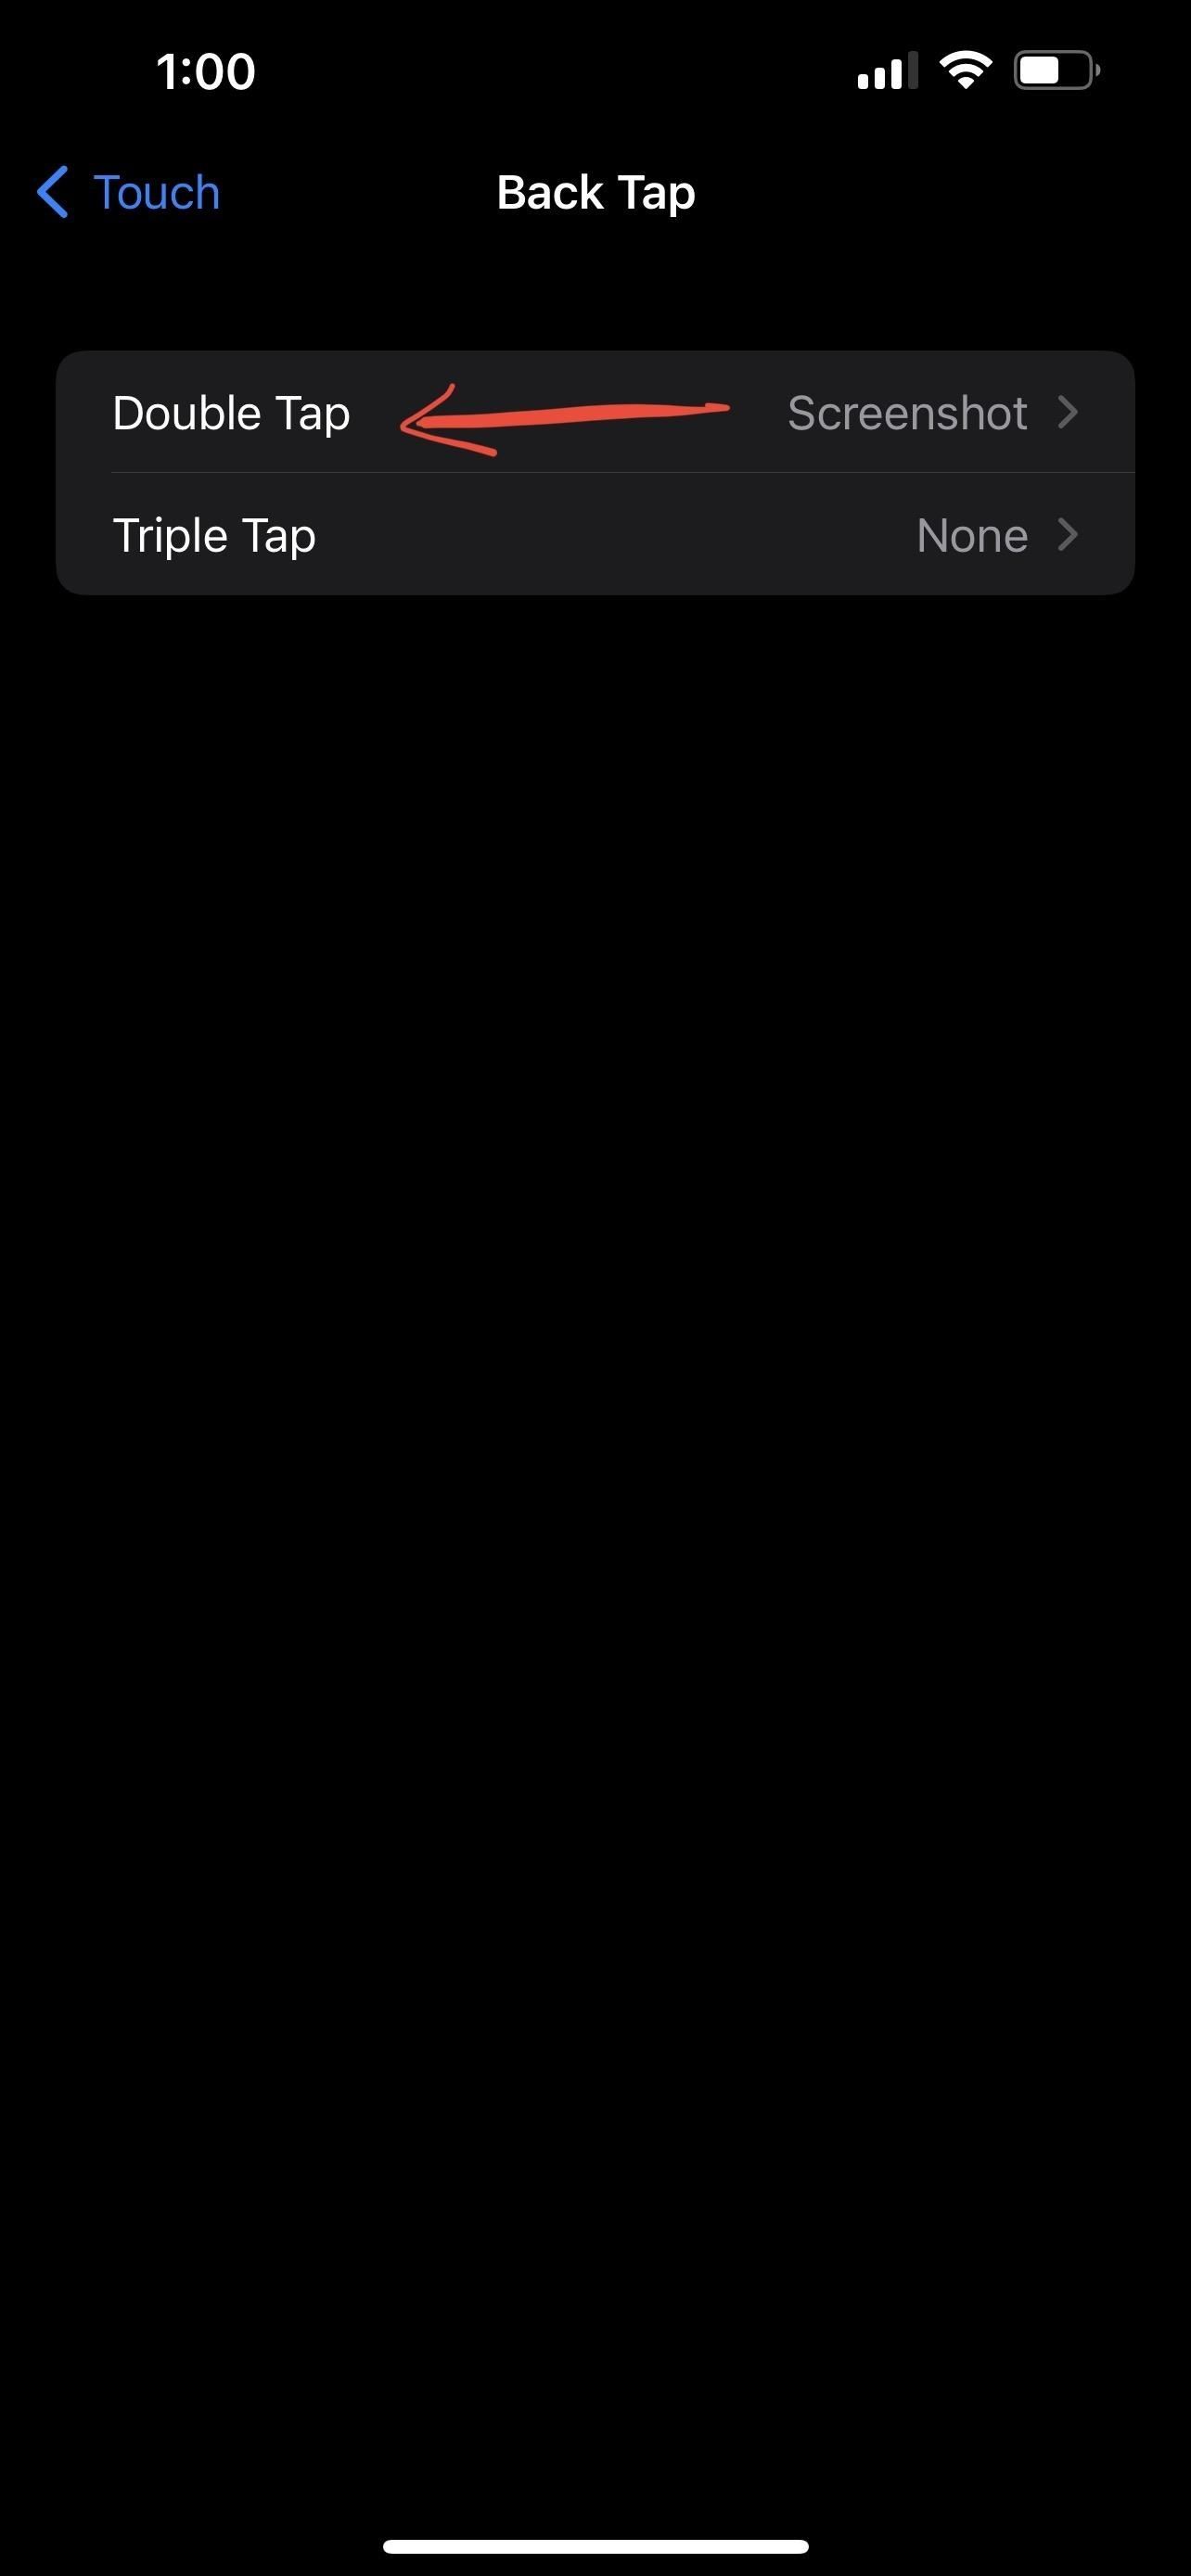
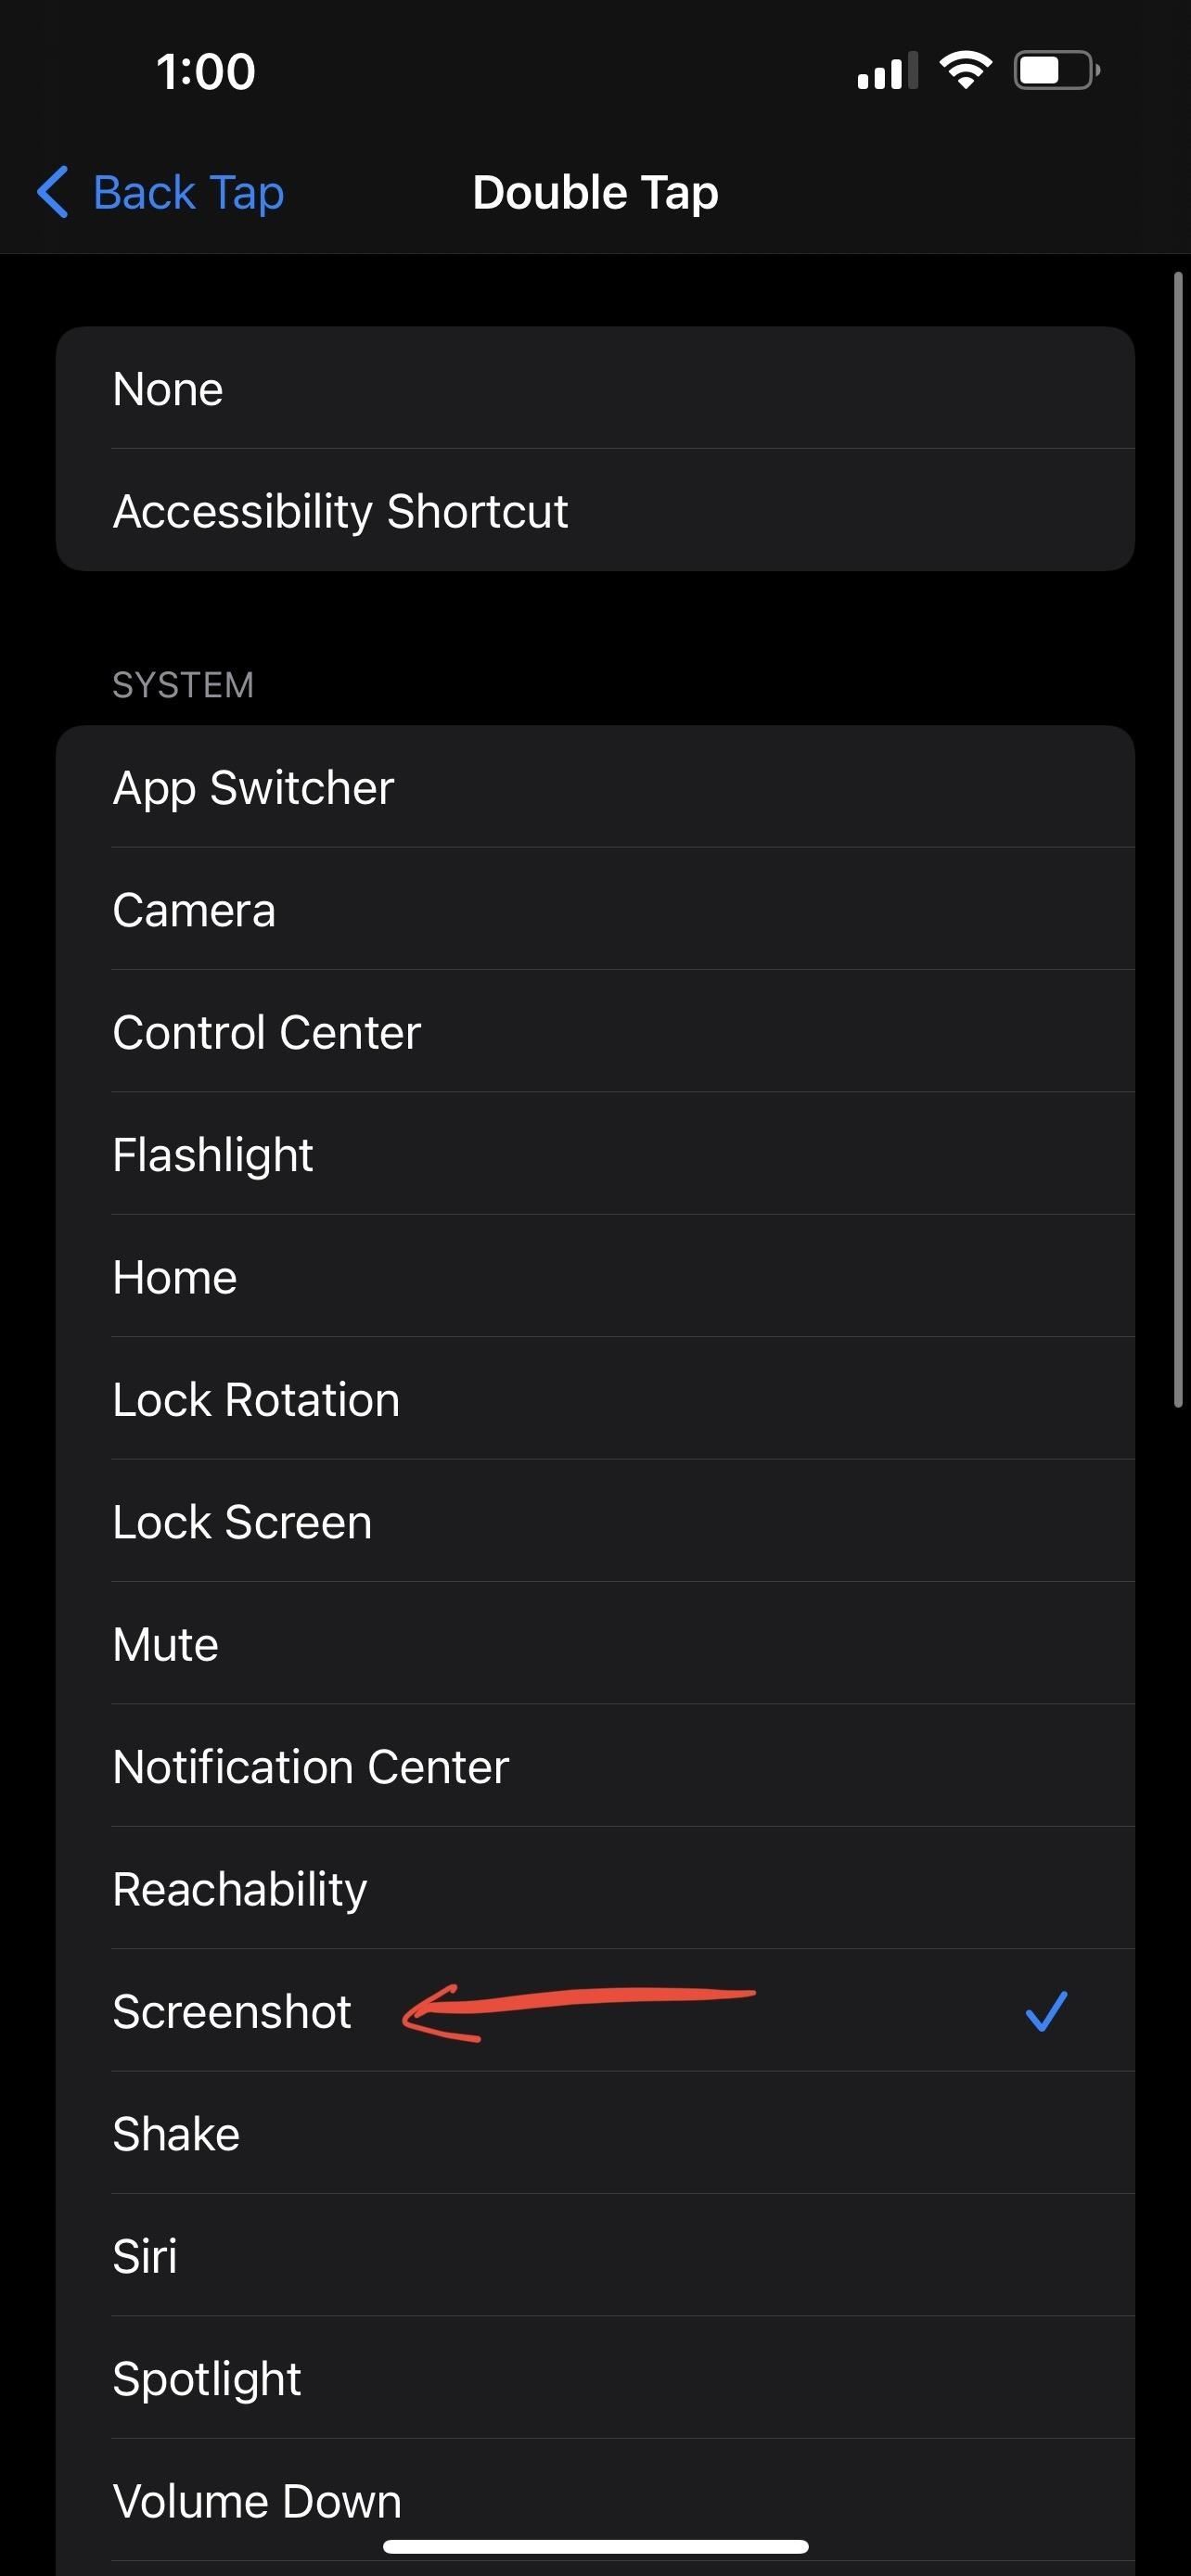
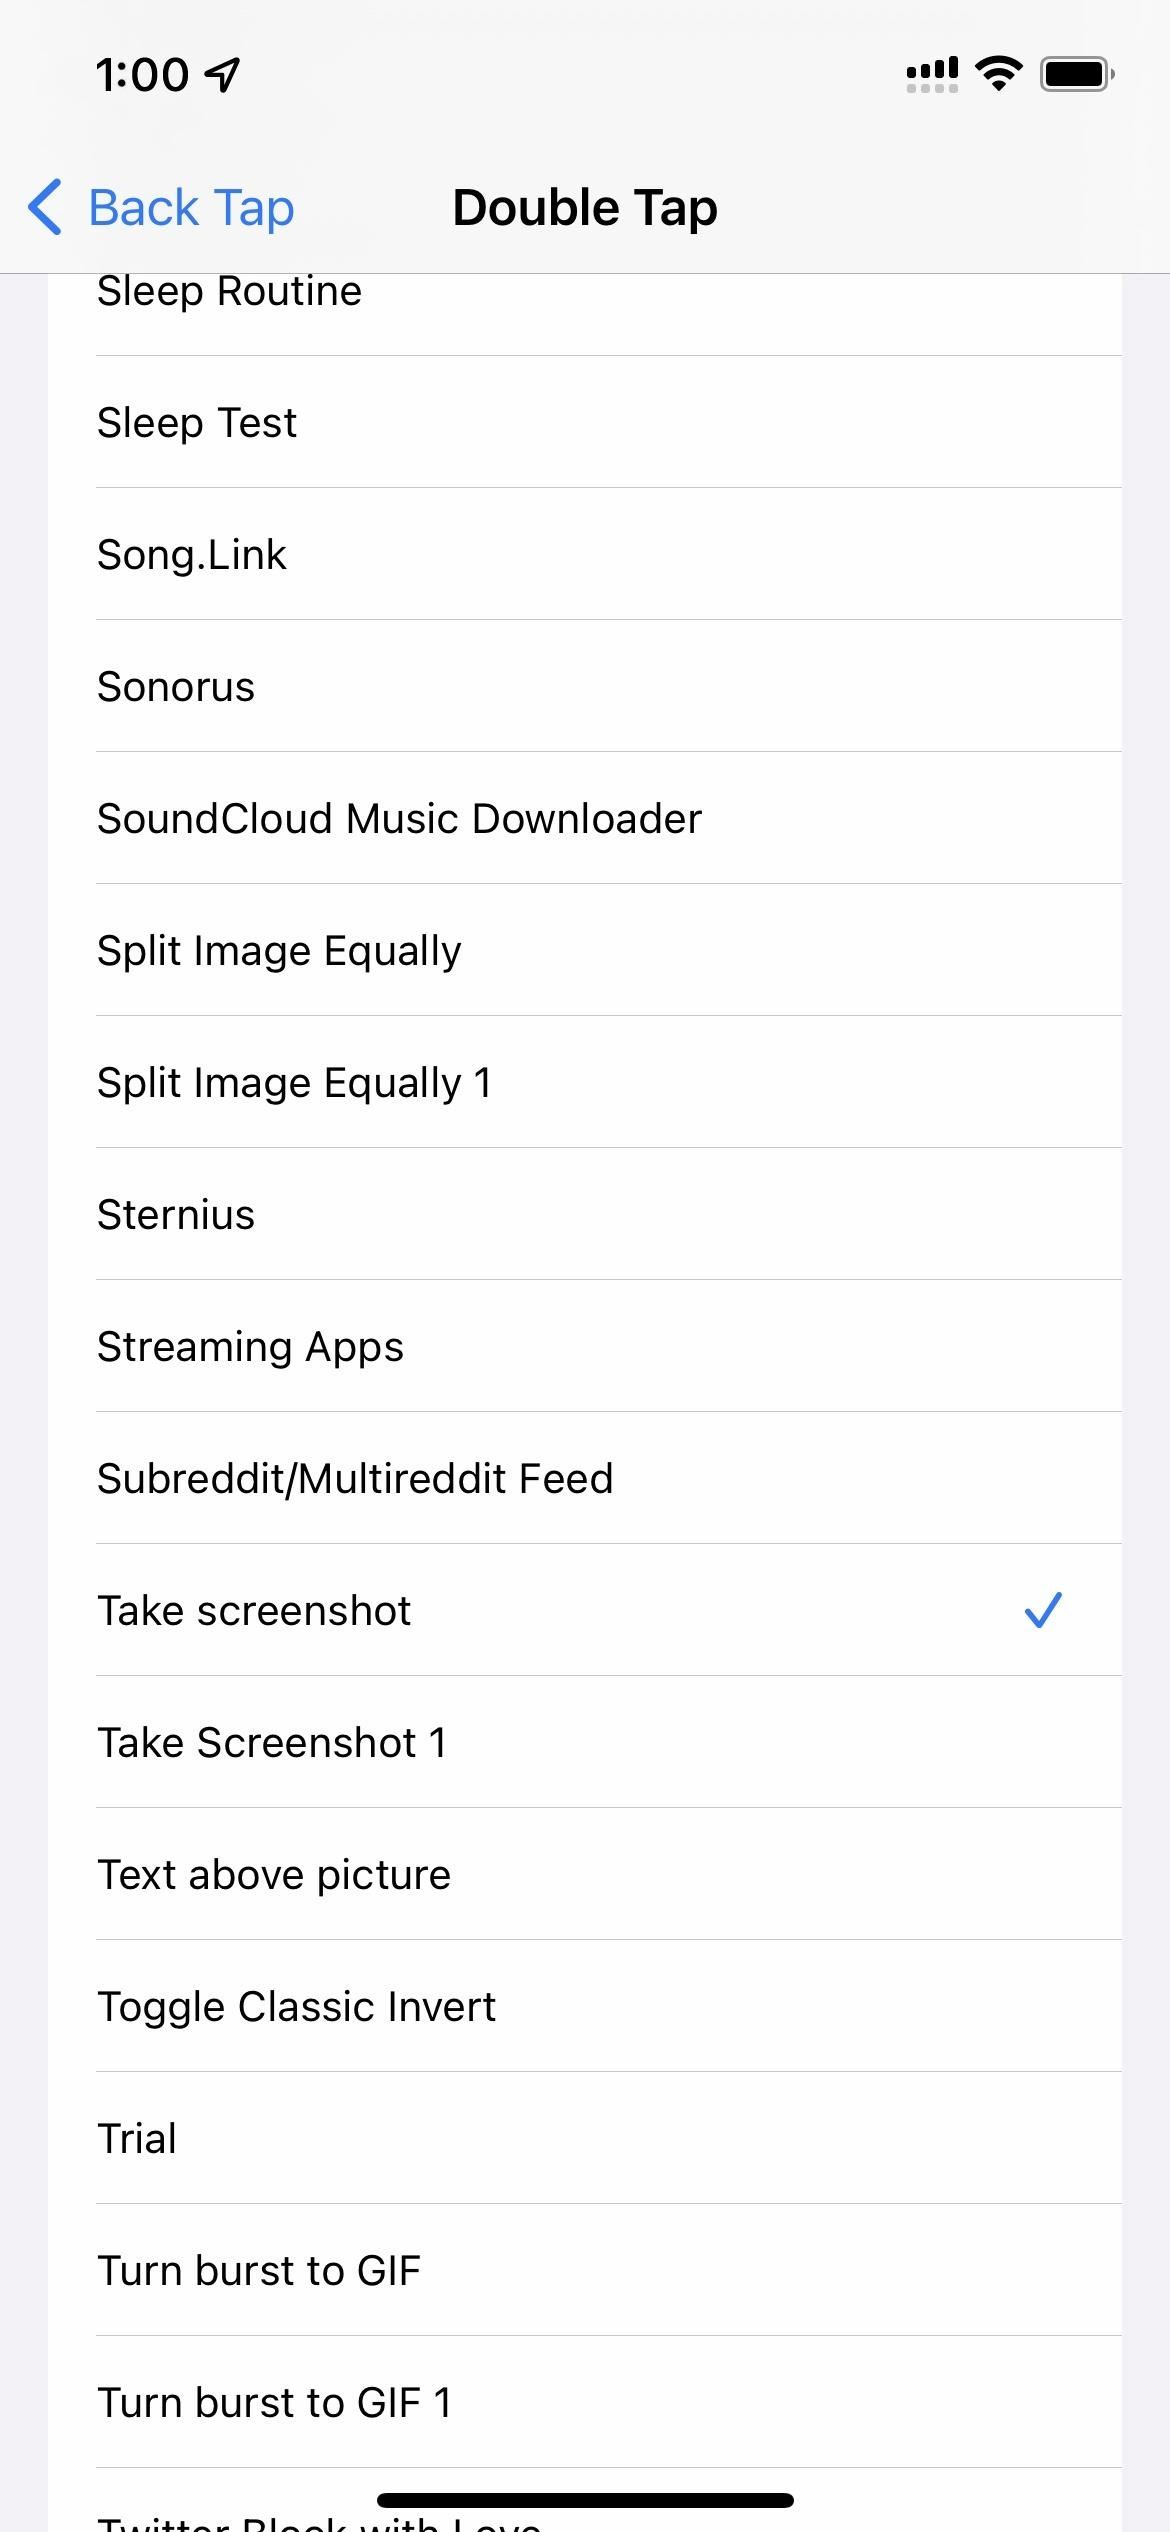
Back Tap is turned off by default on all iPhone 13 series models. Head to Settings –> Accessibility –> Touch –> Back Tap to toggle it on. Choose either "Double Tap" or Triple Tap," then pick "Screenshot" from the list of system functions. When you need to take a screenshot, double- or triple-tap the back of your iPhone, depending on which you set.
Option 4: Shortcuts
Since iOS 14.5, Apple's Shortcuts app has had a "Take Screenshot" action, and it's still there in iOS 15 for all iPhone 13 series variants.
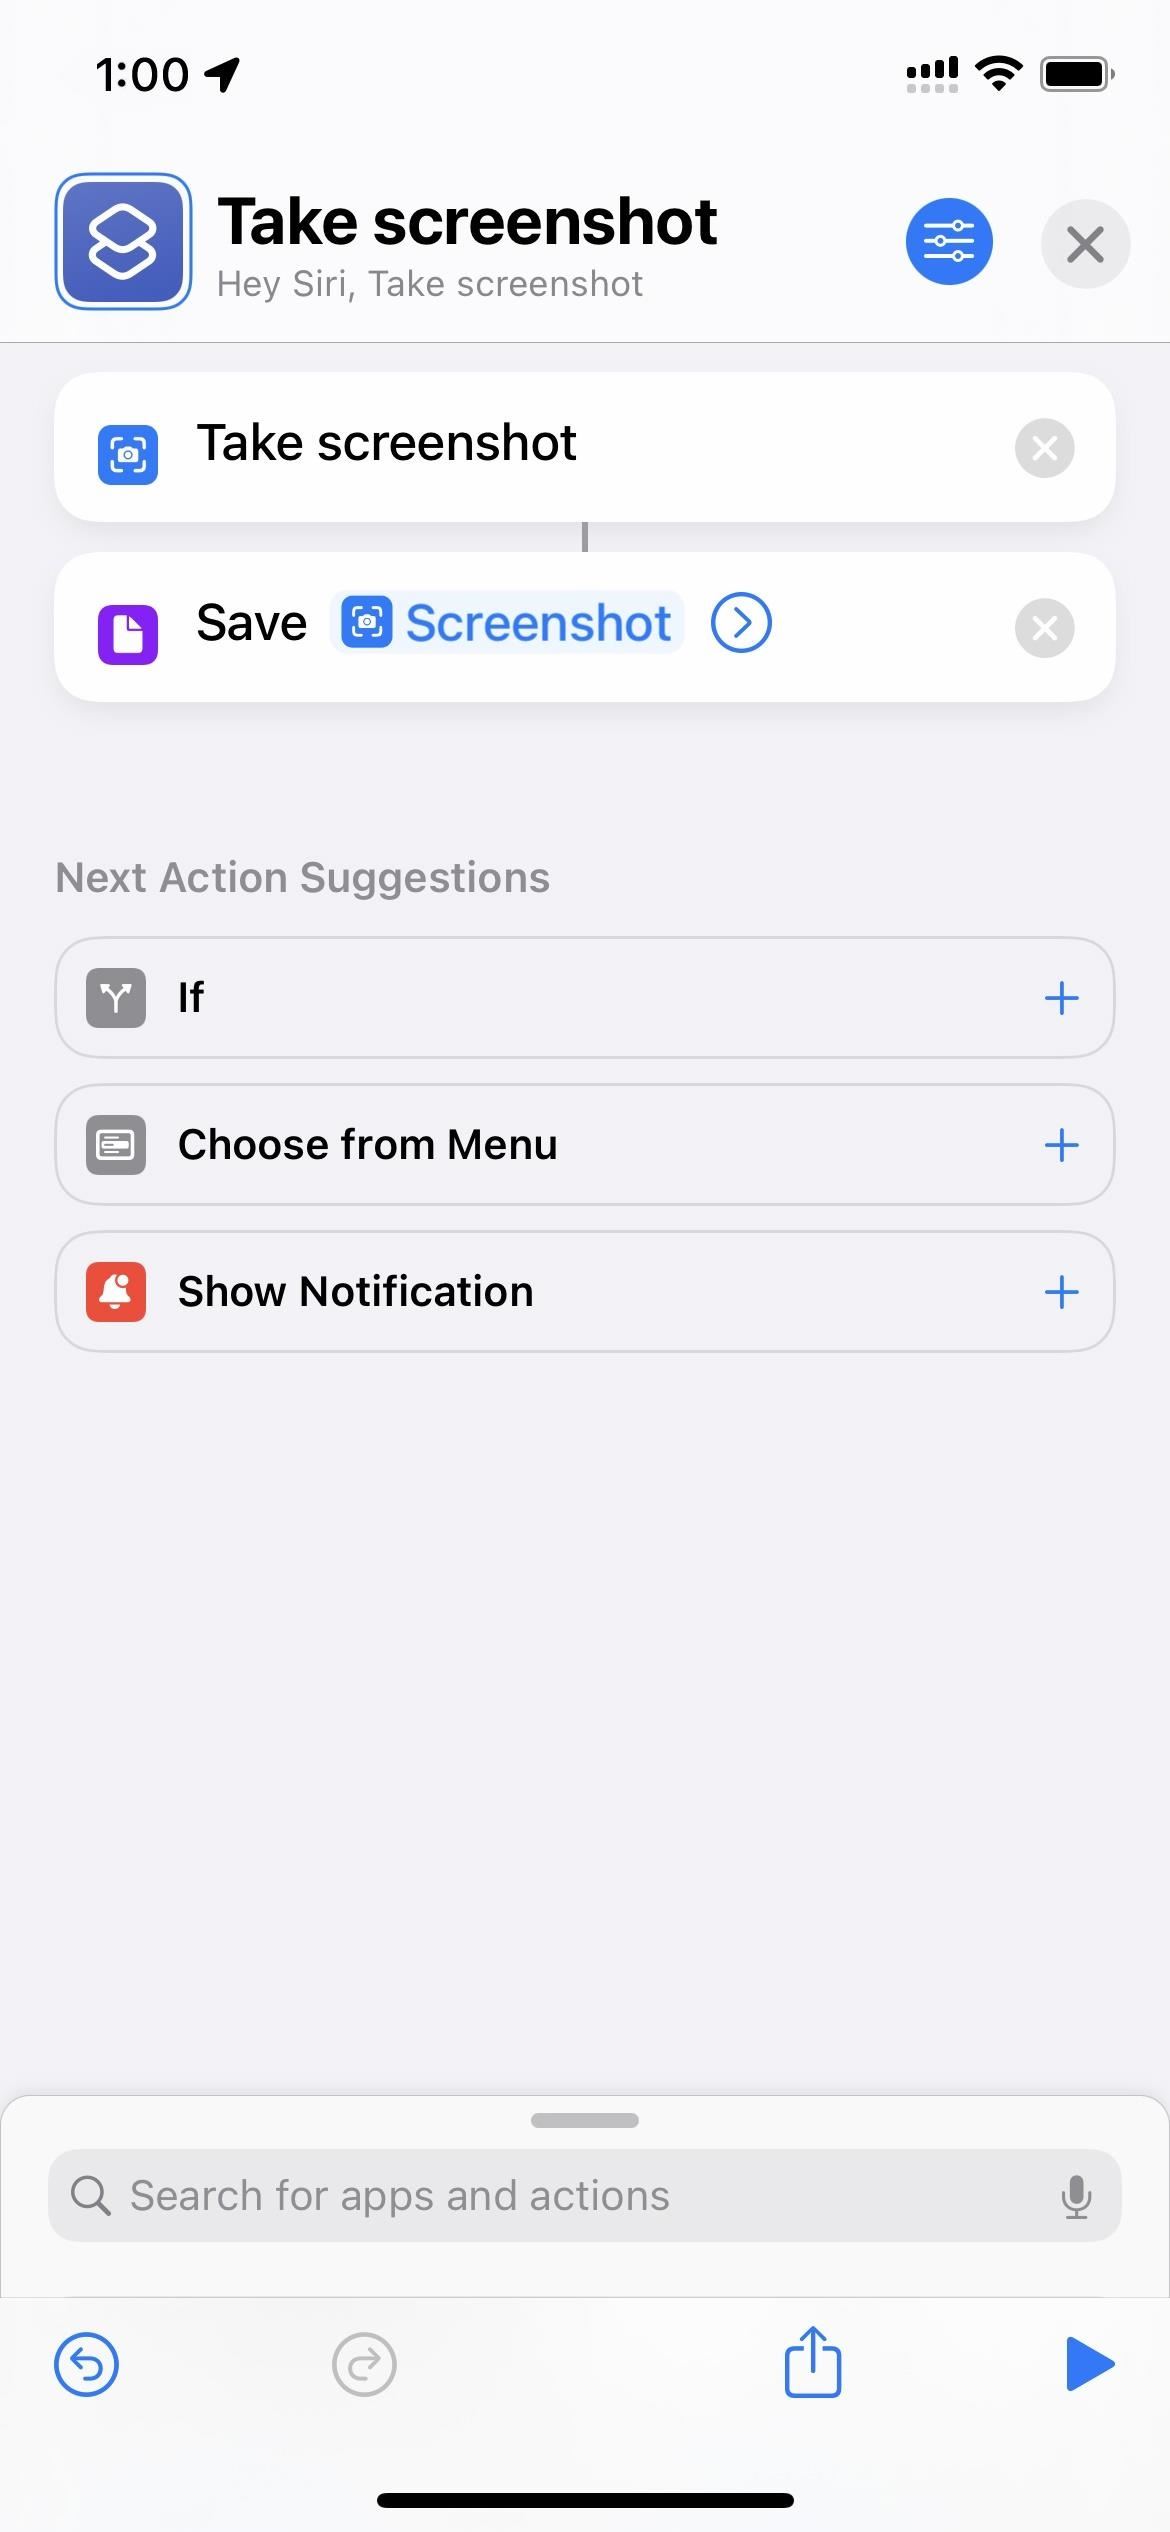
To create a screenshot-taking shortcut, go to "My Shortcuts" in Shortcuts, tap the plus (+) to start a new workflow, tap "Add Action" or touch the search bar, then look for and select "Take Screenshot." Next, add the "Save to Photo Album" action, which is necessary, or the shortcut won't do anything with the screenshot taken.
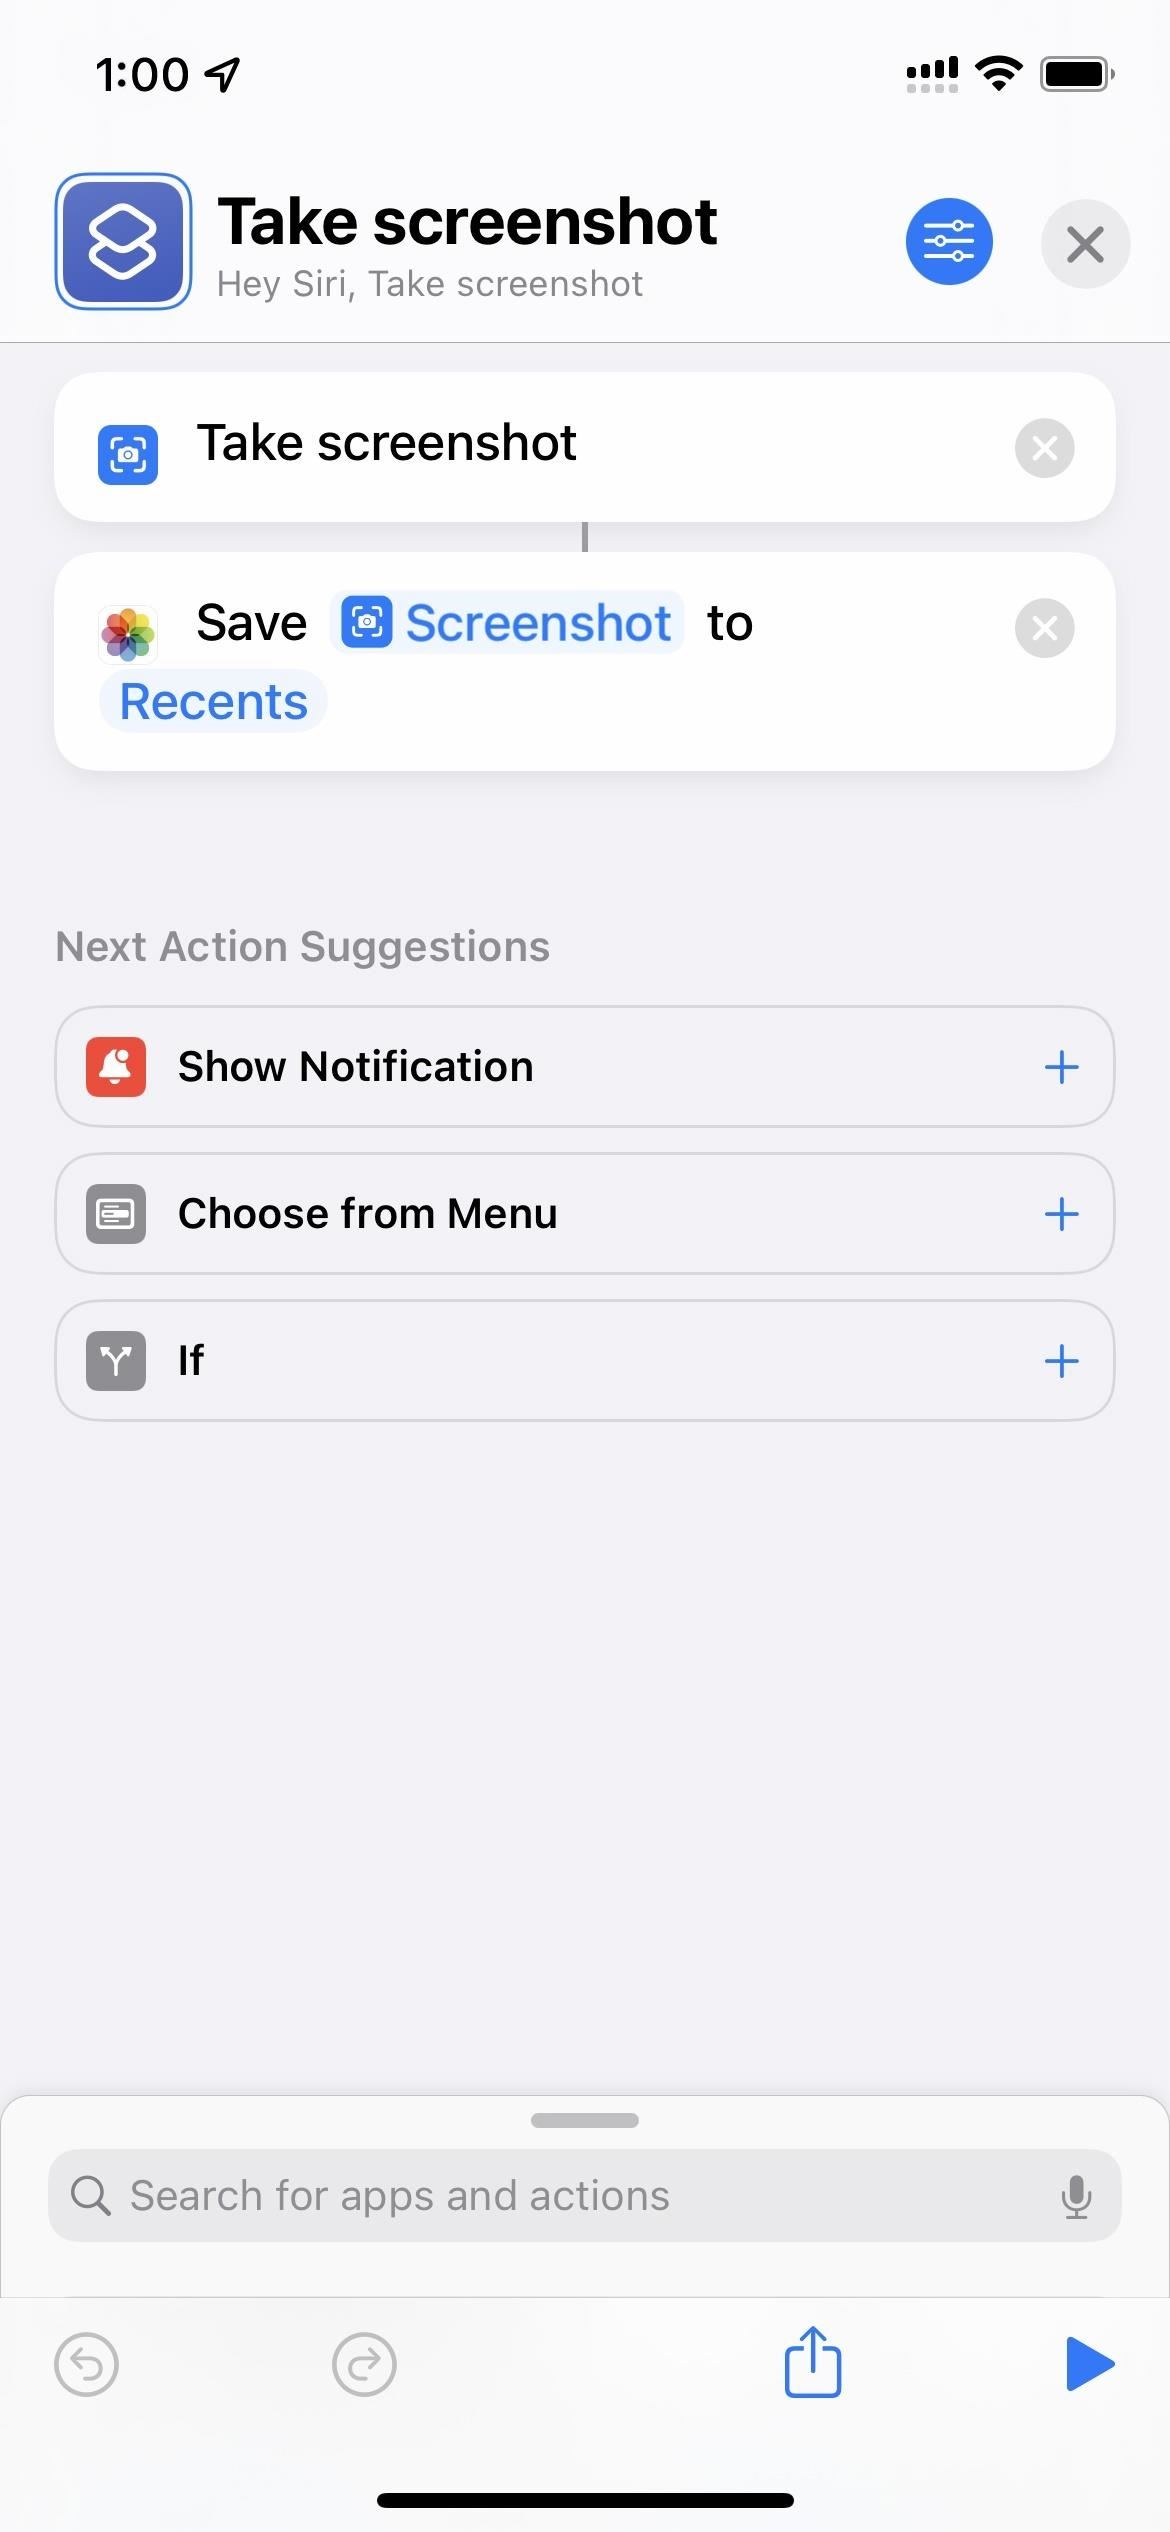
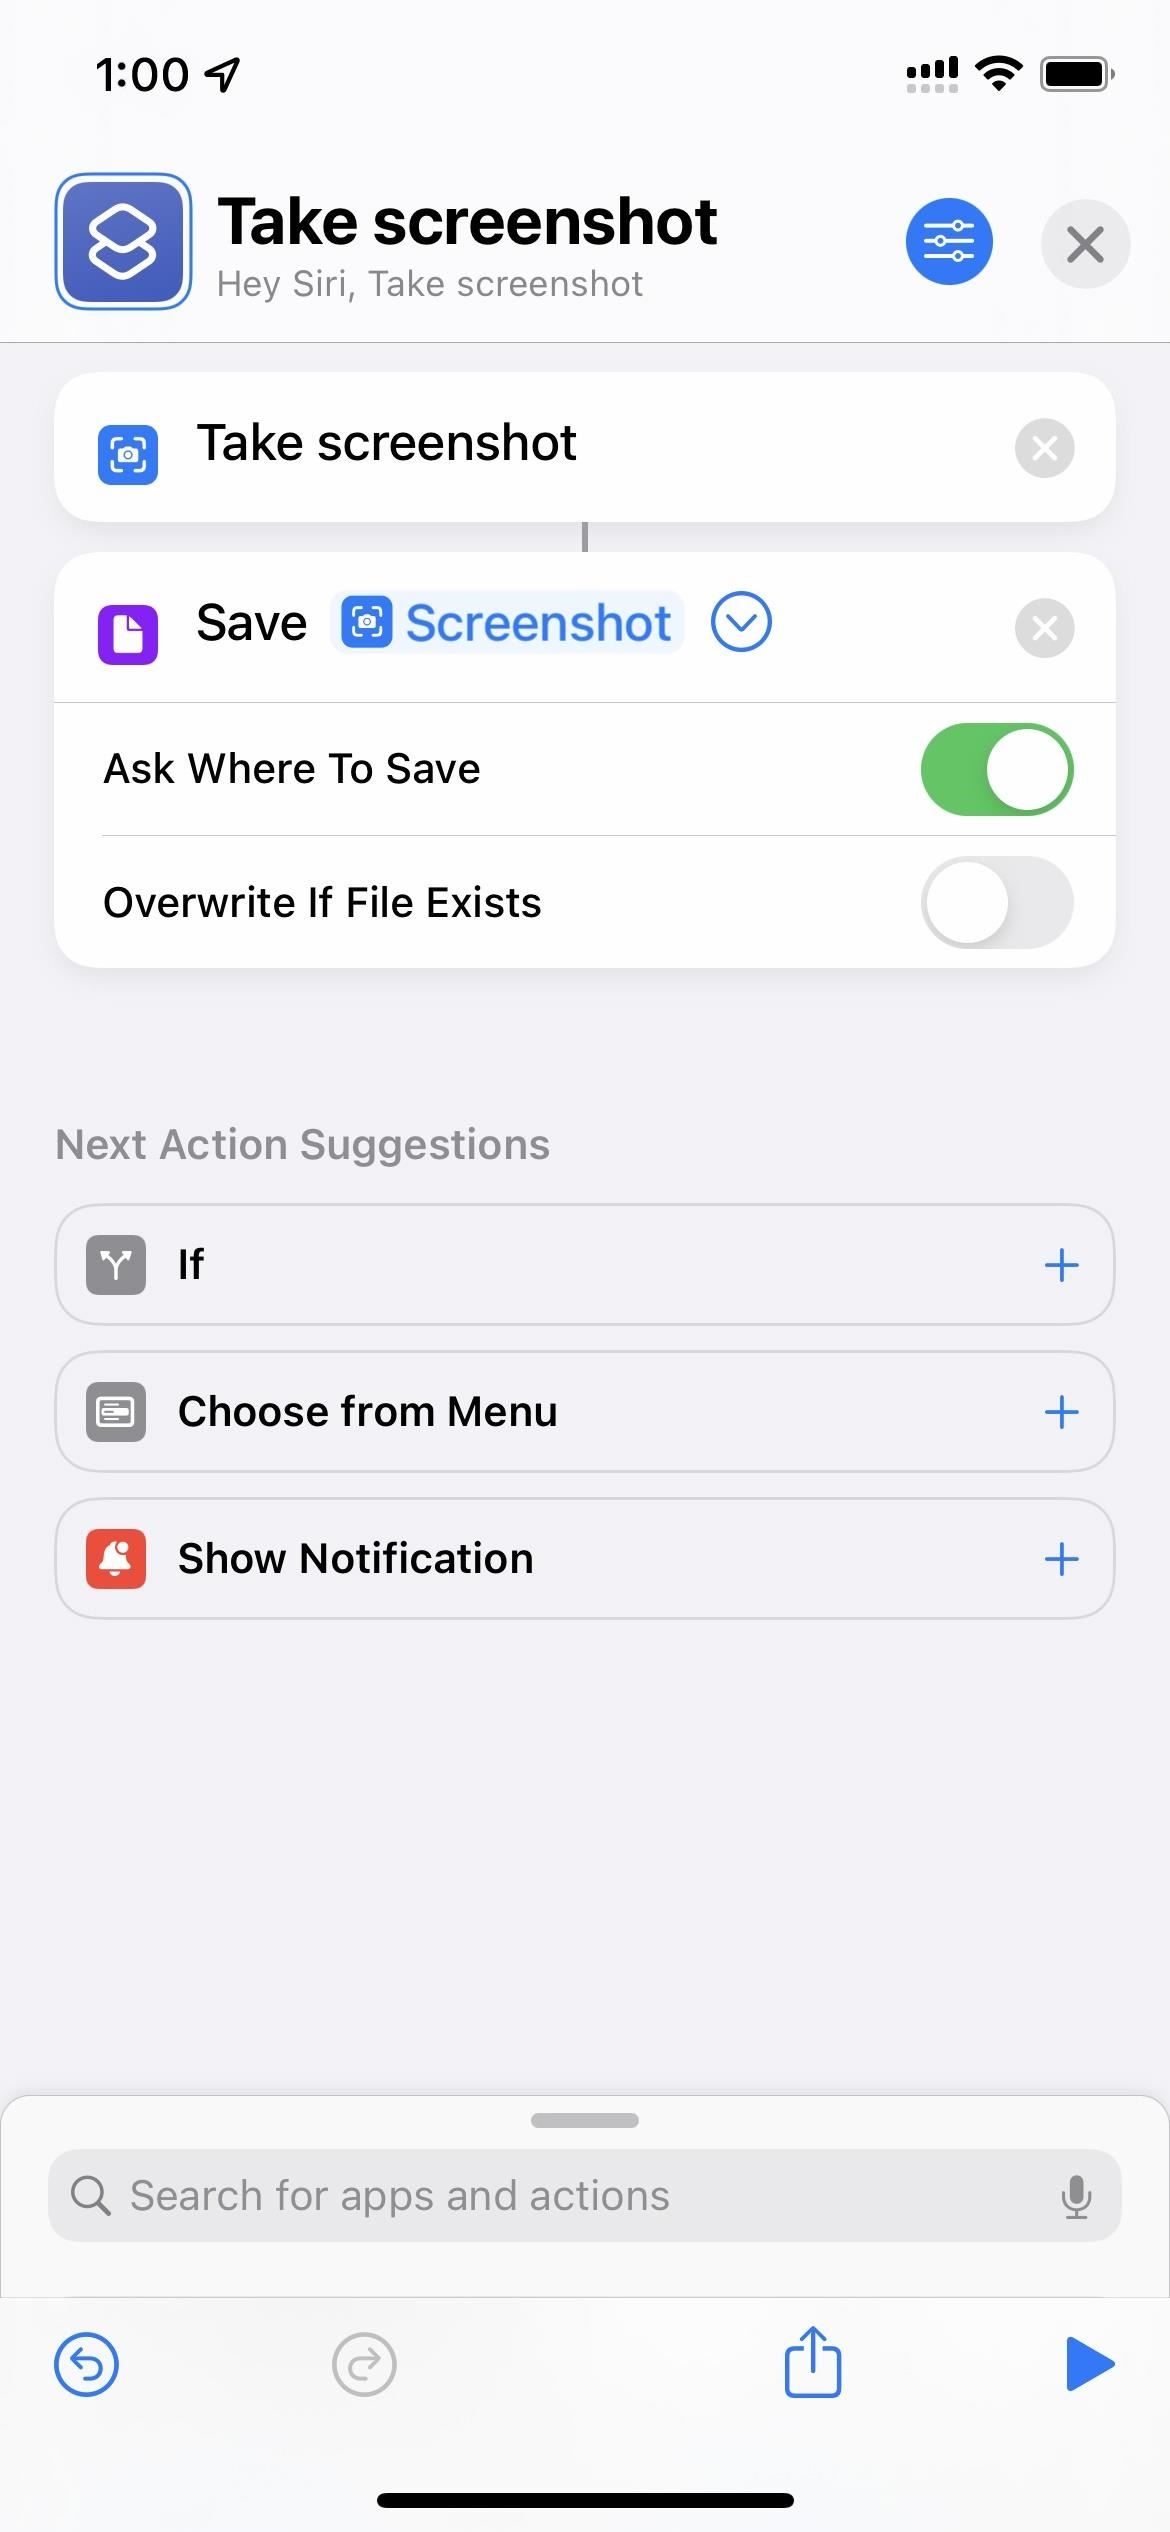
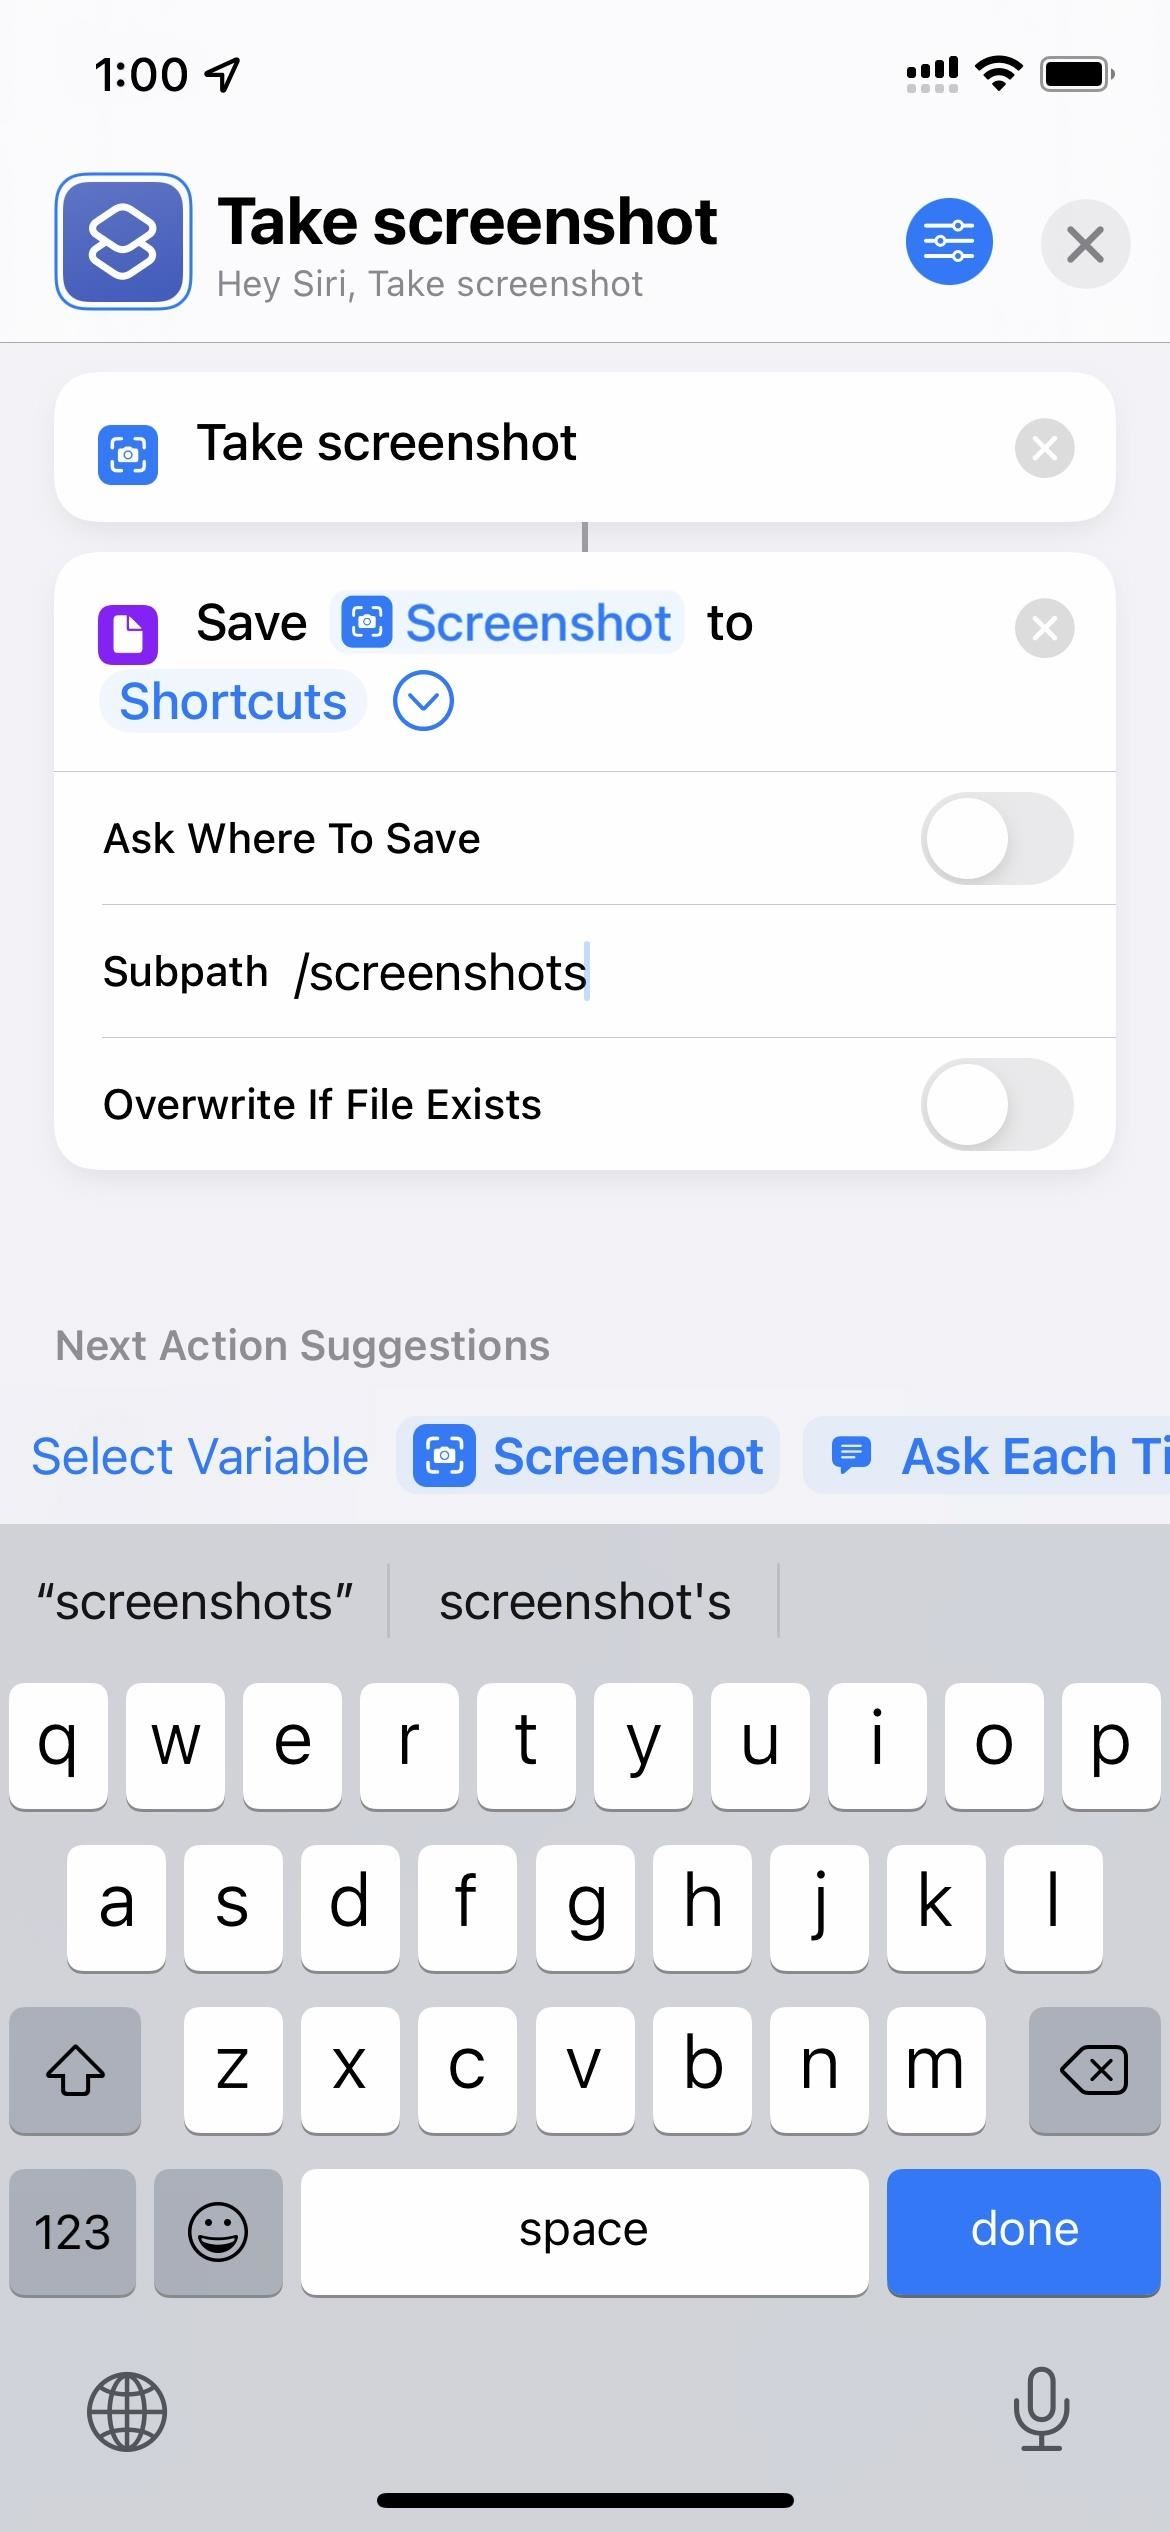
You could also choose a different action besides "Save to Photo Album," such as "Save File," which lets you put the screenshot somewhere in the Files app instead.
After that, change its name to whatever you want, which will also be the keyword or phrase you'll use with Siri to activate the shortcut. Siri is one of the most useful ways to use the shortcut, so make sure you change the name from "Take Screenshot" since that Siri phrase already exists, as seen in Option 2 above. It's an excellent opportunity to make a shorter Siri command, such as "Shot." You can then use that Siri command with Hey Siri, the Side button shortcut, or Type to Siri.
When in the shortcut editor, tap the settings icon up top, and you have other options to activate the shortcut such as "Add to Home Screen," "Show in Share Sheet," and "Receive What's On Screen." However, these are all fairly useless since they will limit what you can take a screenshot of without adding other actions to the shortcut, like a waiting period.
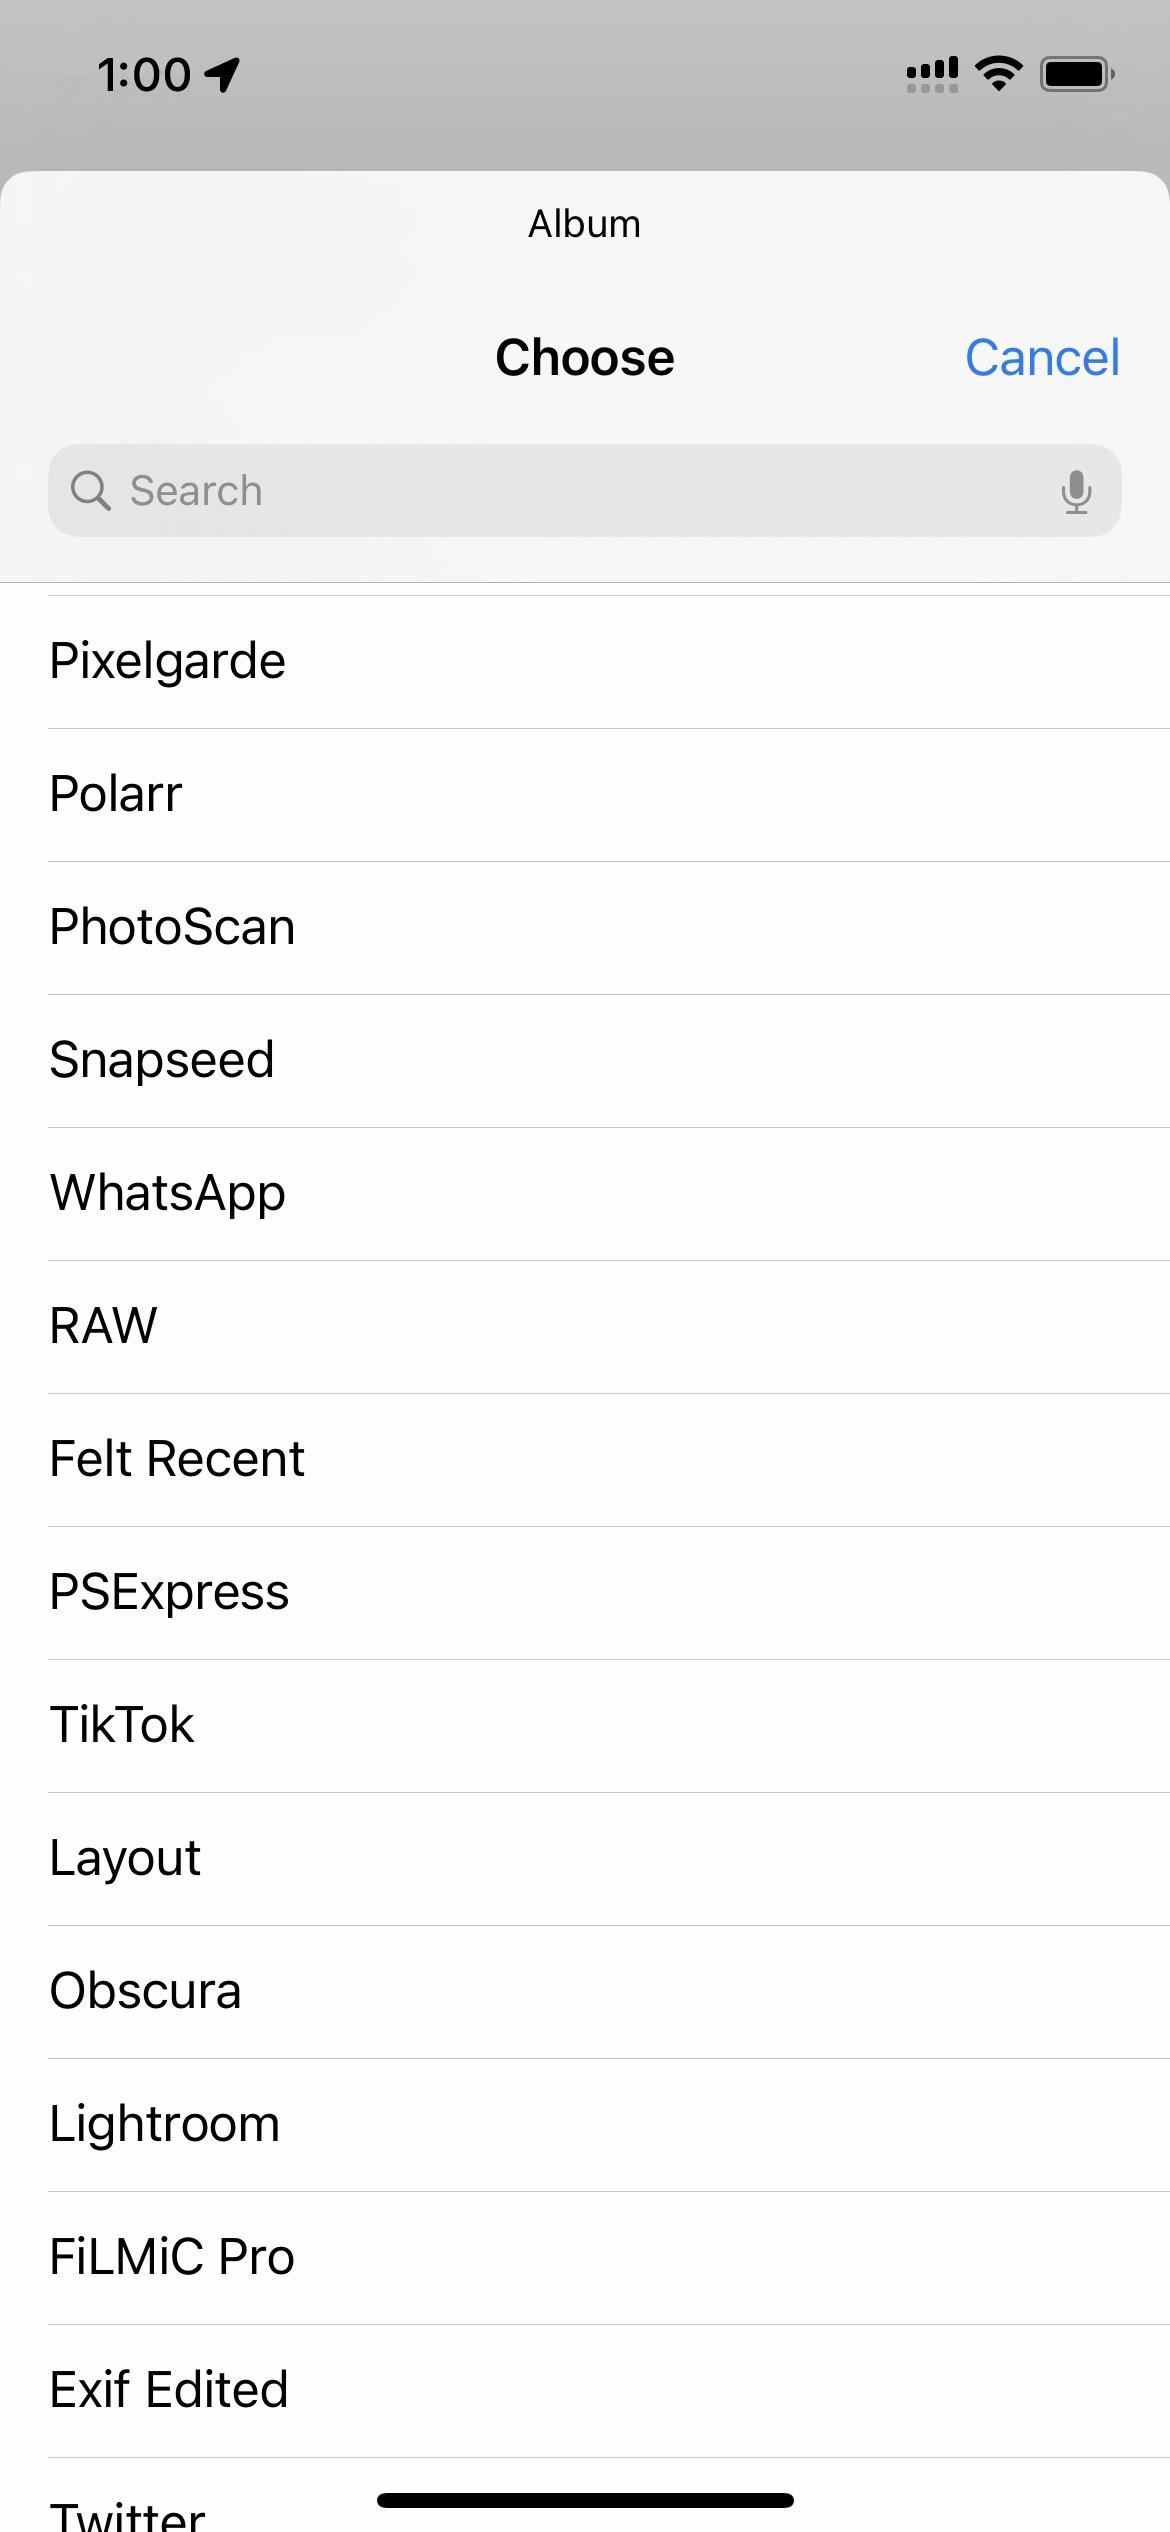
Assigning it to Back Tap would be better, as seen in Option 3 above. There are three critical differences between the system "Screenshot" in Back Tap and your shortcut. First, the thumbnail won't appear in the bottom left. Second, you can change the album the screenshot appears in if you select something other than "Recents." It will still appear in the "Screenshots" folder, but you can also make it appear in a different album. Third, you can pick a custom save location other than in Photos.

Option 5: Voice Control
There's another hands-off way you can capture a screenshot on your iPhone 13, 13 mini, 13 Pro, or 13 Pro Max: Voice Control. This accessibility feature has been available since iOS 13, and it lets you use your voice to control your iPhone. You can juggle around multiple apps, use a secret voice command to unlock your iPhone, and also take screenshots with it.
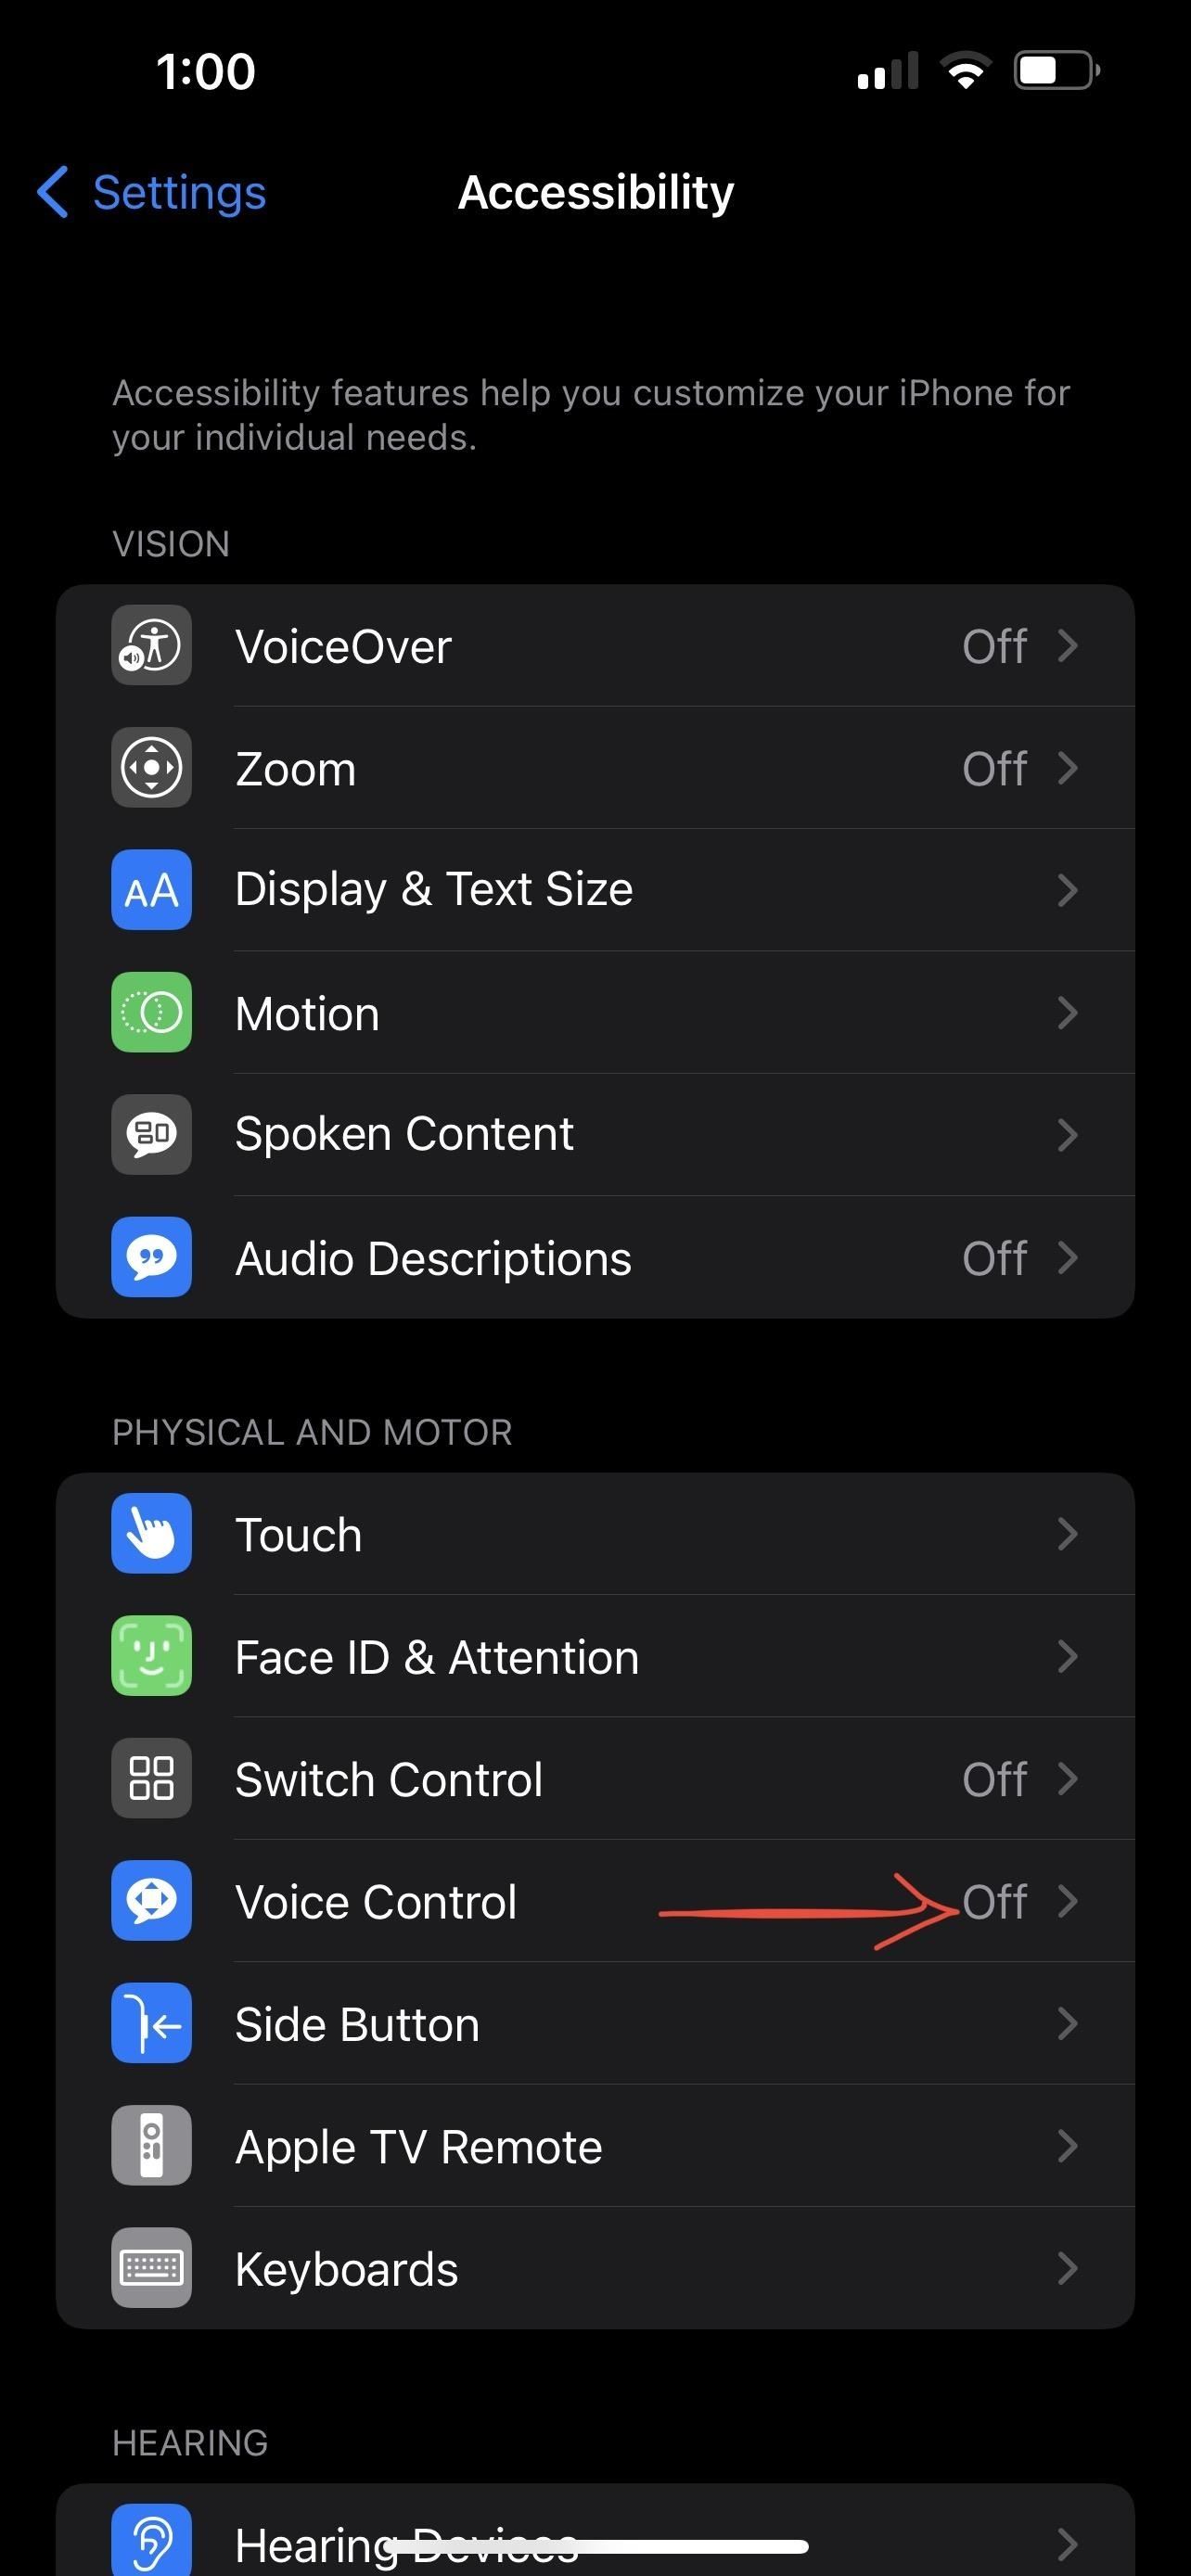
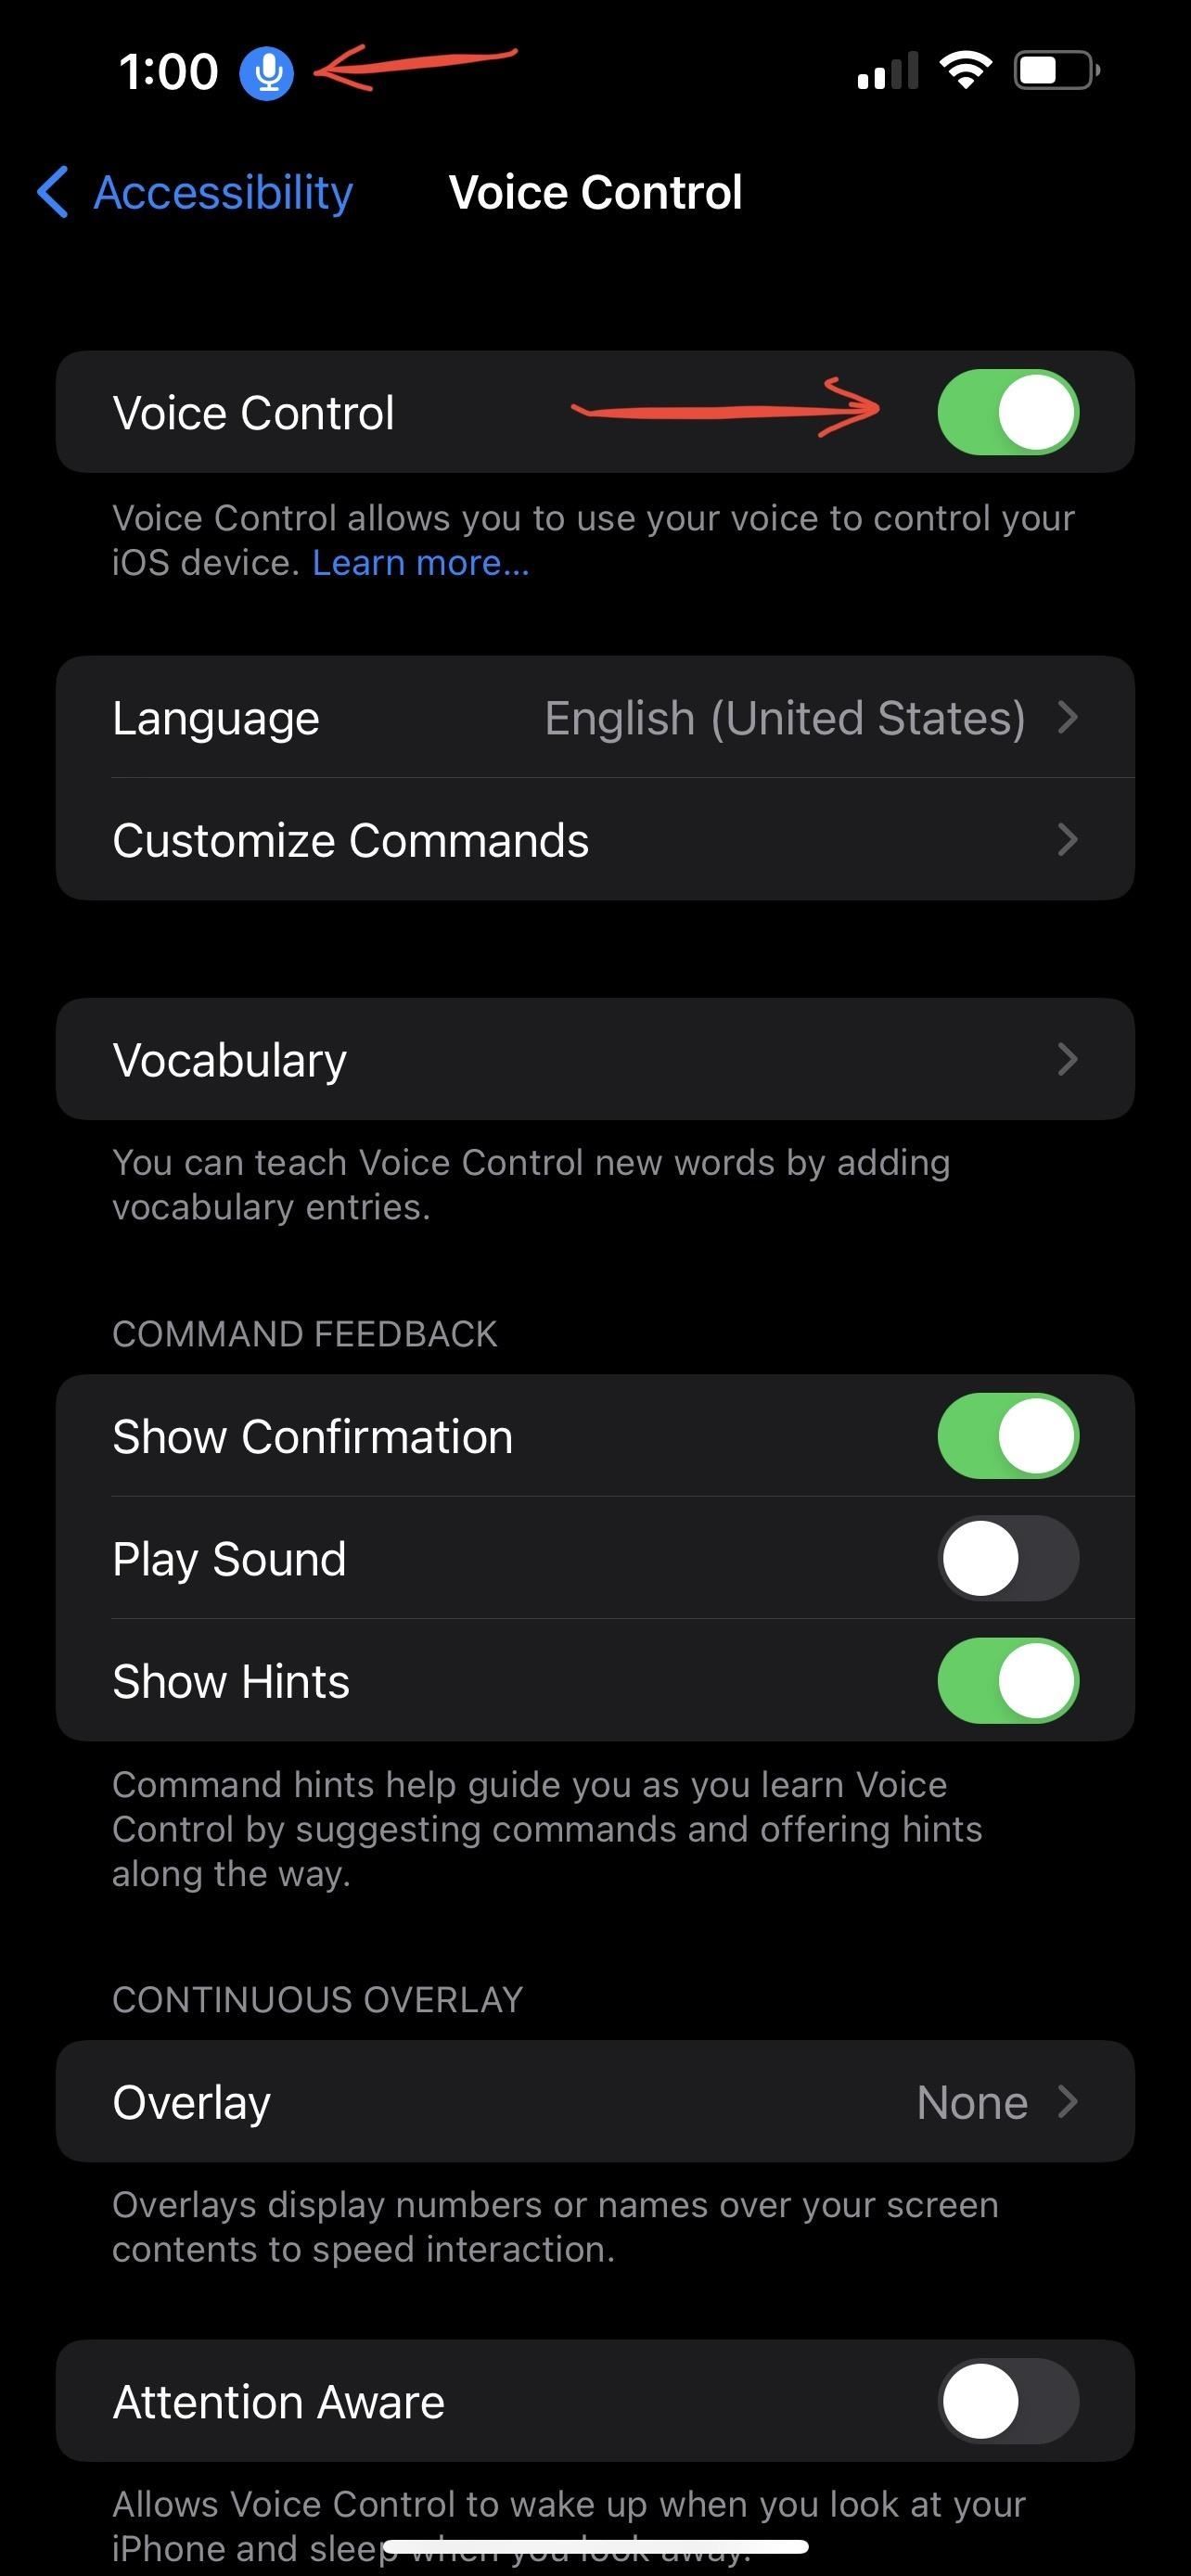
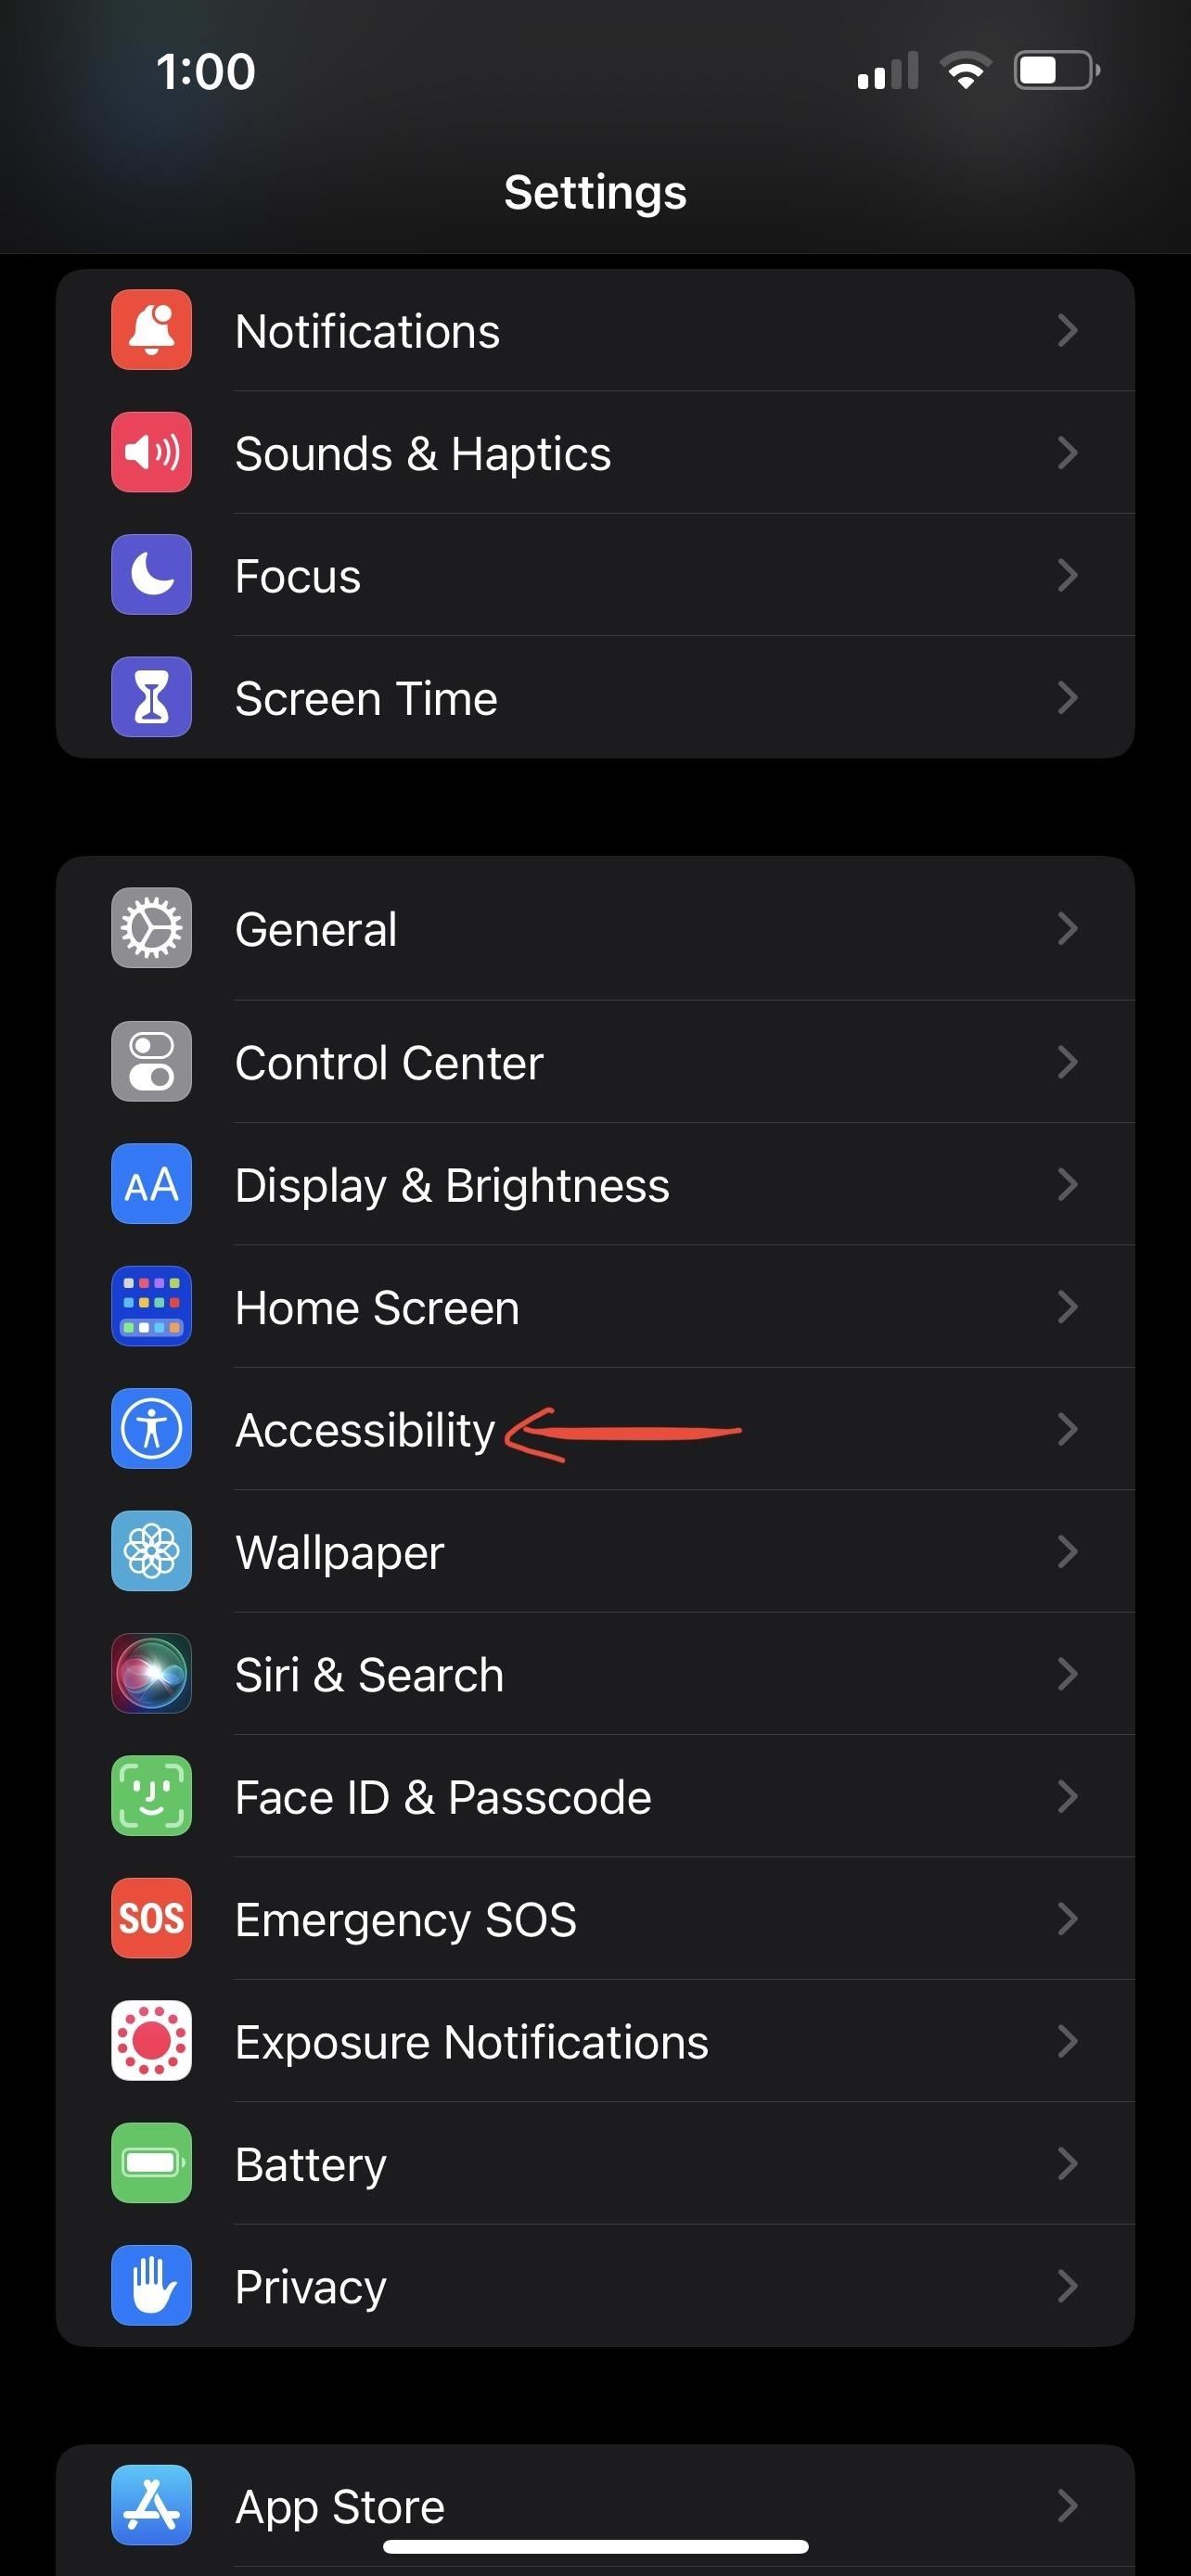
Voice Control is off by default. To turn it on, go to Settings –> Accessibility –> Voice Control and toggle it on (there are other ways to enable it too). Once it's enabled, you'll see a blue speakerphone icon appear beside the time in your status bar. Now, all you have to do is say "take screenshot," and your iPhone will immediately take a screenshot.

Option 6: AssistiveTouch
Your iPhone 13 series model has a feature called AssistiveTouch, which can make it easier to perform different functions for some users, including taking a screenshot. With Option 1 above, you need to press multiple hardware buttons simultaneously, but you can use AssistiveTouch in various ways.
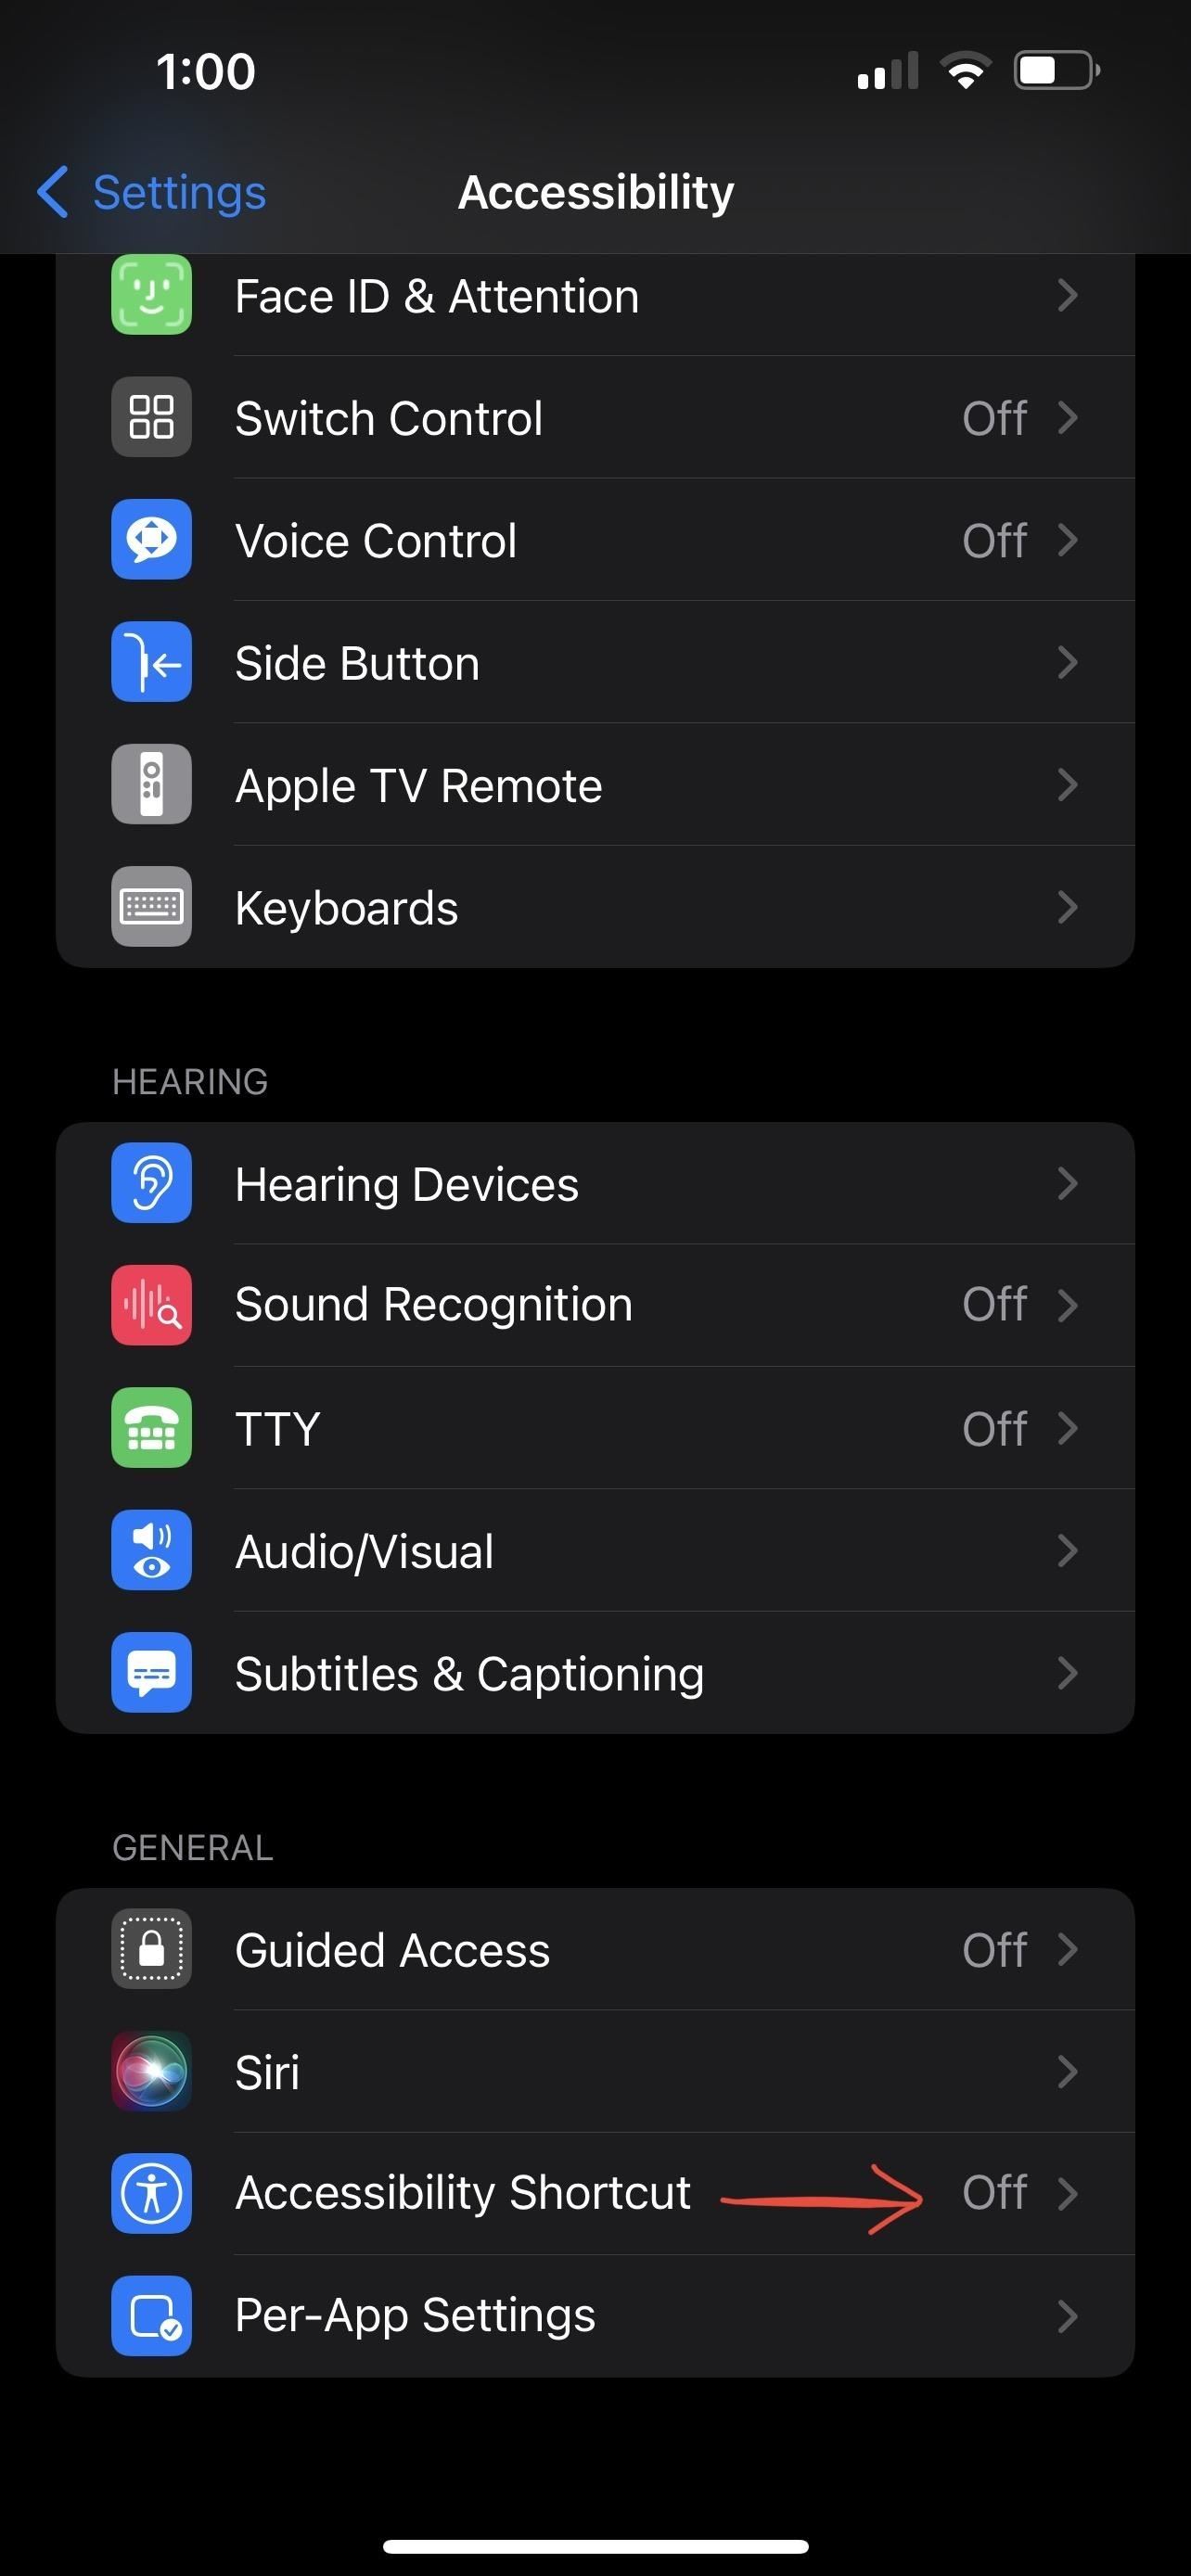
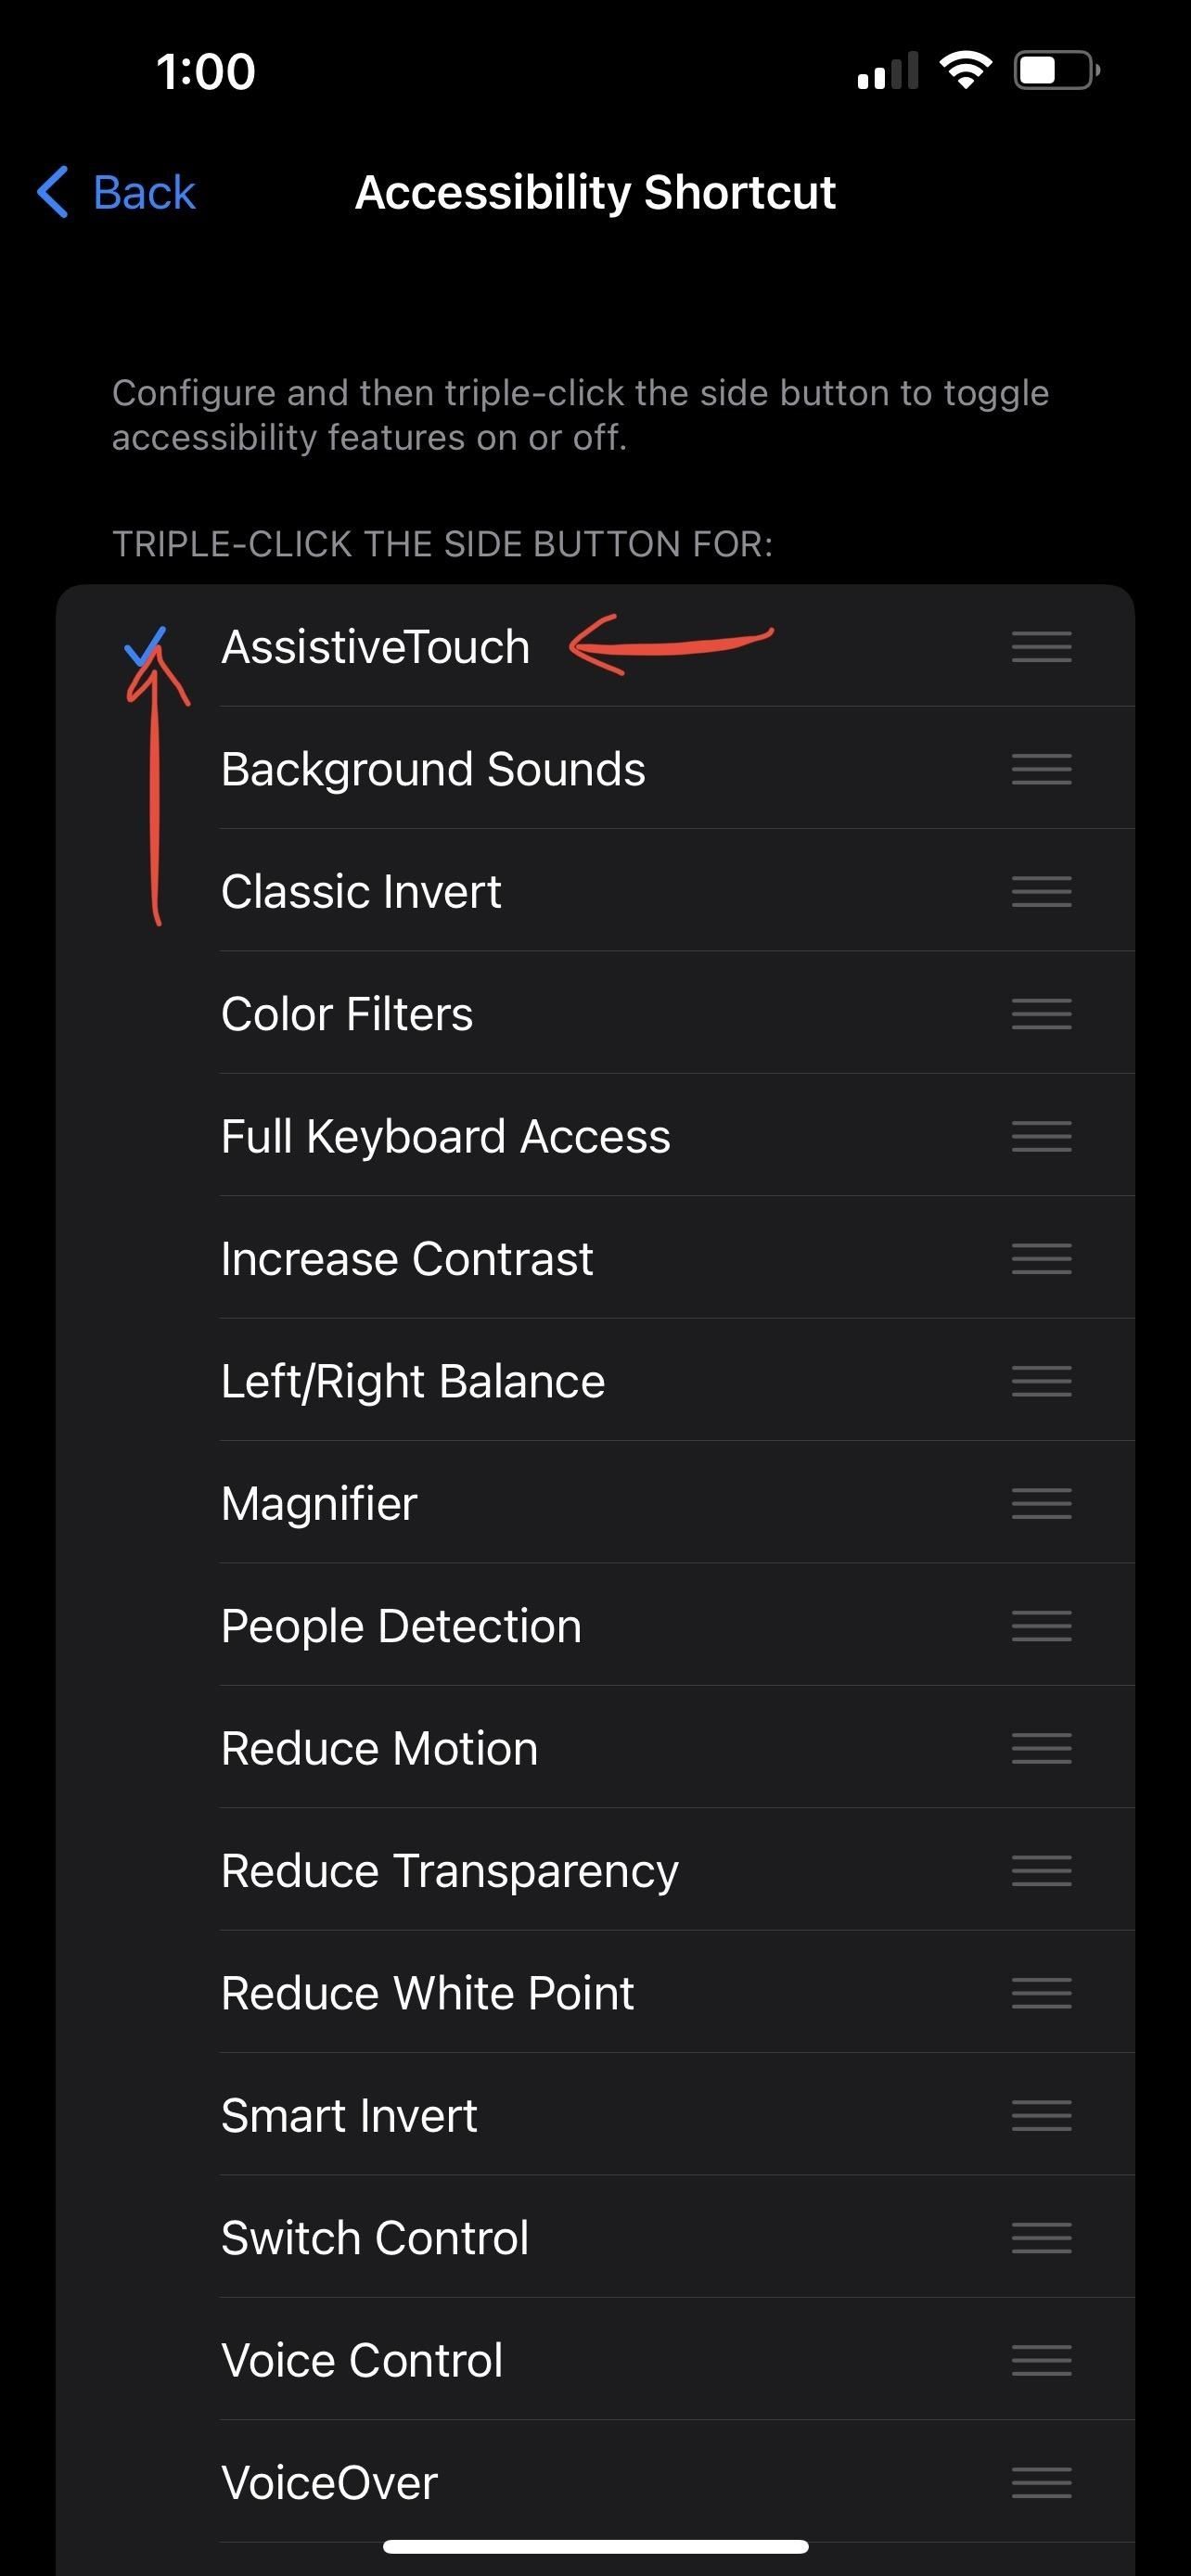
If you want to triple-click your Side button to use AssistiveTouch, go to Settings –> Accessibility –> Accessibility Shortcut, then make sure "AssistiveTouch" has a blue checkmark next to it. Make sure that only AssistiveTouch is enabled. Otherwise, when you triple-click the Side button, you'll be prompted to choose a feature. Selecting only one item on the list saves an extra step.
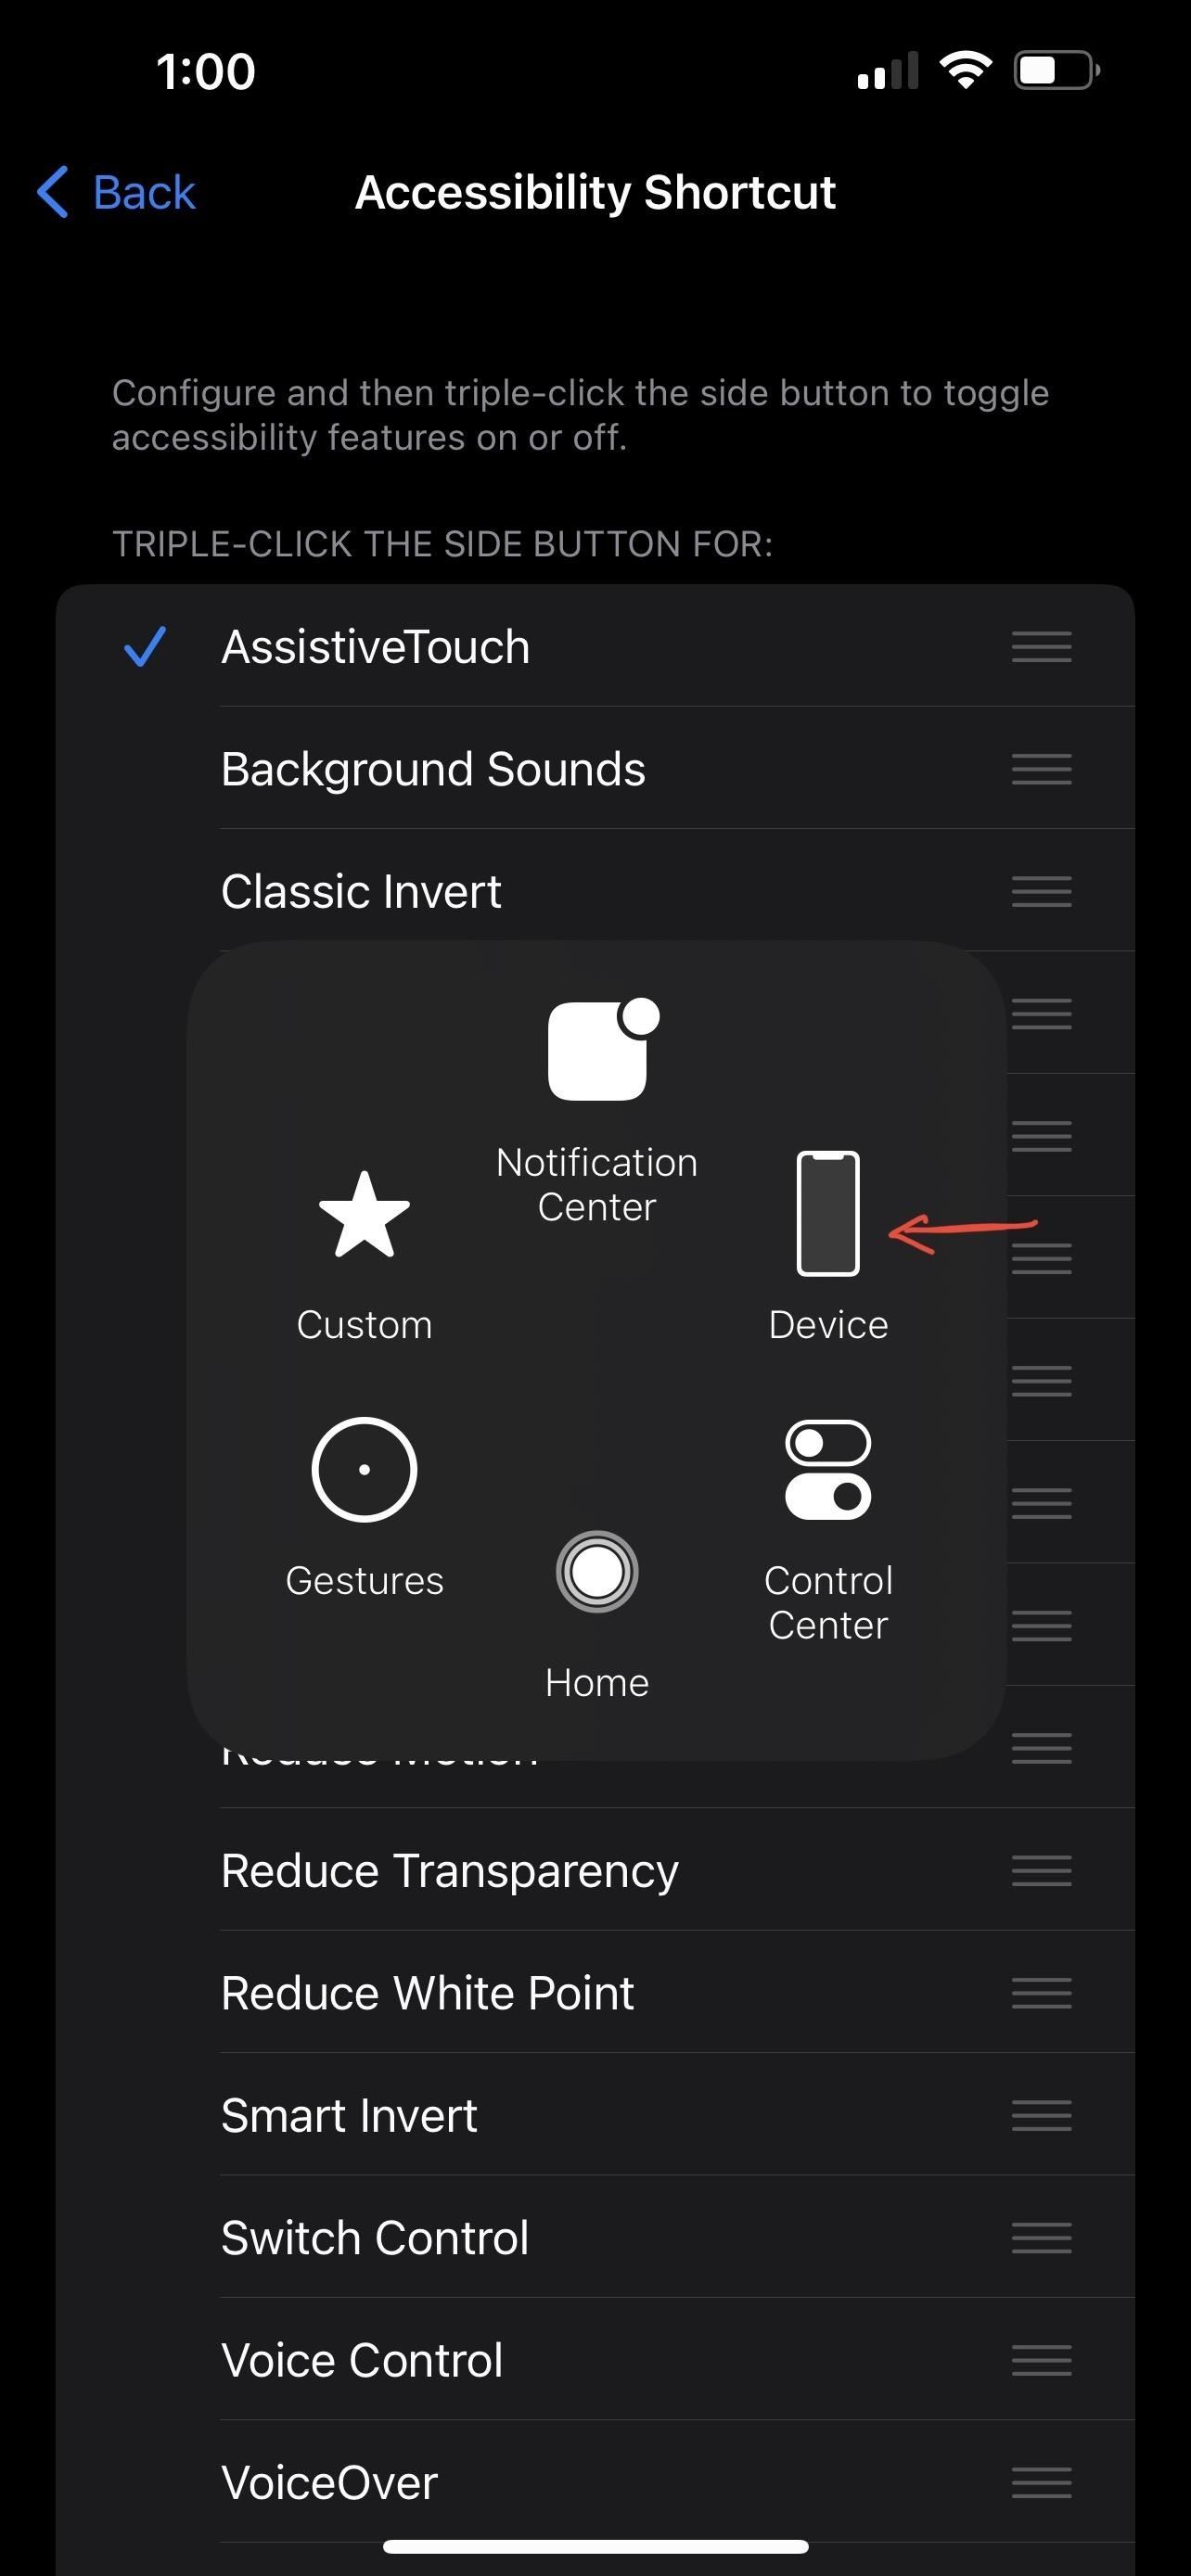
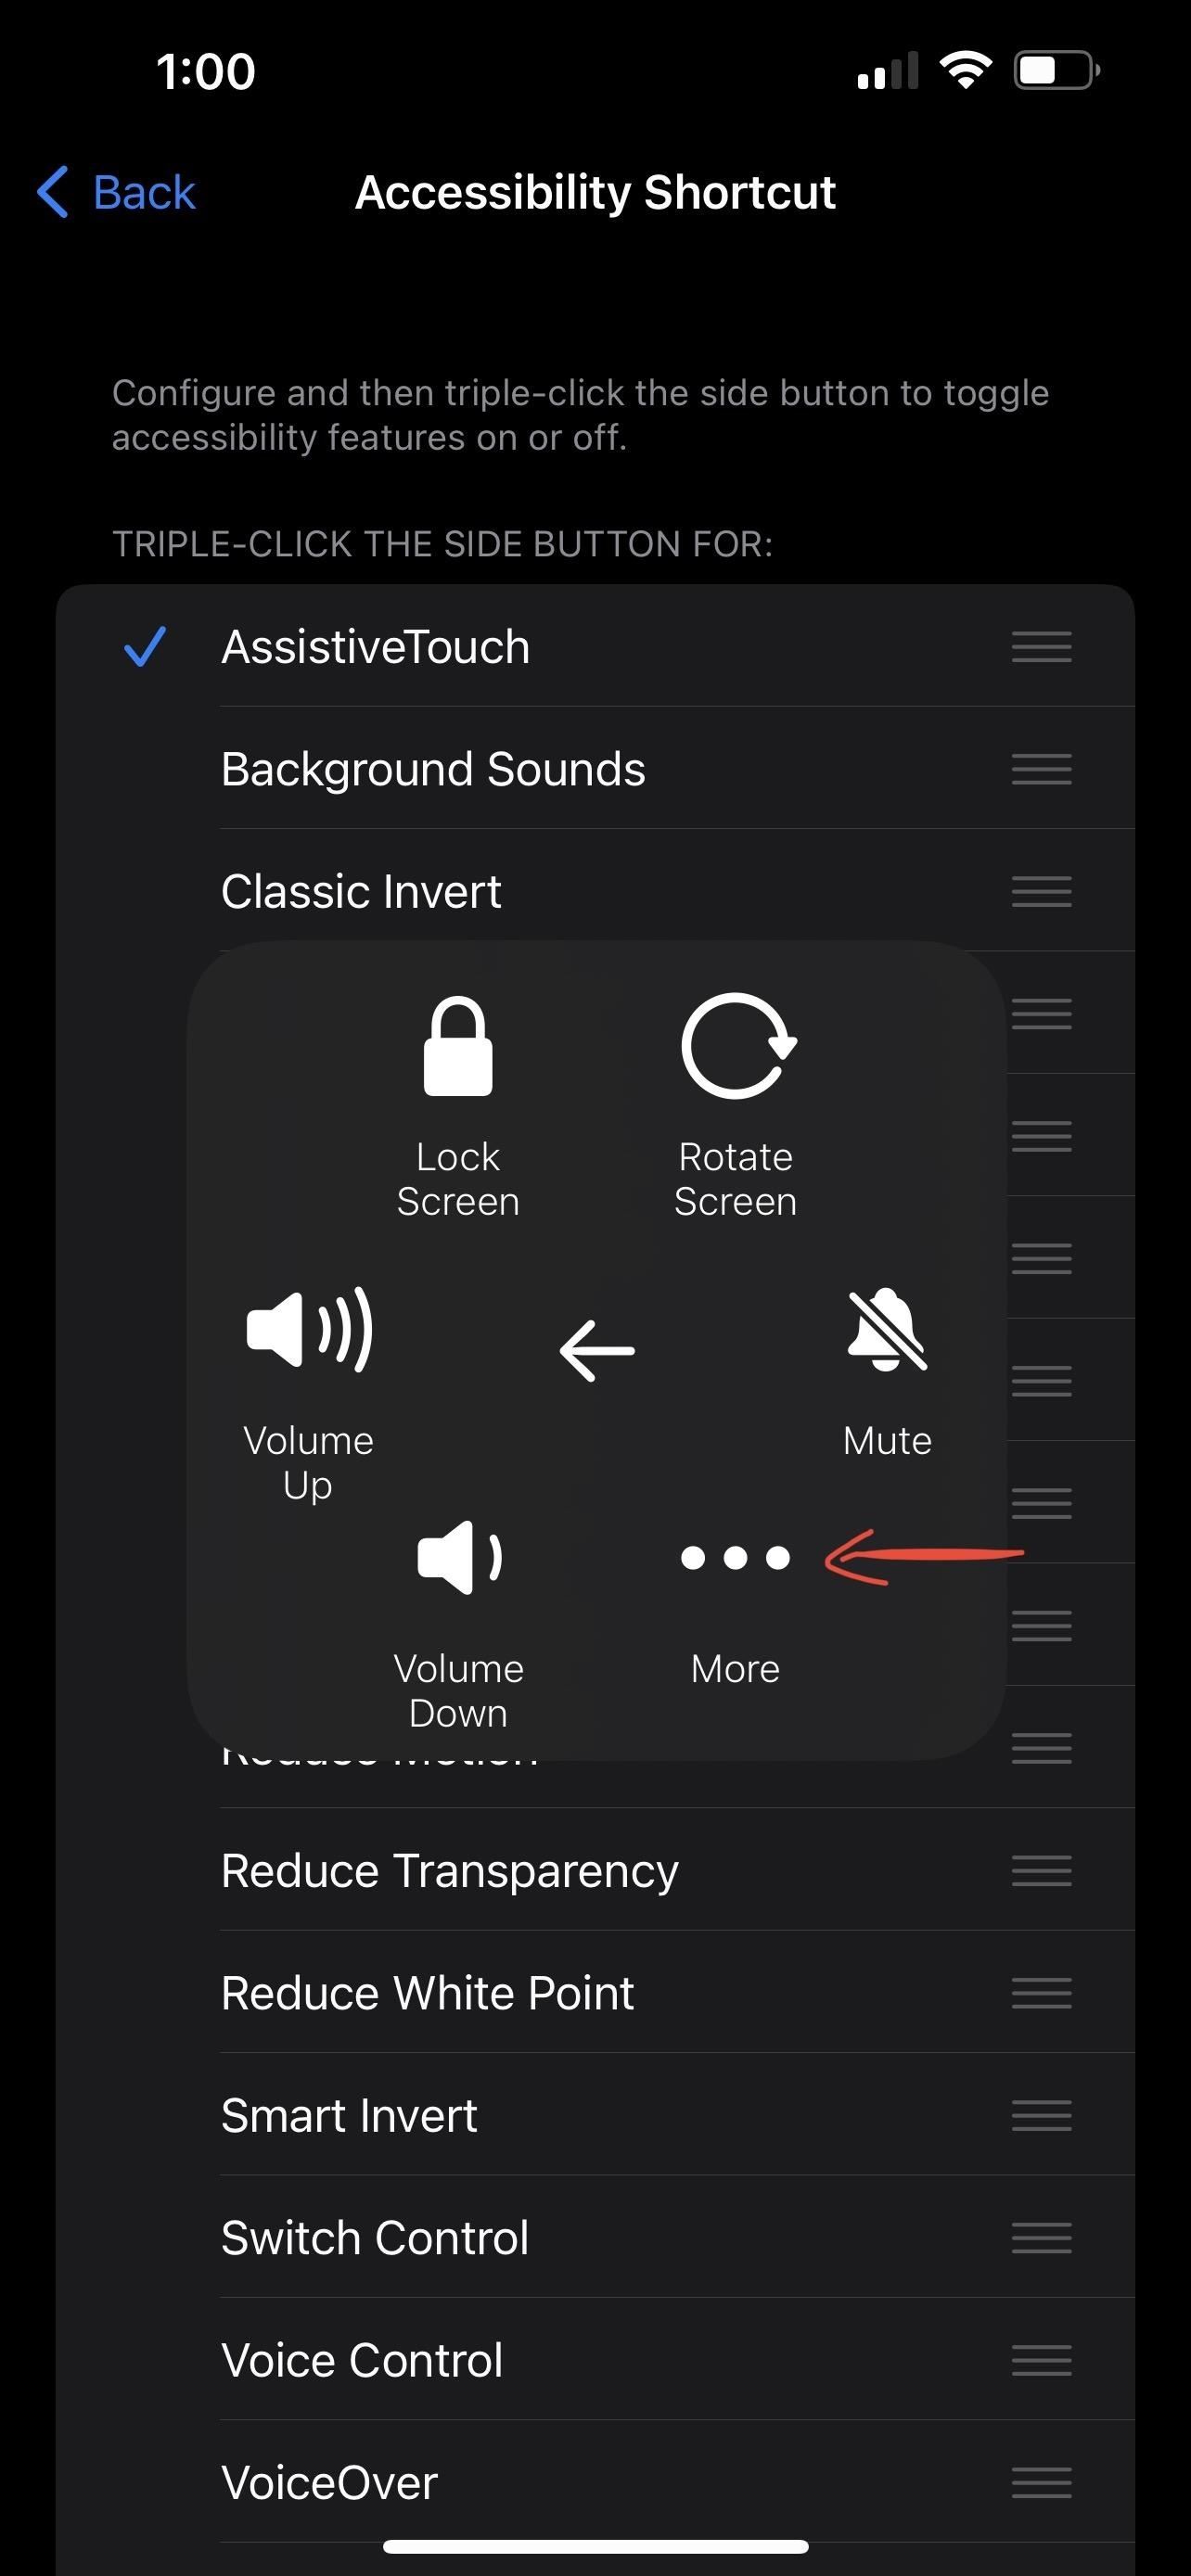
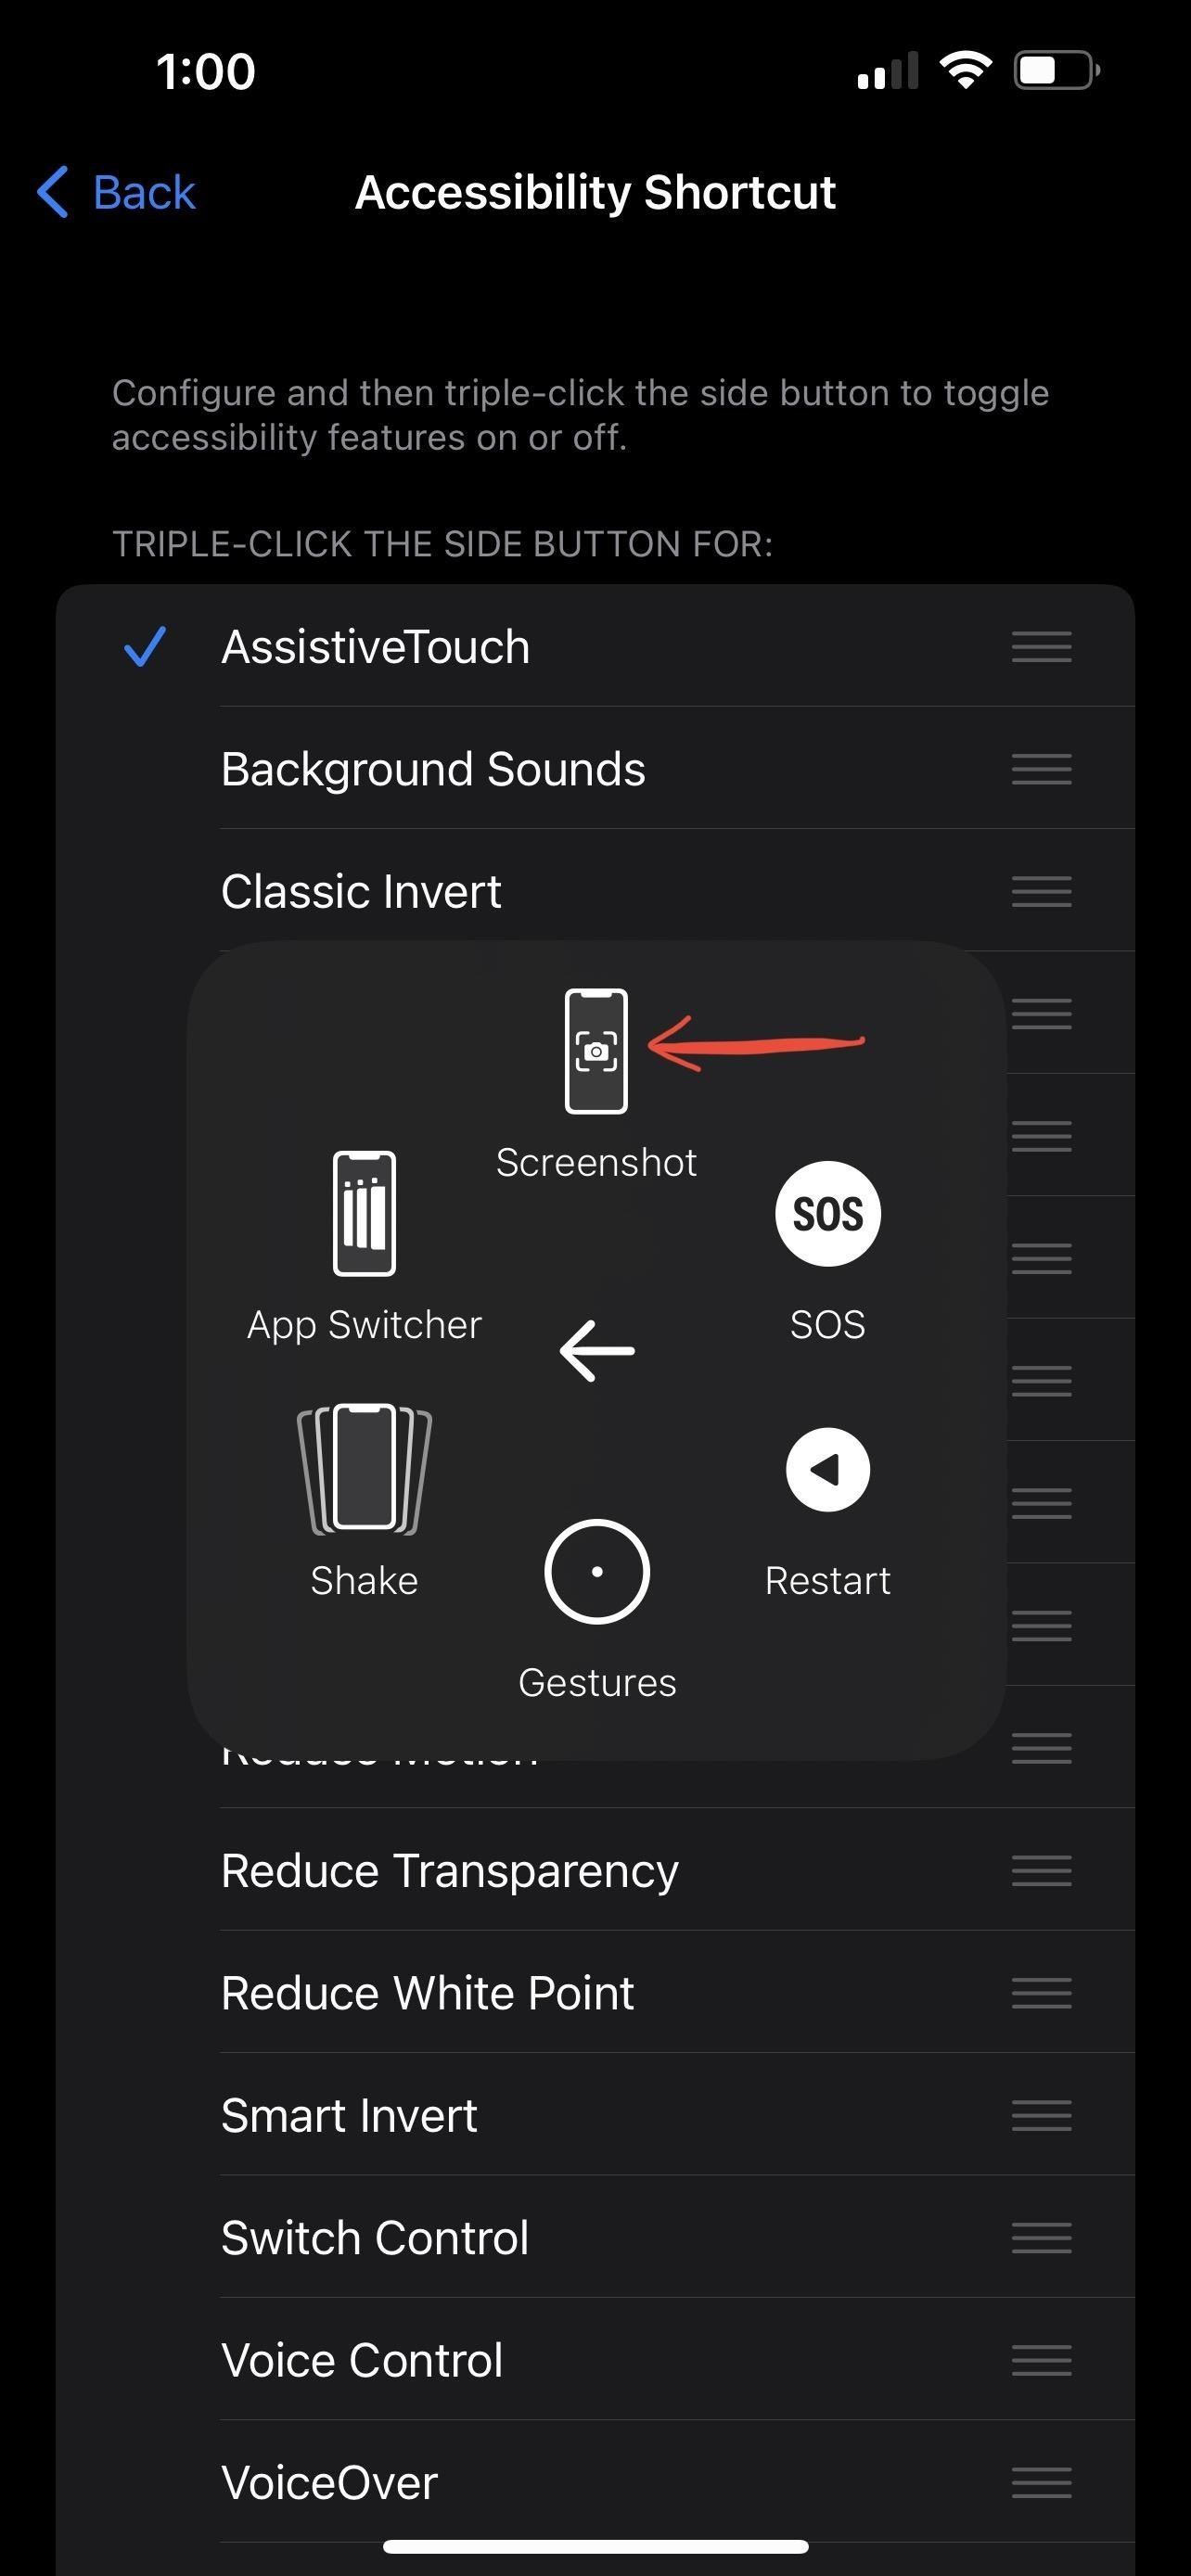
To access the AssistiveTouch menu, triple-click the Side button, and you'll see a circle appear on your screen. Tap that circle, go to Device –> More, then choose "Screenshot."
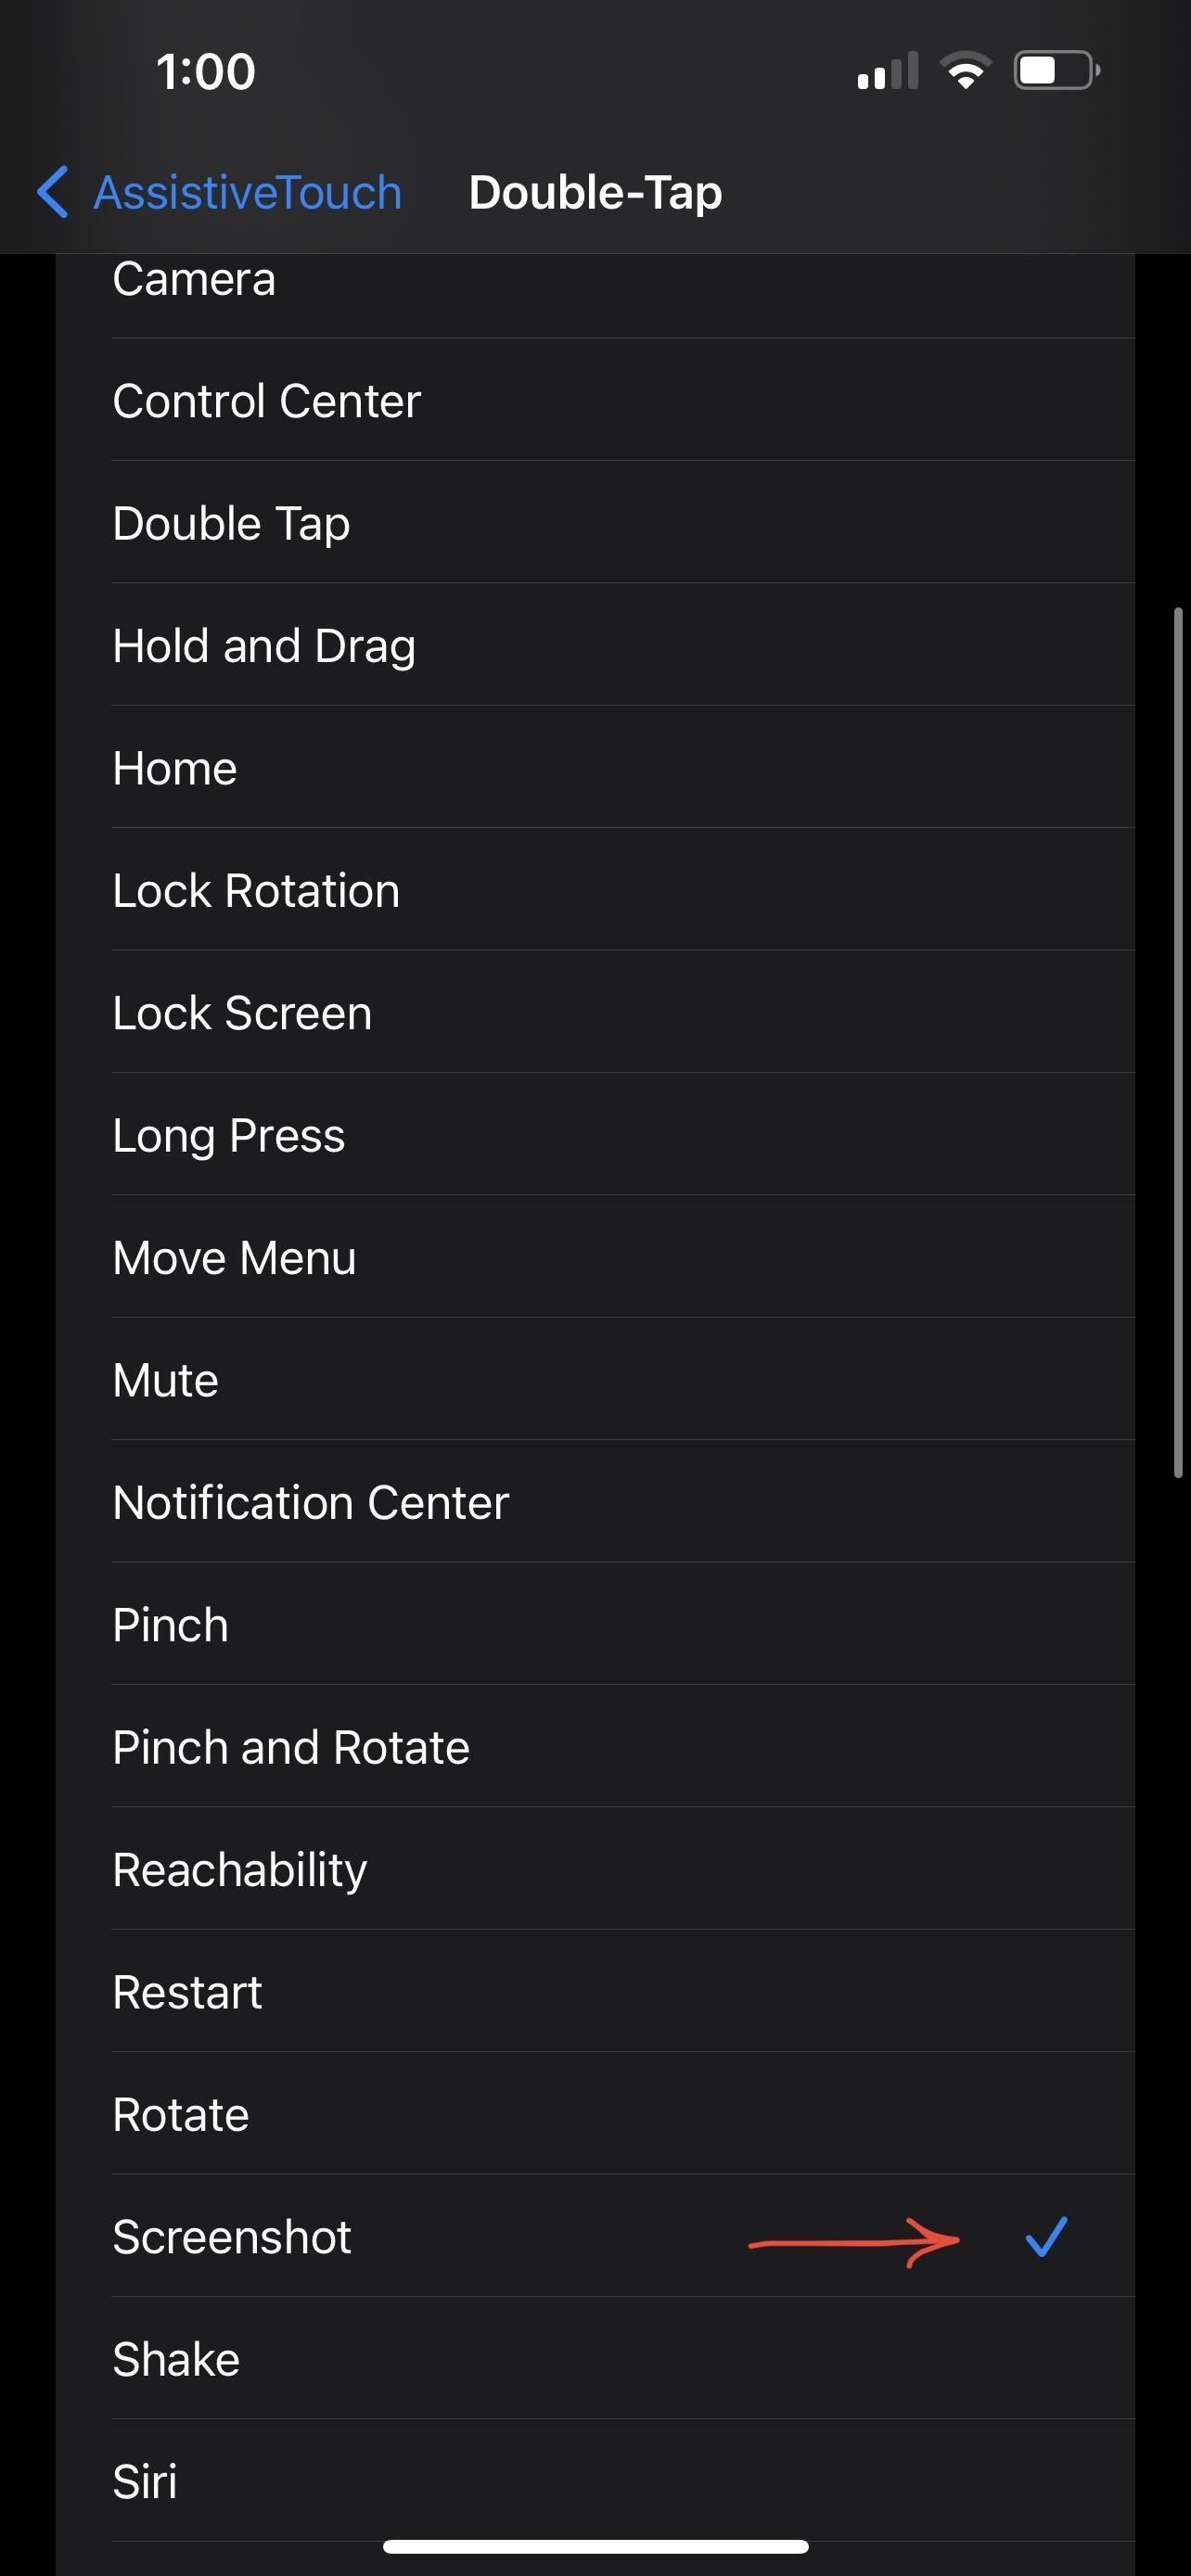
That's not all. If you want to further save time, you can set it up so that you can either single-tap the AssistiveTouch icon, double-tap it, or long-press it to take a screenshot. For instance, if you choose double-tap, all you need to do is tap twice on the AssistiveTouch circle, and it will capture a screenshot.
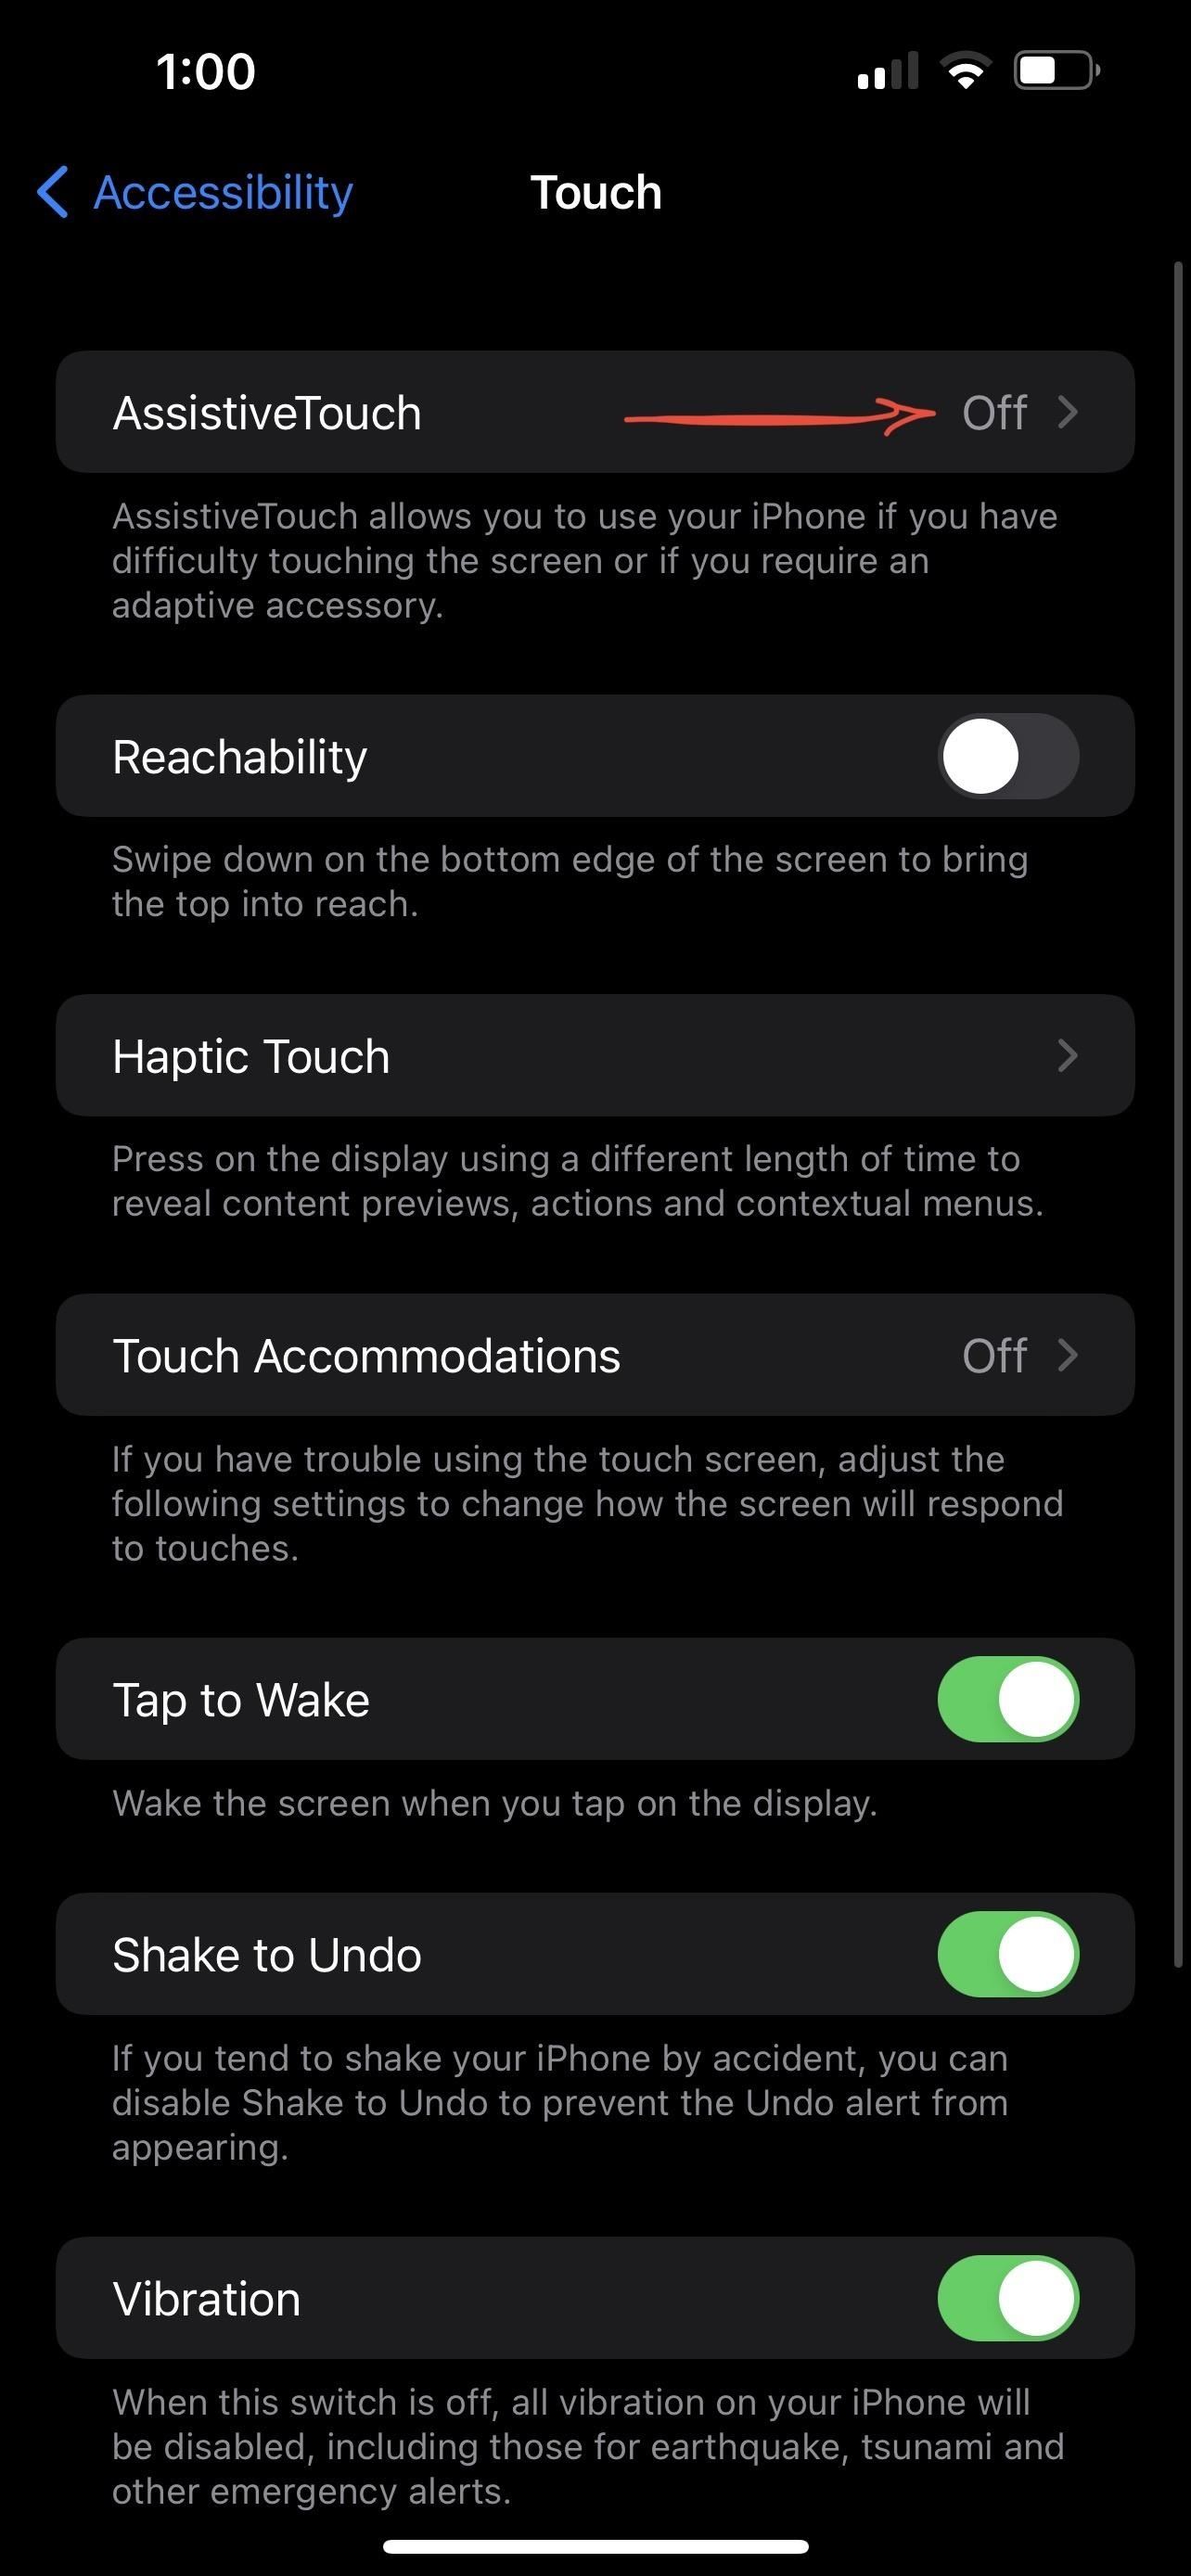
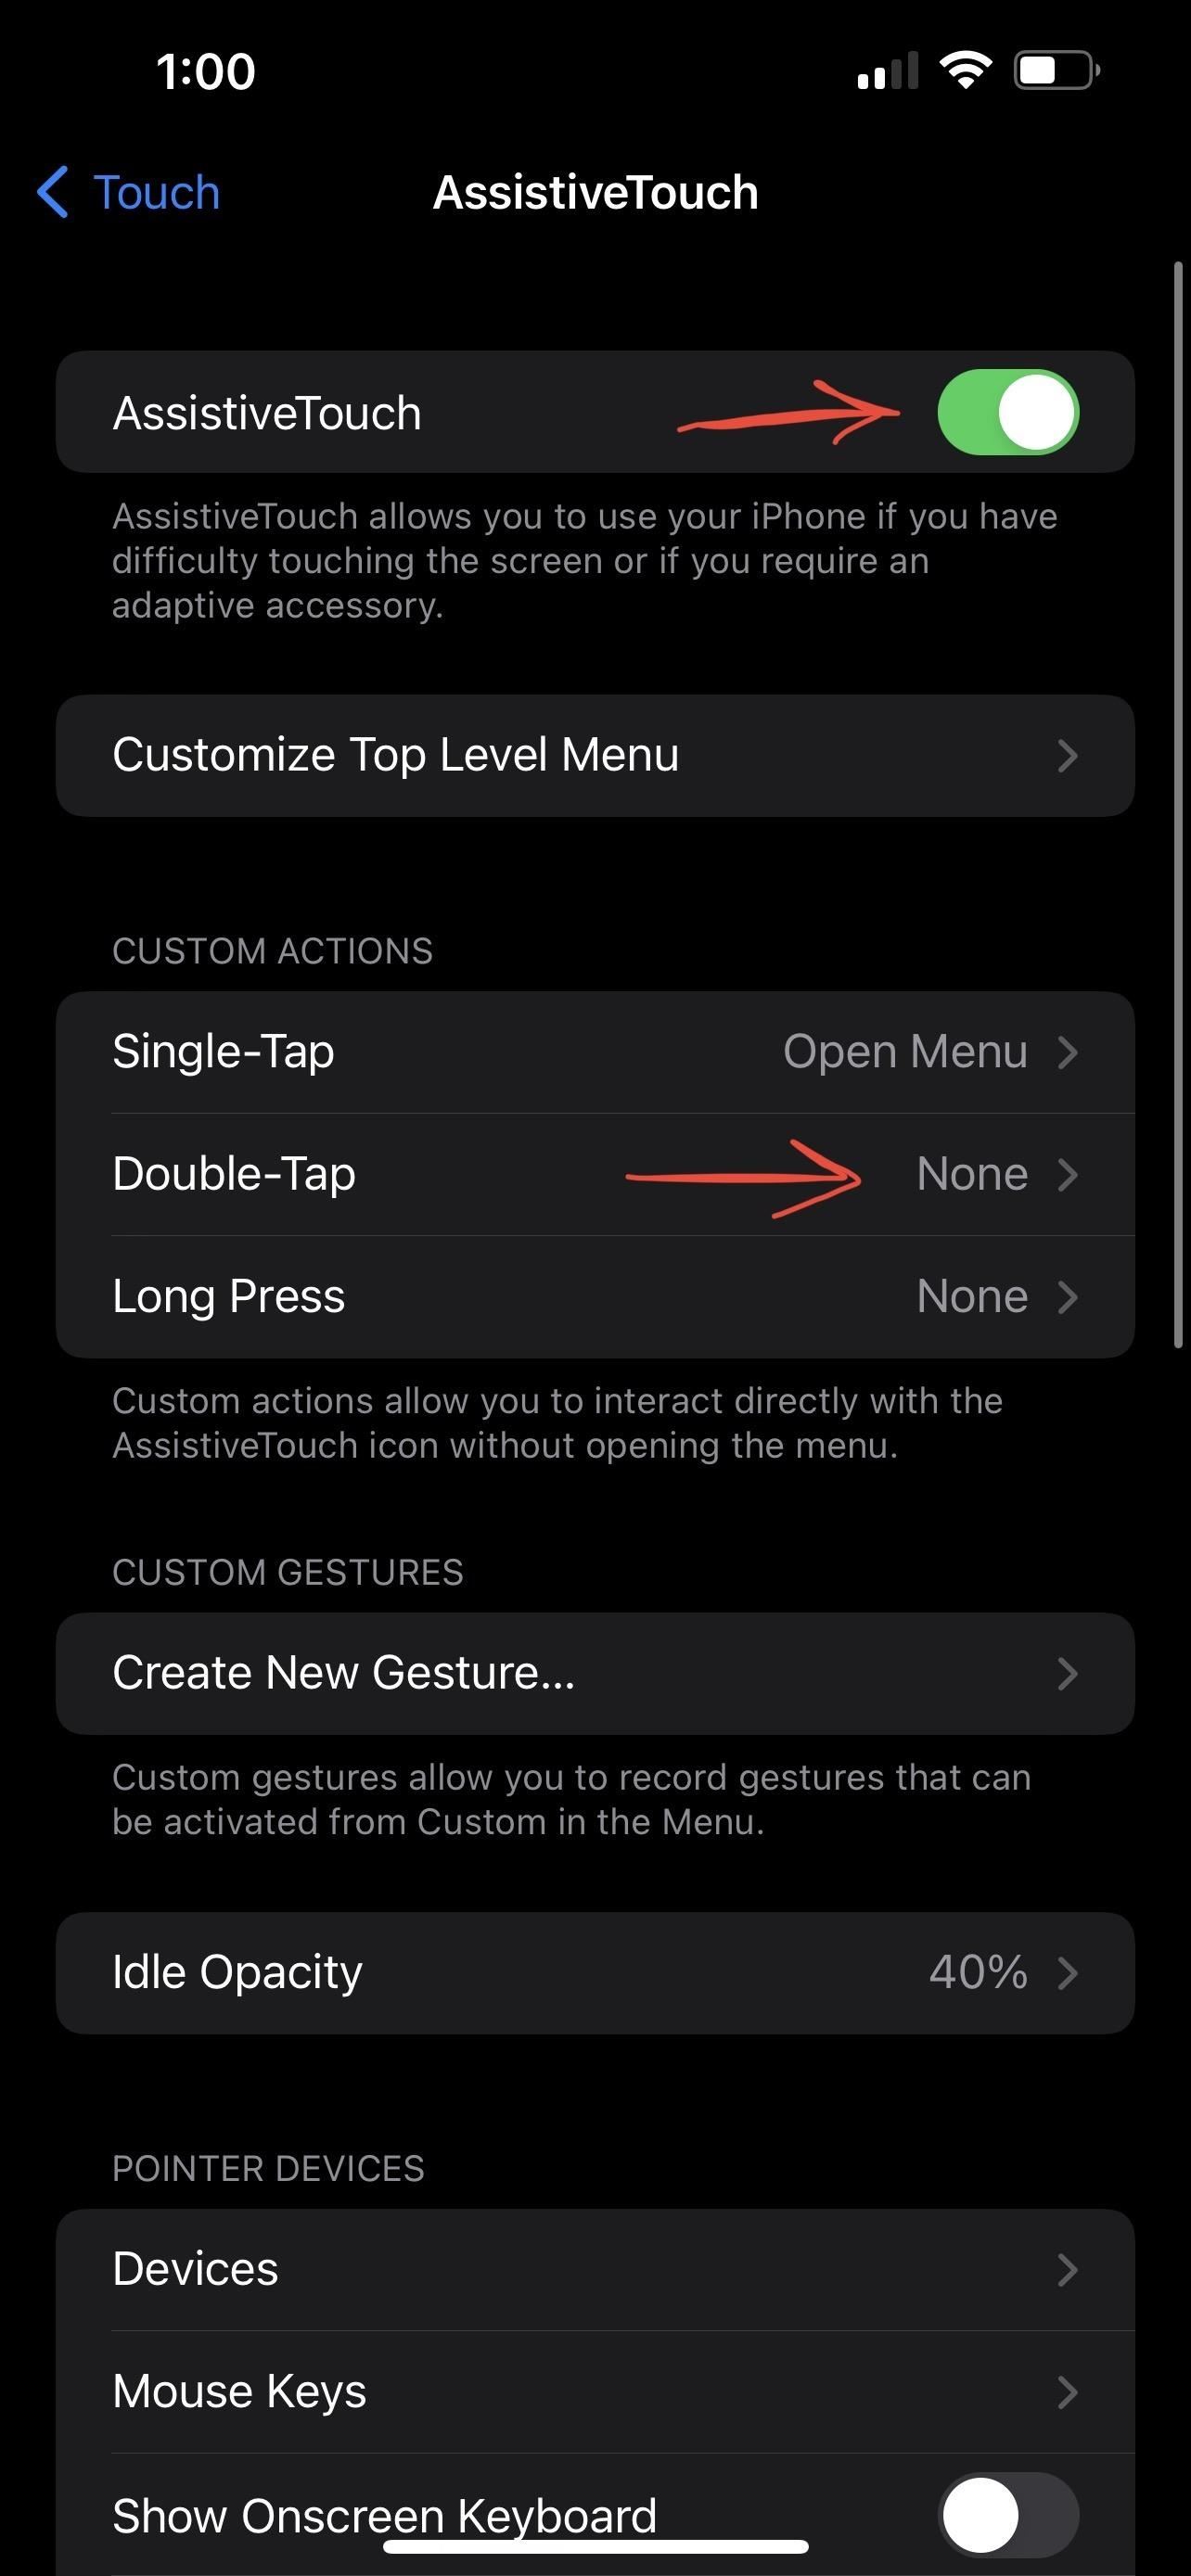
Go to Settings –> Accessibility –> Touch –> Assistive Touch to set it up. Toggle it on if it's off, and under Custom Actions, you'll see "Single-Tap," "Double-Tap," and "Long Press." Select one to see a list of functions you can assign to it, then choose "Screenshot."
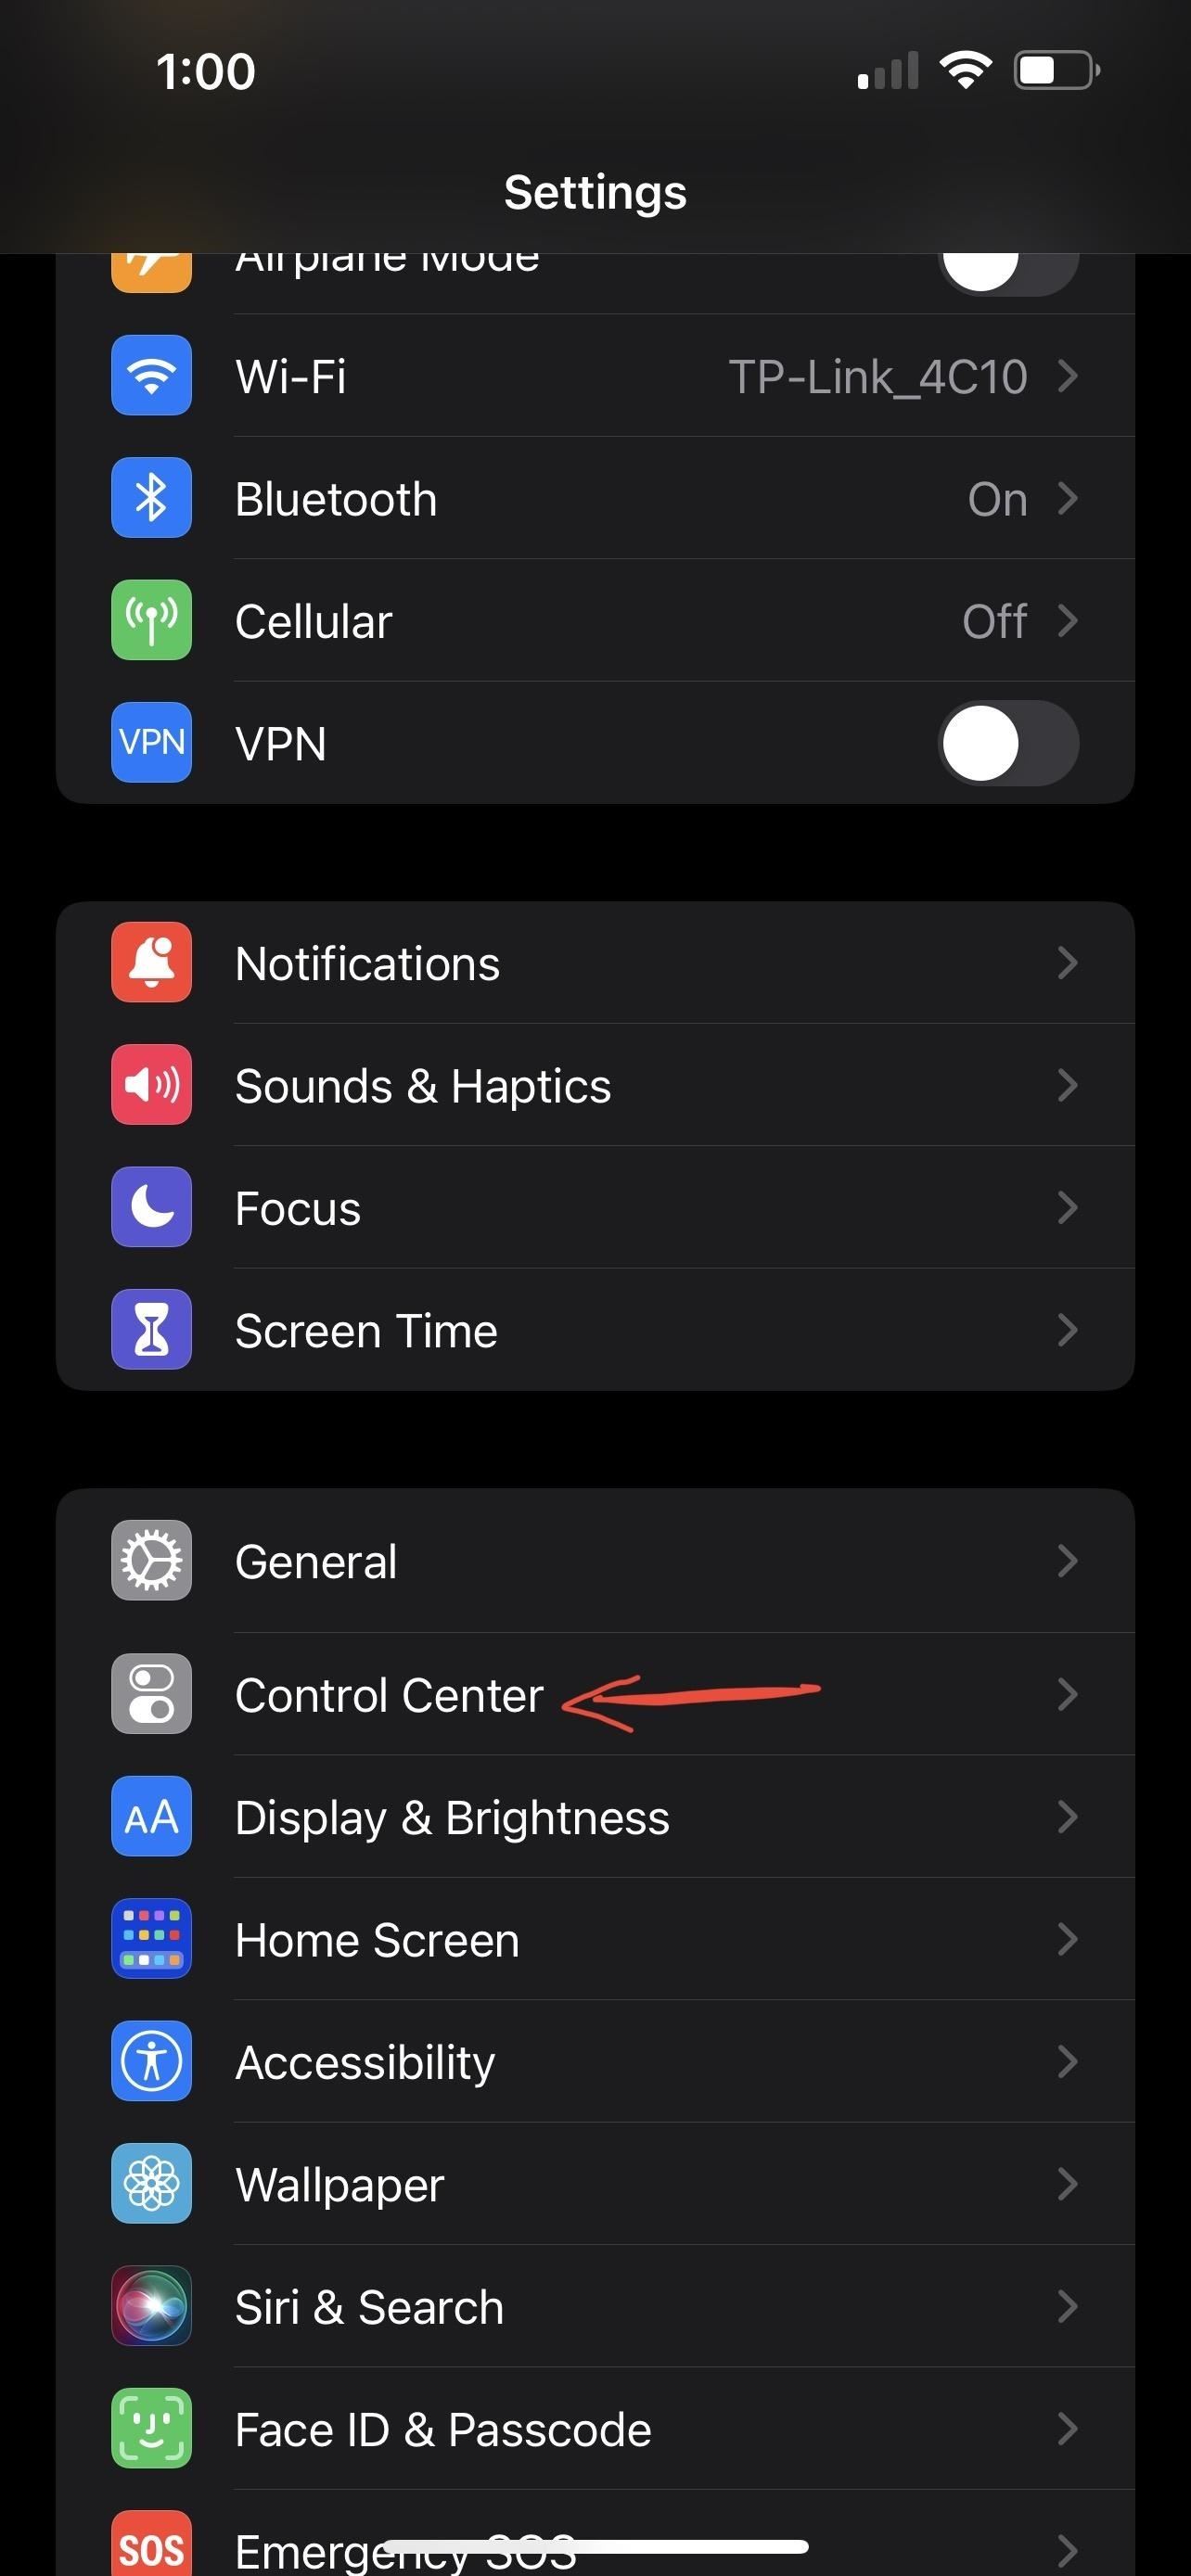
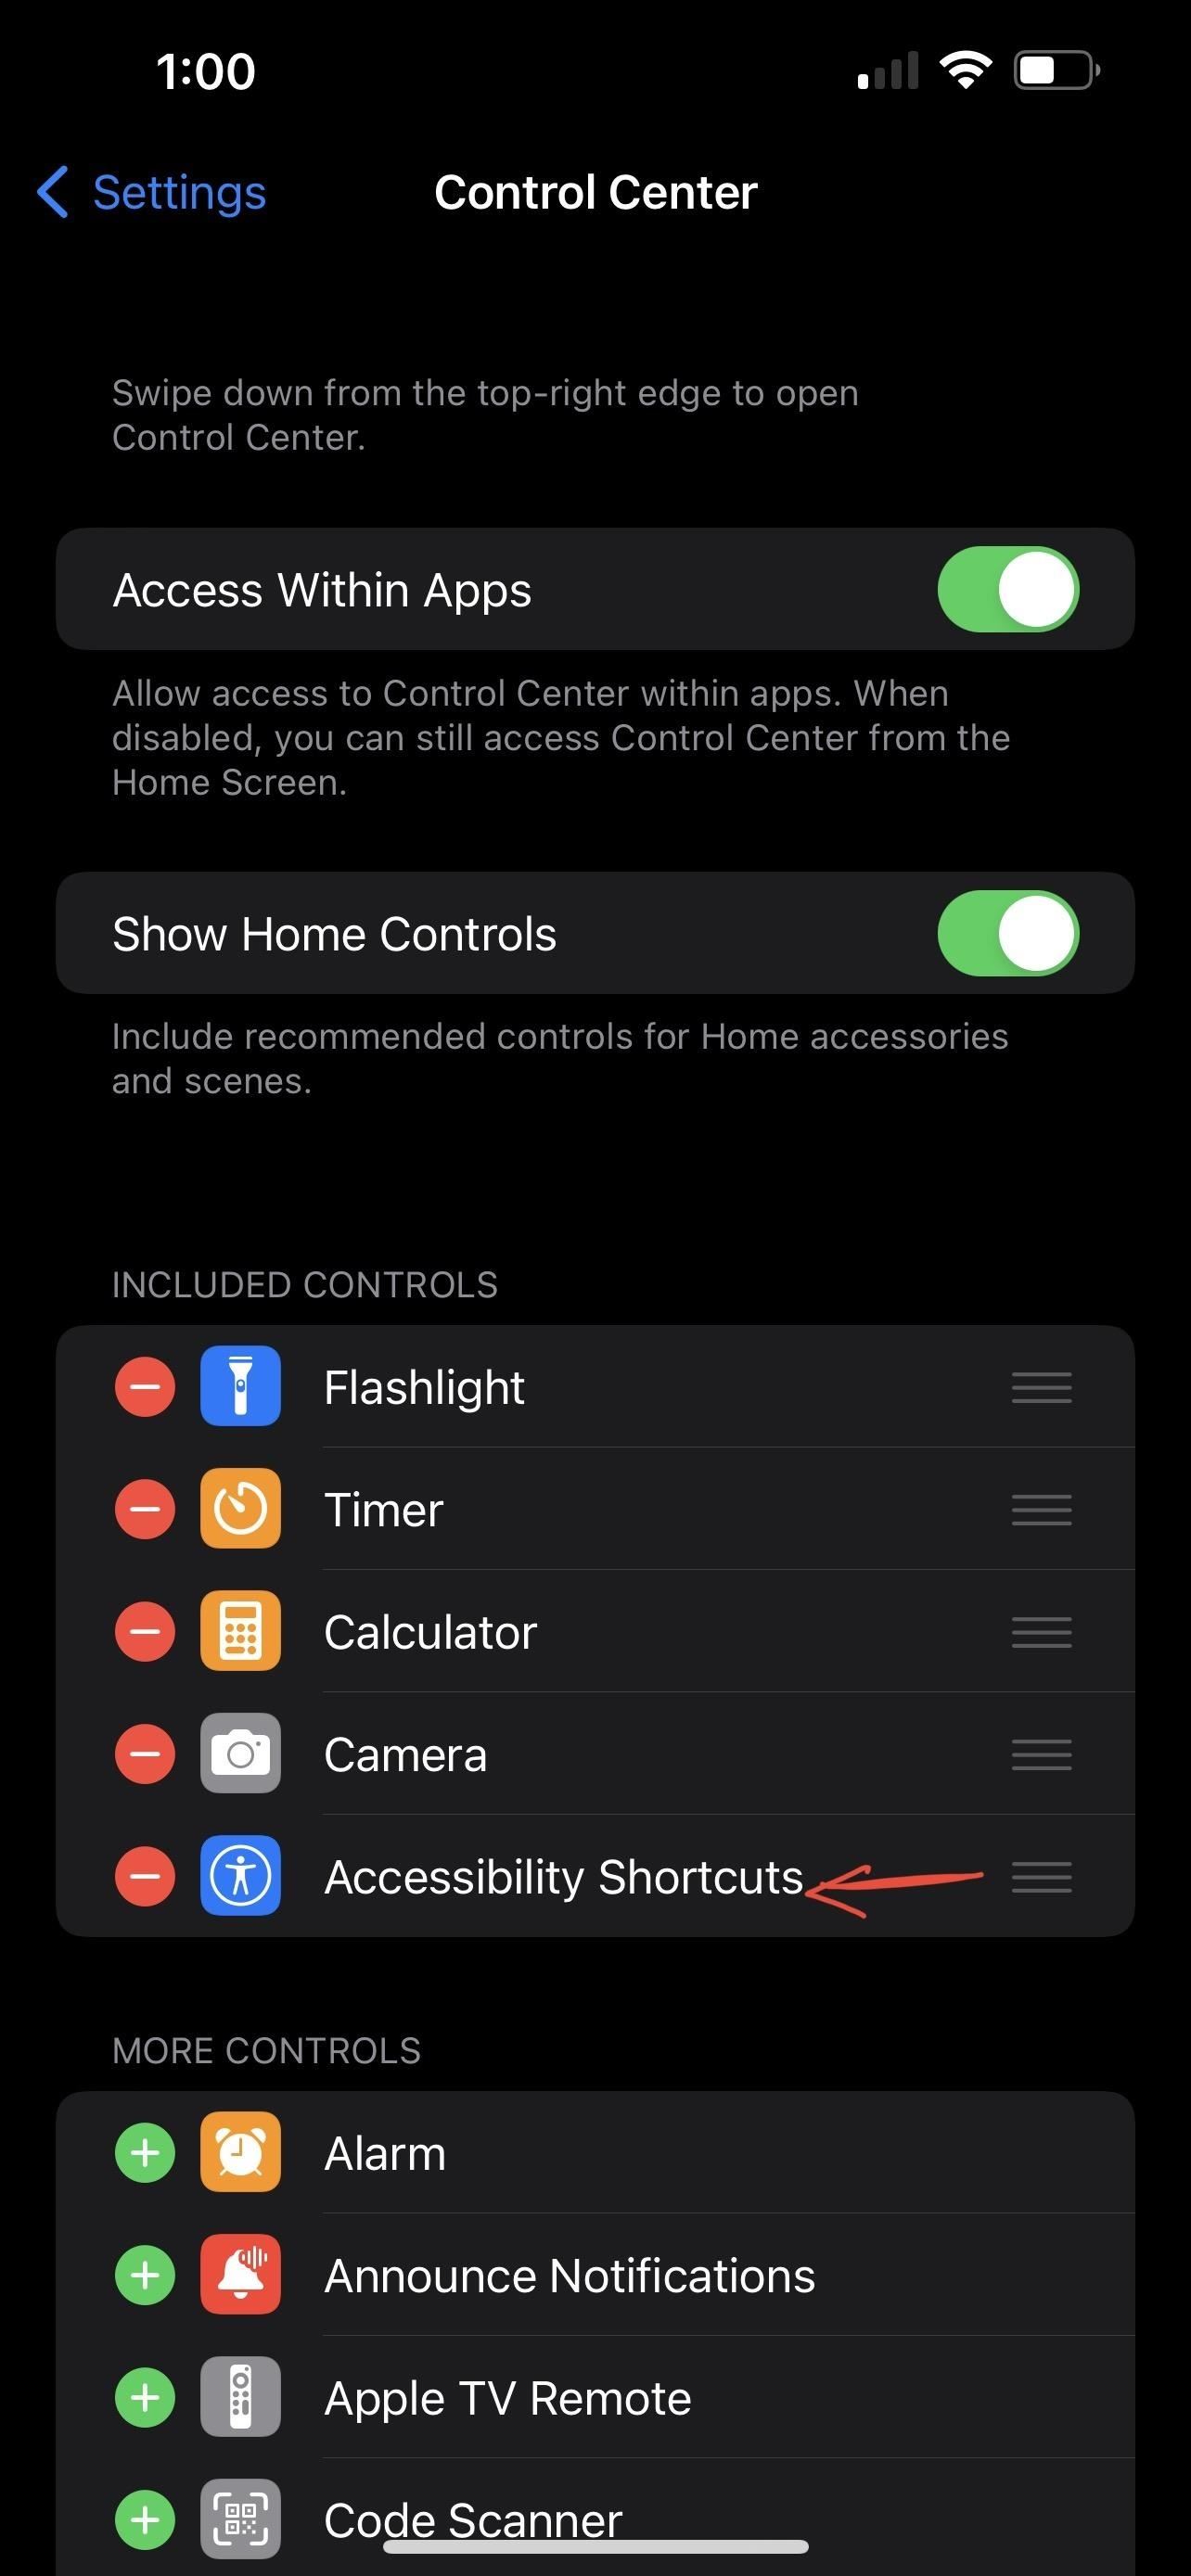
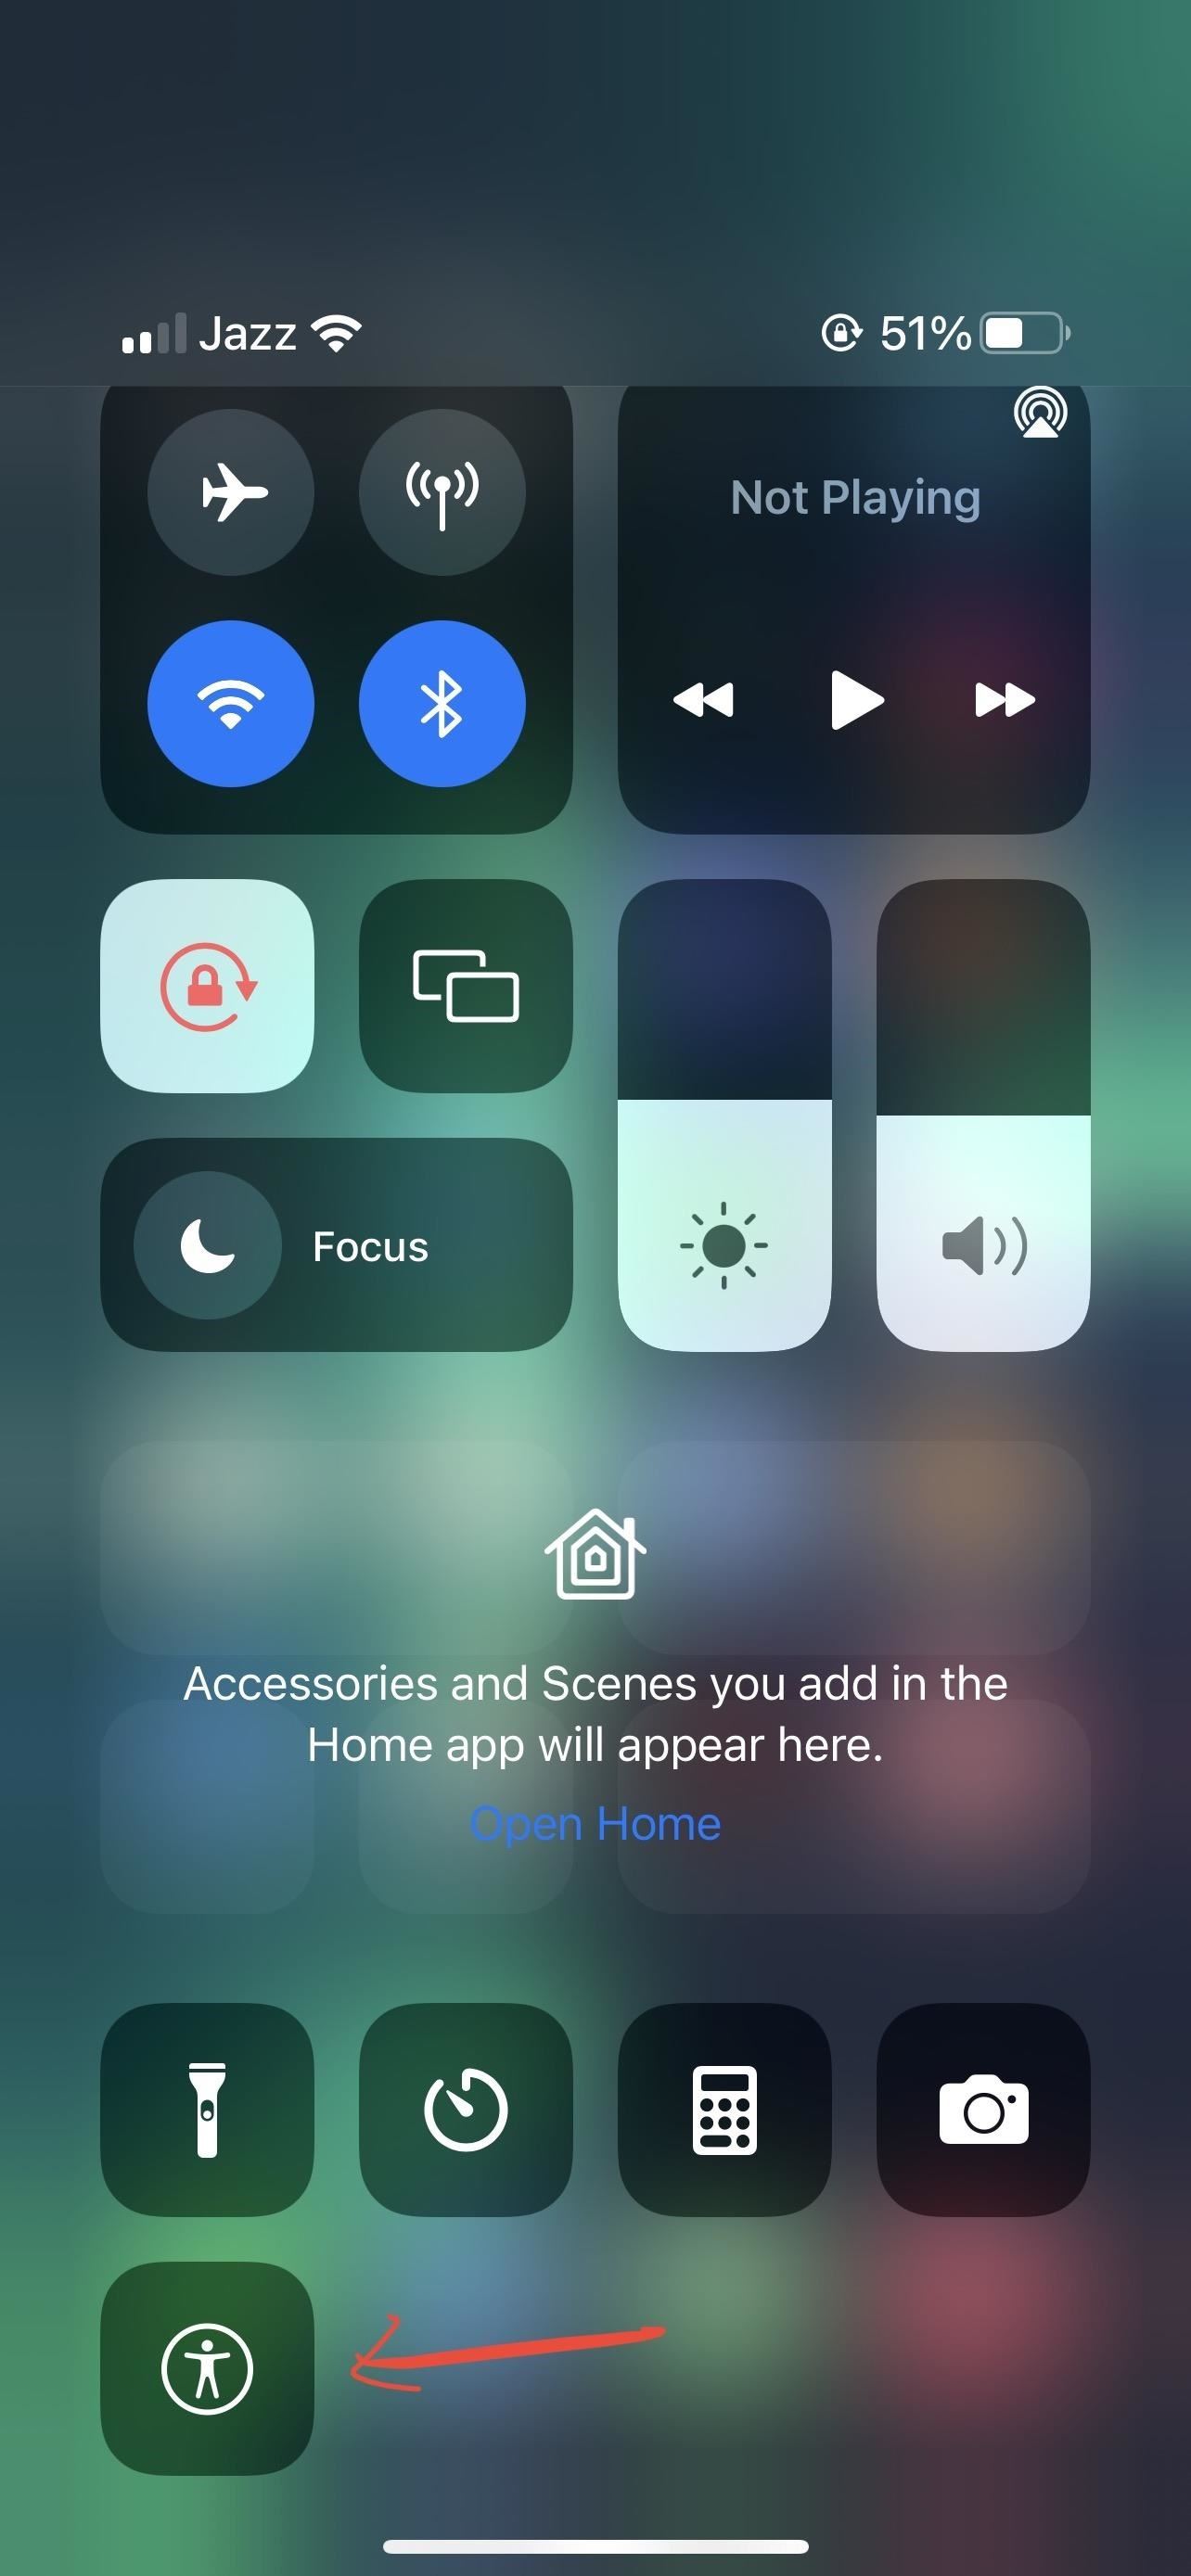
If you don't always want to keep AssistiveTouch on, you can add it to the Control Center. Go to Settings –> Control Center, and ensure "Accessibility Shortcuts" is included. You can then swipe down from the top right to access the Control Center and hit the Accessibility control. That way, you don't always have to go into Settings or use the triple-click shortcut to turn it on and off.
Option 7: Screen Mirroring
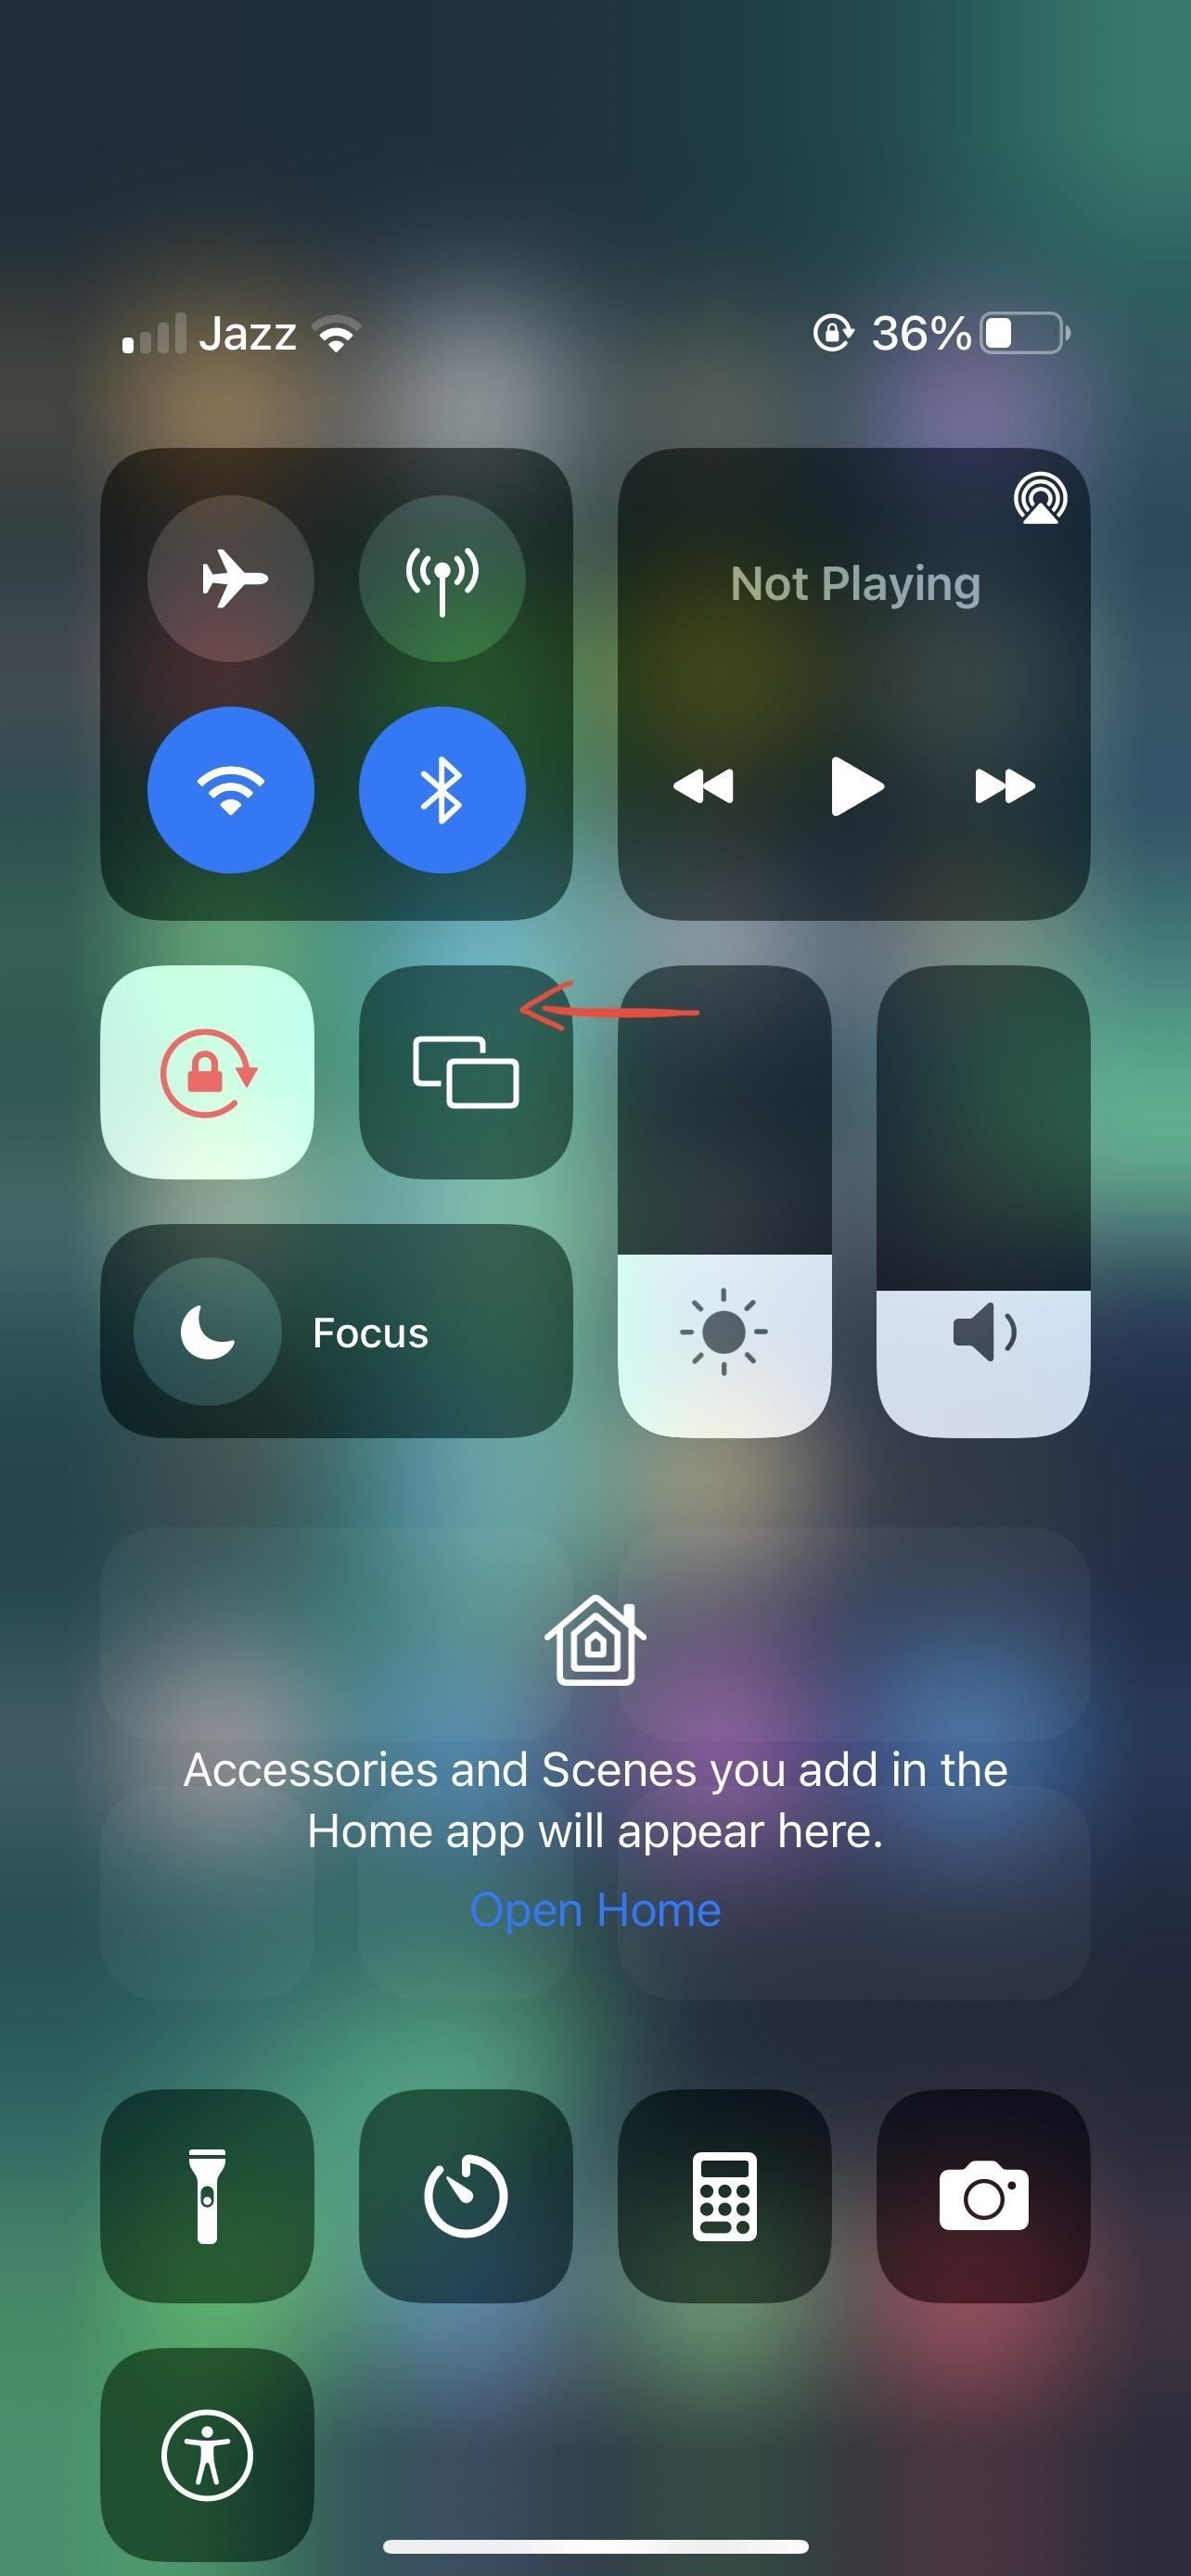
Another way you can take a screenshot of your iPhone 13 series model is by using your Mac computer. When you swipe down from the top right of your iPhone's screen to open Control Center, you'll see a Screen Mirroring button (two window panes) left of the brightness adjustment column.
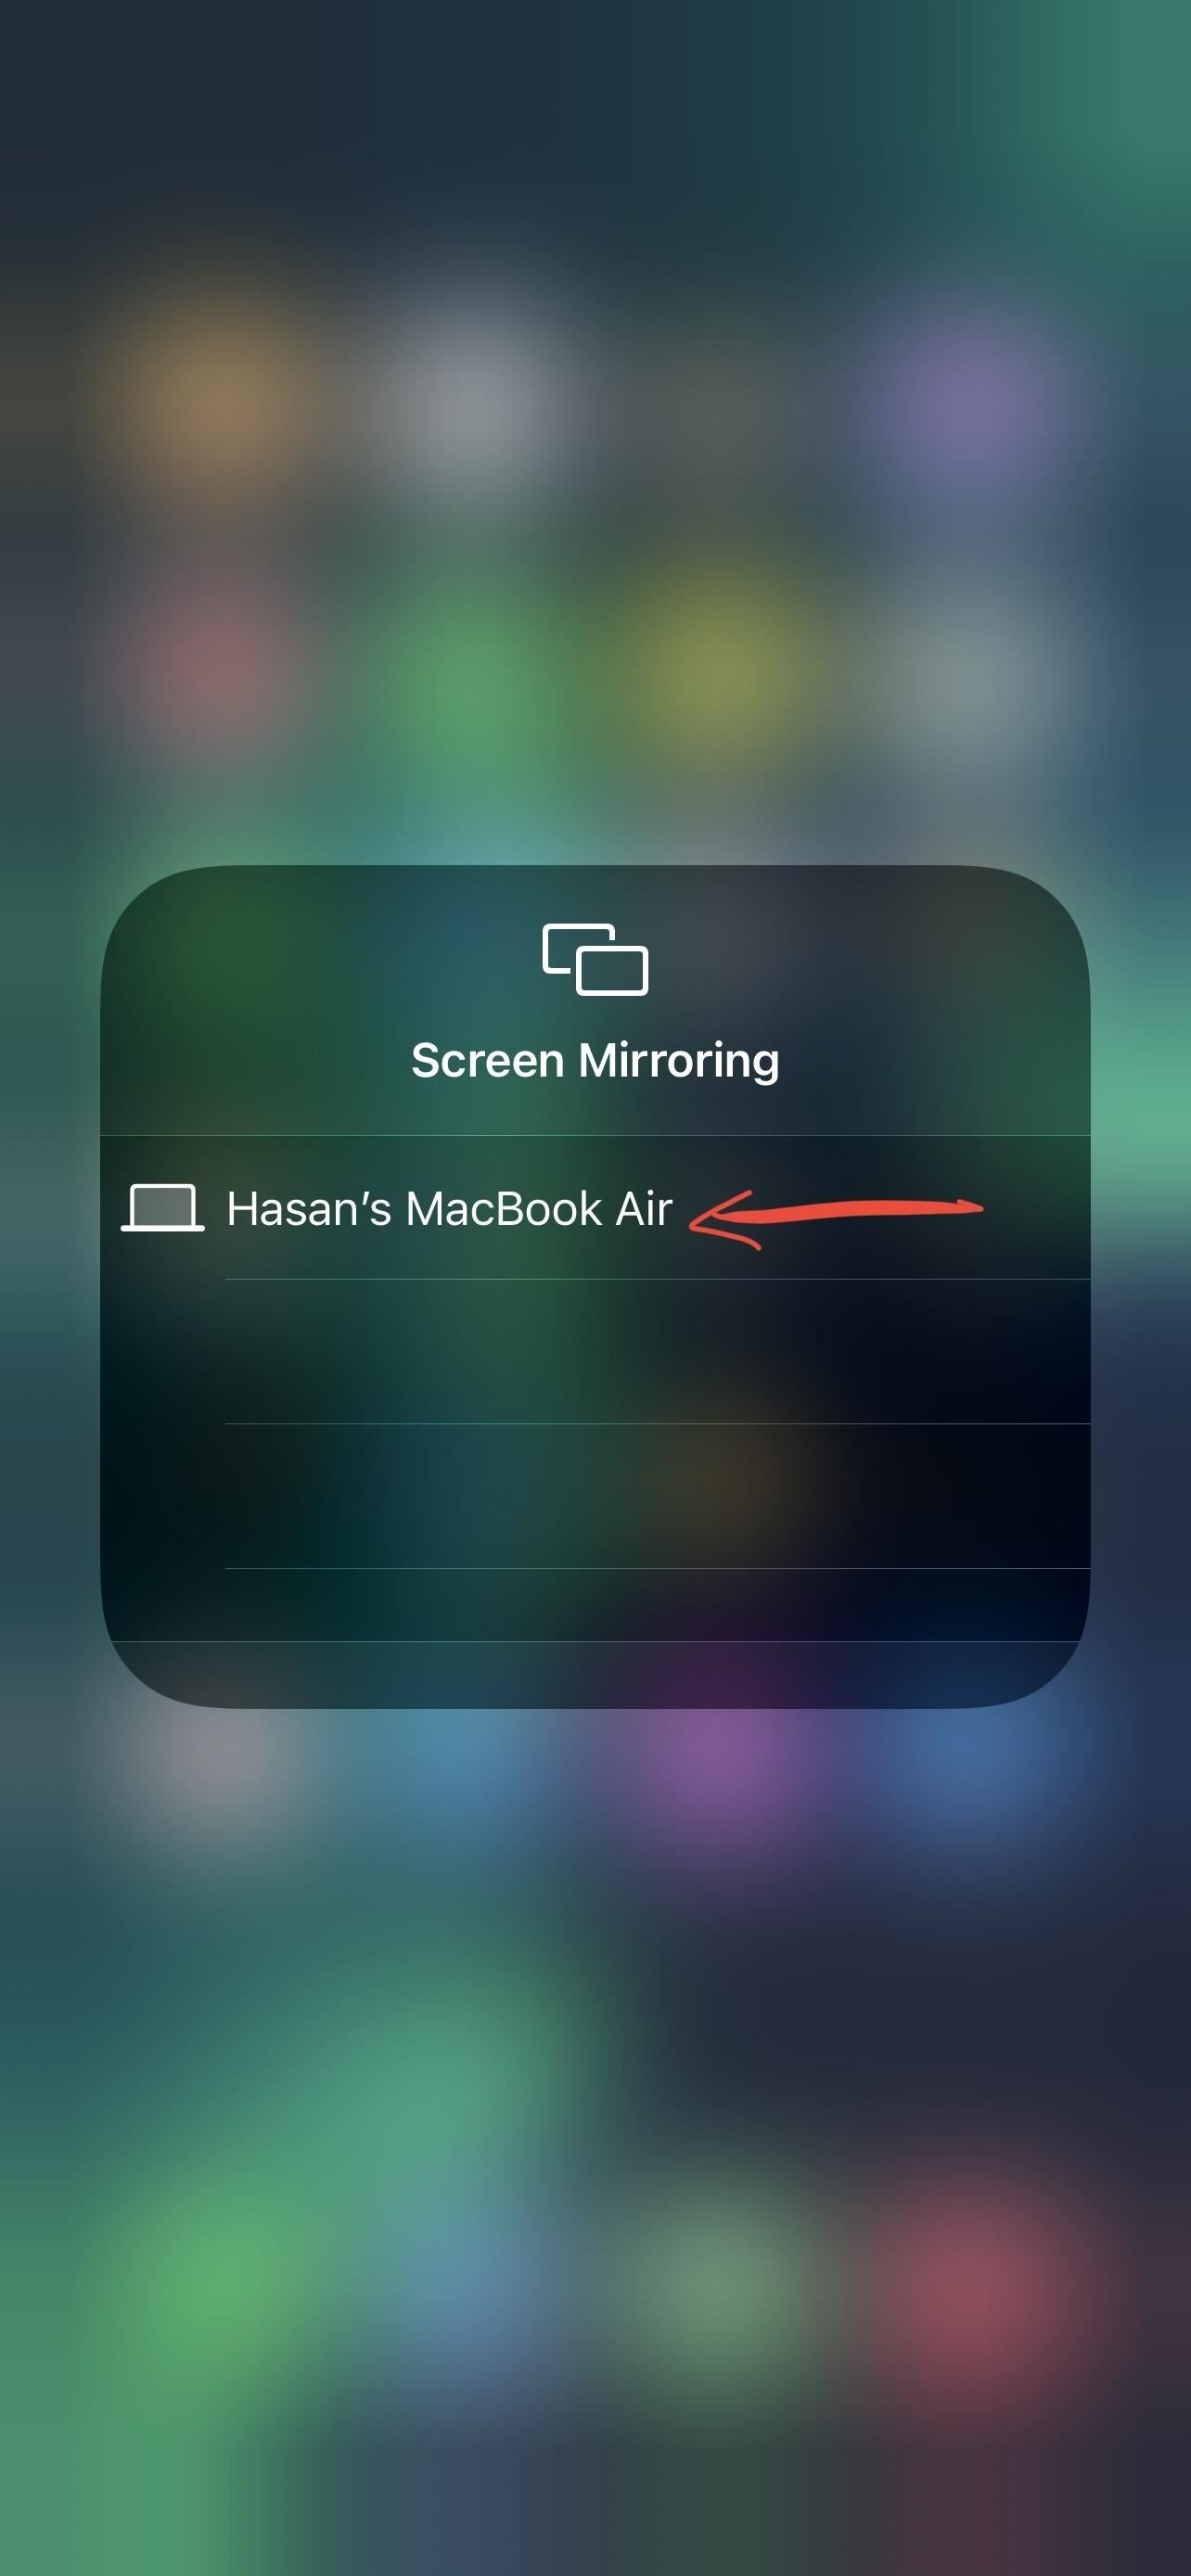
Screen Mirroring lets you see your iPhone's screen on your Mac. After you tap the button, it will prompt you to connect to your computer. Tap the name of your macOS computer, and you're good to go.
Now, it will display your iPhone's screen on your Mac. Since it's only mirroring the screen, you won't be able to control your iPhone from your Mac, but you can take a screenshot with macOS. To do so, press Command-Shift-3 or take a screenshot on your Mac like you usually would. You'll hear a clicking sound, and it will save the screenshot to the Desktop.
Unfortunately, you'll likely see black bars on the top and bottom or sides in your screenshot that you'll probably want to crop out later. However, it will let you take screenshots of some screens you might not have been able to screenshot otherwise, like when a screenshots thumbnail appears. You can use Command-Shift-4 to use the selection tool for more targeted screenshot boundaries.
To turn off Screen Mirroring, open Control Center on your iPhone, tap the Screen Mirroring button, and choose "Stop Mirroring."
Option 8: QuickTime Player
If you want to record your iPhone's screen without the annoying red bubble, using QuickTime Player on your Mac is a good choice. It's also a decent option for taking screenshots, and unlike Screen Mirroring (Option 7 above), you can take them without huge black bars appearing.
However, like Screen Mirroring, it helps take screenshots of elements on the iPhone's screen that regular screenshots won't show, like a screenshot's thumbnail or AssistiveTouch's on-screen icon.
Connect your iPhone 13, 13 mini, 13 Pro, or 13 Pro Max to your Mac using a Lightning to USB or Lightning to USB-C cable, depending on the ports on your Mac model. If you see "Unlock iPhone to Use Accessories" on your iPhone, unlock your iPhone with Face ID. You may also have to "Trust" the computer; if so, tap "Trust" on your iPhone and enter your passcode.
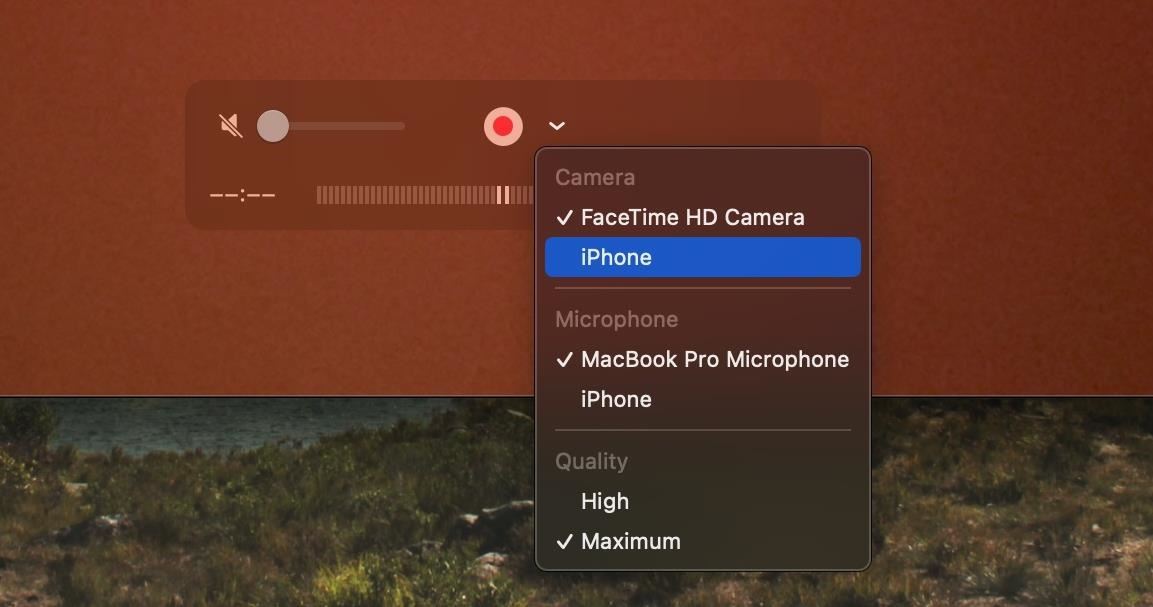
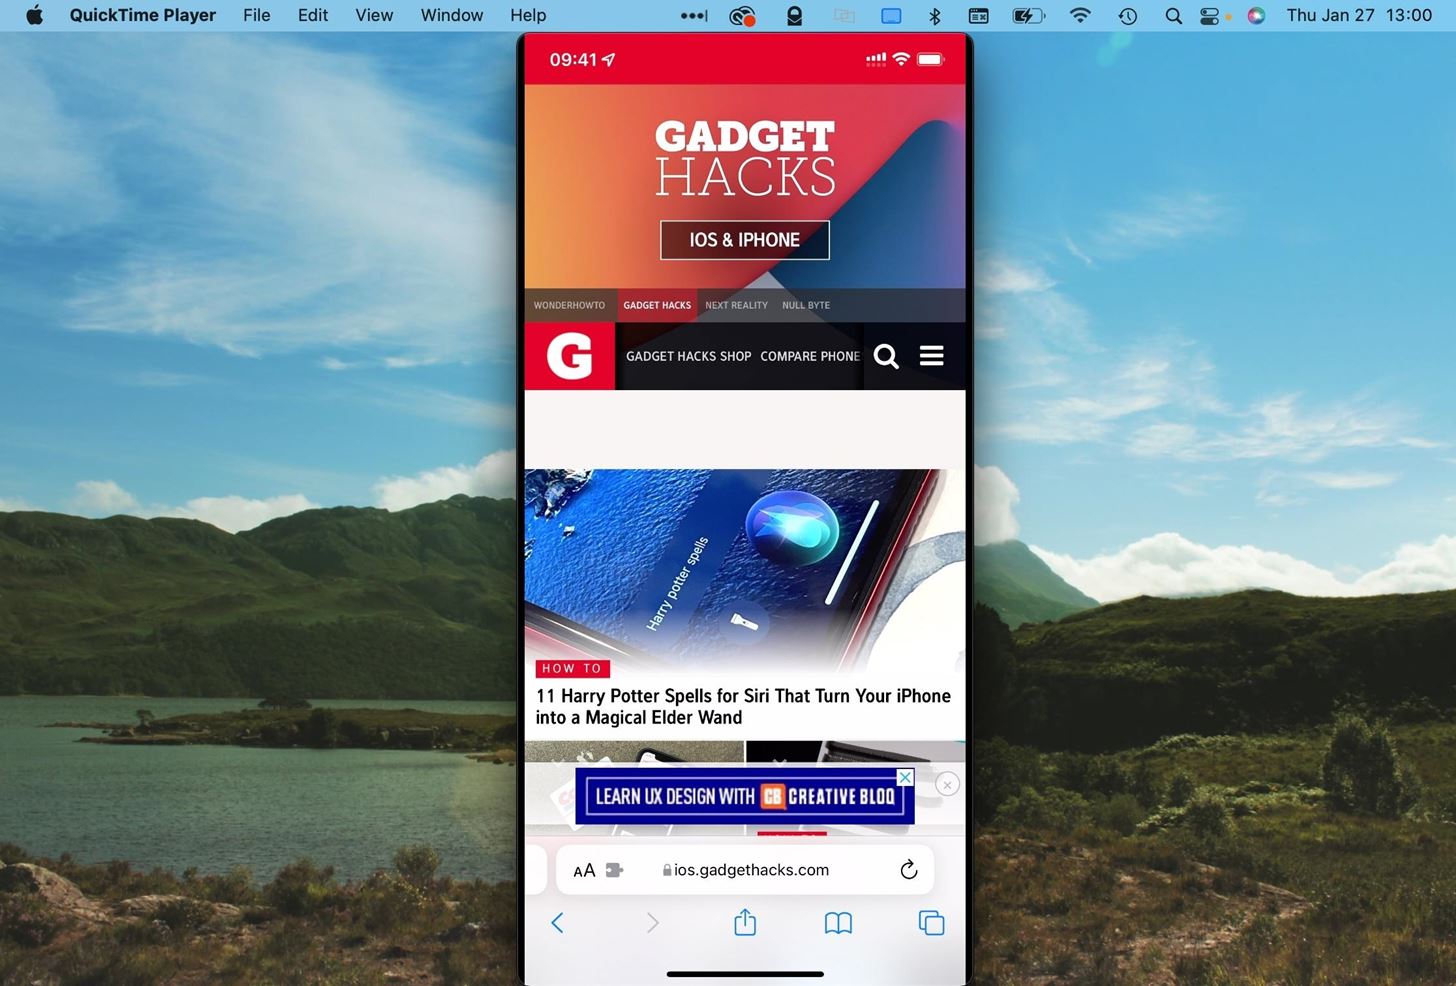
Next, open QuickTime Player on macOS and click "File" in the menu bar, followed by "New Movie Recording." Your Mac will likely show your camera's feed, so switch to your iPhone by clicking the drop-down icon by the record button and choosing your iPhone's name.
After, you can adjust QuickTime's window size of your iPhone's screen just like any other app window on macOS, affecting the screenshot's resolution.
To take the screenshot, use the Command-Shift-5 shortcut, move the camera image to the QuickTime Player window so it's selected, hold down the Option key, and left-click your mouse (or hold down Control and click your trackpad). This will take a screenshot similar to one on your iPhone. If you don't hold down Option while you snap the shot, you'll get a drop-shadow around the image.
You can also use Command-Shift-4 to take a more targeted screenshot with the selection tool. However, no matter which way you take the screenshot, make sure the QuickTime controls are not shown in the window, or they'll appear in the screenshot.
Screenshots save to your Desktop by default, but you can click "Options" on the screenshot menu that appears after hitting Command-Shift-5, then choose another location. You can also disable the floating thumbnail and add a timer from here.
Just updated your iPhone? You'll find new emoji, enhanced security, podcast transcripts, Apple Cash virtual numbers, and other useful features. There are even new additions hidden within Safari. Find out what's new and changed on your iPhone with the iOS 17.4 update.


Be the First to Comment
Share Your Thoughts